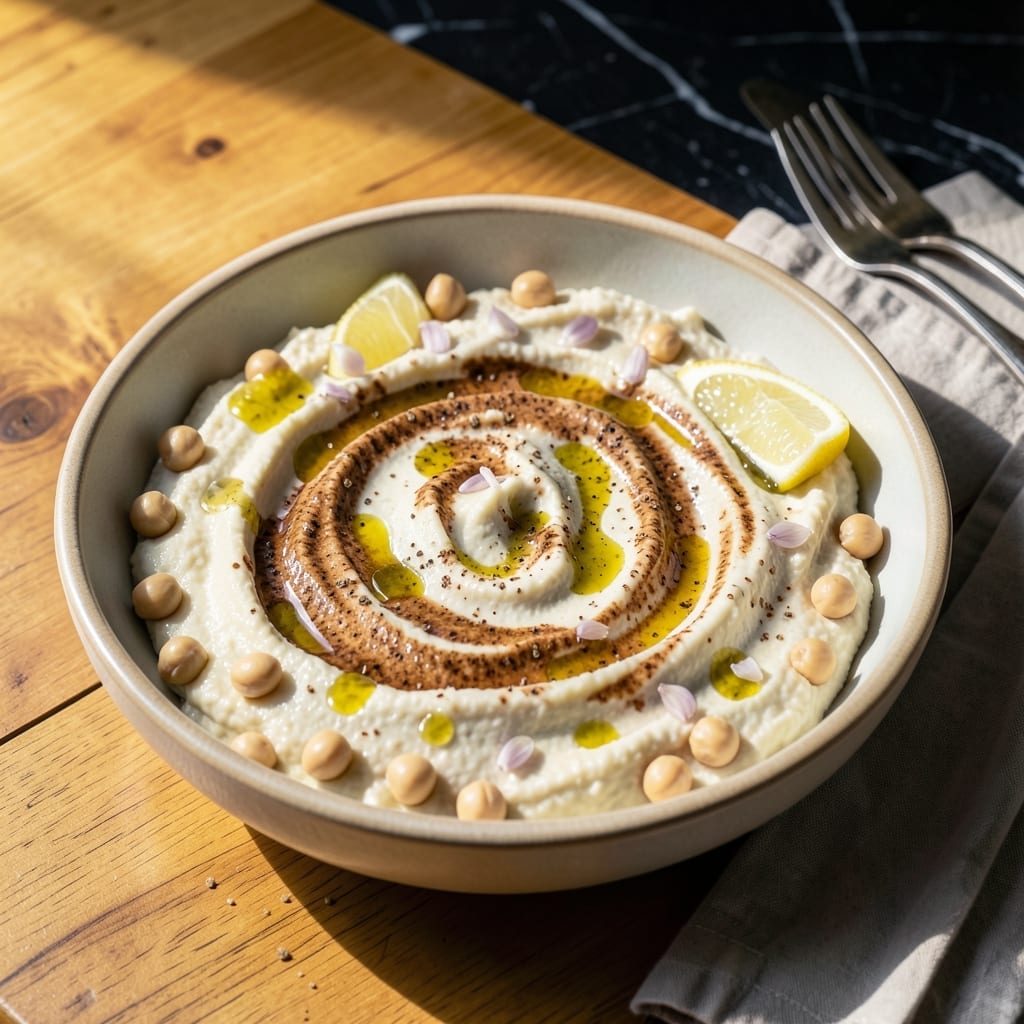
There’s a reason Mediterranean hummus remains timeless—its velvety texture and bold flavors elevate any meal. This version captures that signature creaminess with a garlic-forward finish that lingers.
I developed this recipe after testing countless blends, focusing on the perfect balance of tahini, lemon, and fresh garlic. The result is smooth, rich, and restaurant-worthy without complicated techniques.
What sets this creation apart is its simplicity. Chickpeas, tahini, and a few pantry staples transform into a dip that’s impossible to resist. Serve with warm pita or crisp vegetables.
Ideal for gatherings or everyday snacking, this hummus delivers consistent quality every time. Here’s how to make it.
Ingredients for Taziki’s Hummus
Canned chickpeas, tahini, and fresh ingredients create this Mediterranean classic with bold garlic flavor.
| Ingredient | Amount | Notes |
|---|---|---|
| Canned Chickpeas 🥘 | 2 cans | 15 oz each, drained and rinsed |
| Tahini 🥜 | ¾ cup | Well-stirred before measuring |
| Fresh Lemon Juice 🍋 | ⅓ cup | About 2-3 lemons, freshly squeezed |
| Garlic Cloves 🧄 | 6 cloves | Peeled and roughly chopped |
| Extra-Virgin Olive Oil 🫒 | ¼ cup | Plus extra for drizzling |
| Ground Cumin 🌿 | 1 ½ tsp | Freshly toasted and ground |
| Sea Salt 🧂 | 1 ½ tsp | Fine grain, adjust to taste |
| Cold Water 💧 | ¼ cup | As needed for texture |
| Smoked Paprika 🌶️ | ½ tsp | For garnish, optional |
| Fresh Parsley 🌿 | 2 tbsp | Finely chopped, for garnish |
[recipe_ingredient_scaler]
The tahini quality is critical here. Soom Foods or Al Wadi brands offer the richest, smoothest texture. Canned chickpeas work best—Goya or Bush’s are reliable. Look for tahini that’s purely sesame seeds without additives. For the garlic, fresh is non-negotiable; jarred minced garlic lacks the sharp, vibrant punch this recipe demands.
Need to swap tahini? Cashew or almond butter can work at a 1:1 ratio, though the flavor changes. No fresh lemons? Bottled lemon juice at half the amount keeps acidity in check. The cumin can be omitted if you dislike earthiness, but it adds depth. Cold water is essential for achieving that velvety texture—never skip it.
Store hummus in an airtight container with a thin olive oil layer on top to prevent drying. Keeps for 5 days in the fridge, or freeze for up to 3 months. The flavors deepen after 24 hours, so make it ahead if possible.
Why You’ll Love This Recipe
- Pantry Staples Only: I always have these ingredients on hand—canned chickpeas, tahini, and lemon juice mean no last-minute grocery runs.
- Garlic-Lemon Zing: The fresh garlic and lemon juice give it that bright, tangy kick that makes store-bought hummus taste flat.
- Dip for Everything: It’s just as good with pita as it is on sandwiches, salads, or even as a veggie dip for my kids’ lunches.
- Budget-Friendly Batch: One can of chickpeas makes a big bowl, and it’s way cheaper than buying it pre-made at the store.
Step-by-Step Instructions for Mediterranean Hummus With Garlic Zest
Master the technique for silky texture and balanced flavor in this classic preparation.
Step 1: Prepare the Chickpeas and Aromatics
Drain and rinse the 2 cans Canned Chickpeas thoroughly under cold water to remove excess starch. This step prevents a pasty texture in the final dish. For maximum creaminess, I remove about half the chickpea skins by rubbing them between my fingers under running water.
Peel and roughly chop the 6 cloves Garlic Cloves. The rough chop allows the garlic to incorporate evenly without creating a paste. Set aside the 0.75 cup Tahini and stir it well before measuring—tahini naturally separates, and stirring ensures accurate measurement and smooth texture.
Step 2: Blend the Base Ingredients
In a food processor, combine the prepared canned chickpeas, tahini, 0.33 cup Fresh Lemon Juice, chopped garlic, 1.5 tsp Ground Cumin, and 1.5 tsp Sea Salt. Pulse for 30 seconds to break down the chickpeas into a coarse meal.
Scrape down the sides of the bowl with a spatula, then process continuously for 2-3 minutes. You’ll notice the mixture transform from crumbly to creamy. The friction generates heat, which helps emulsify the tahini and chickpeas into a smooth paste. Stop and scrape the bowl as needed.
Step 3: Achieve the Perfect Consistency
With the processor running, slowly drizzle in the 0.25 cup Extra-Virgin Olive Oil through the feed tube. This gradual addition creates an emulsion, giving the hummus its characteristic velvety texture. Process for another 1-2 minutes until completely smooth.
Assess the texture. If it appears too thick, add the 0.25 cup Cold Water one tablespoon at a time while processing. The ideal consistency should be smooth and spreadable but not runny. Taste and adjust seasoning—you may need an additional pinch of sea salt depending on your preference.
Step 4: Rest and Garnish for Serving
Transfer the hummus to a serving bowl and let it rest at room temperature for 10-15 minutes. This resting period allows the flavors to meld and the texture to stabilize. You’ll notice the hummus thickens slightly as it cools.
Create a shallow well in the center using the back of a spoon. Drizzle with additional extra-virgin olive oil and sprinkle with 0.5 tsp Smoked Paprika for color and subtle smokiness. Finish with the 2 tbsp Fresh Parsley for a pop of freshness. Serve with warm pita or fresh vegetables.
Pro Tips For Making Taziki’S Hummus
- Reserve Chickpea Water: Don’t drain all the liquid from the canned chickpeas—reserve about 1/4 cup of the starchy water to loosen the hummus as needed. I learned this the hard way after ending up with a paste so thick it could hold up a wall.
- Bloom the Tahini: Whip the tahini with the lemon juice for 2-3 minutes before adding anything else—it turns pale and fluffy, almost like a thick mayo. Sounds weird, but it works: this prevents the hummus from turning bitter or separating.
- Roast the Garlic: Skip raw garlic if you want a smoother, sweeter flavor—roast the cloves (still in their skins) at 400°F for 15 minutes, then squeeze out the soft insides. My grandmother swore by this, and she was right: it mellows the sharpness perfectly.
- Chill Before Serving: Give the hummus at least 30 minutes in the fridge after blending. I used to rush this part and wondered why my hummus never had that creamy, restaurant-style texture—turns out, patience actually changes the outcome.
Wine and Beer Pairings for This Dish
Crisp White Wines
Hummus pairs brilliantly with crisp, acidic white wines that cut through the richness. I love a chilled Greek Assyrtiko—its citrus notes and mineral finish complement the garlic and lemon. Sauvignon Blanc from New Zealand works beautifully too, with its zesty lime and herbal undertones. 🍷
Light Red Options
For red wine lovers, opt for light-bodied, low-tannin options. A Pinot Noir from Oregon offers bright cherry notes that won’t overpower the dish. I also enjoy a Grenache from Spain—its red fruit flavors and subtle spice harmonize with the cumin. Serve slightly chilled.
Refreshing Beer Pairings
A crisp pilsner like Stella Artois cleanses your palate between bites. For craft beer fans, a Belgian witbier with its citrus and coriander notes adds an interesting twist. I usually avoid heavy IPAs—they can overwhelm the hummus’s delicate flavors. 🍺
Non-Alcoholic Choices
Sparkling water with a squeeze of lemon enhances the dish’s freshness. For something more flavorful, try Mediterranean-style sparkling lemonade—it mirrors the recipe’s citrus notes. Iced mint tea also works well, offering a cooling contrast to the garlic’s boldness.
Nutrition Facts
Frequently Asked Questions
Can I use dried chickpeas instead of canned?
Yes, but they require soaking overnight and 1-2 hours of cooking until tender. Canned chickpeas are more convenient and consistent in texture.
Why is my hummus bitter?
Bitterness often comes from low-quality tahini or over-processed garlic. Use fresh tahini and 6 cloves of garlic max. Balance with extra lemon juice or salt.
How do I make it smoother?
Remove chickpea skins and blend longer. Add cold water while processing until silky. A high-speed blender helps achieve that ultra-creamy texture.
Can I skip the resting time?
Resting 10-15 minutes lets flavors meld. Skipping it may result in a thinner texture and less developed taste. Patience pays off!

Trained in classic French technique but raised on slow-cooked ribs and spicy rubs, she blends culinary skill with smoke and soul.
- Recipe for Boneless Pork Chops in Cast Iron Skillet: Sear and Baste to Juicy Perfection - October 3, 2026
- Recipe for Boneless Cross Rib Roast: Slow-Roasted Beef with Herb Crust - October 3, 2026
- Hamburgers in Sauce Recipe Crock Pot: Slow-Cooked Savory Delight - October 3, 2026