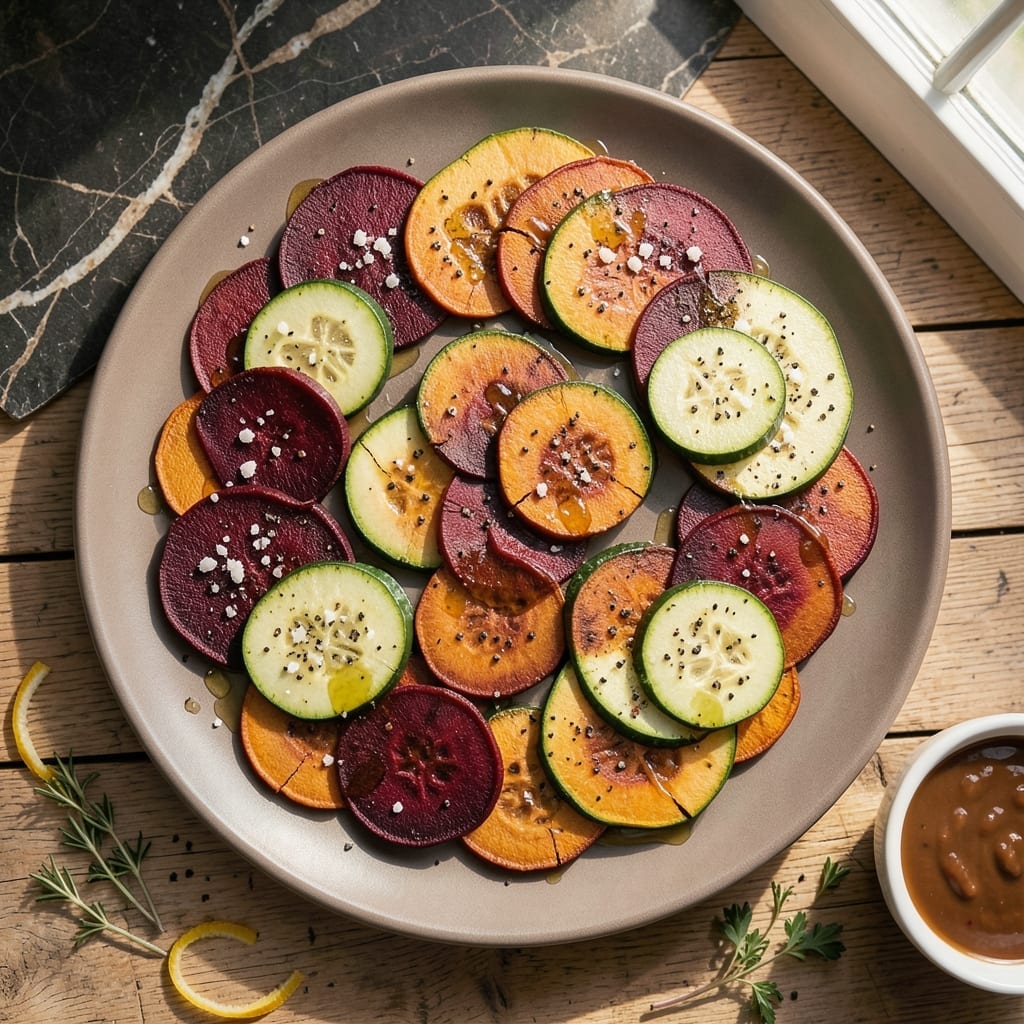
These baked vegetable crackers transform garden produce into a crisp, satisfying snack. My French training taught me the importance of precise slicing for even baking, while my pitmaster instincts ensure maximum flavor in every bite.
Thinly sliced vegetables like beets, sweet potatoes, and zucchini bake into crunchy, golden rounds when prepared with care. The key is uniform thickness and low, steady heat to remove all moisture without burning.
I developed this method after foraging wild herbs and realizing their potential in simple preparations. The result is a snack that’s as nutritious as it is delicious, with no artificial additives.
Perfect for entertaining or healthy snacking, these crackers keep well in airtight containers. Here’s how to make them at home.
Ingredients for Vegetable Crackers
Fresh garden veggies meet French precision and pitmaster boldness for a snack that’s simple yet extraordinary.
| Ingredient | Amount | Notes |
|---|---|---|
| Medium Beets 🍠 | 2 whole | Peeled, thinly sliced |
| Sweet Potatoes 🍠 | 2 whole | Peeled, thinly sliced |
| Zucchini 🥒 | 2 whole | Thinly sliced, no peeling |
| Extra-Virgin Olive Oil 🫒 | 3 tbsp | For brushing slices |
| Coarse Sea Salt 🧂 | 1 tsp | Plus extra for finishing |
| Freshly Ground Black Pepper 🌶️ | ½ tsp | For seasoning |
| Dried Rosemary 🌿 | 1 tsp | Crushed for even distribution |
| Dried Thyme 🌿 | 1 tsp | For earthy depth |
| Smoked Paprika 🌶️ | ½ tsp | Adds pitmaster flair |
| Garlic Powder 🧄 | ½ tsp | For savory kick |
| Fresh Parsley 🌿 | 2 tbsp | Chopped, for garnish |
| Wild Herbs 🌿 | 1 tbsp | Optional, for foraging flair |
[recipe_ingredient_scaler]
The vegetables are key here—farmers market beets and sweet potatoes have the sweetness and density needed for that perfect crunch. Slice them paper-thin (a mandoline is worth the investment for this). Whole Foods or Trader Joe’s usually have consistent quality. Zucchini adds a lighter touch, but don’t skip peeling the beets and sweet potatoes—the skin can get tough when baked.
No mandoline? Use a very sharp knife and a steady hand (or ask the butcher counter at Kroger to slice them for you). Swap zucchini for eggplant or parsnips if you like. The smoked paprika is non-negotiable for that pitmaster depth, but regular paprika works in a pinch. Fresh thyme or rosemary can replace dried at one-third the amount.
Store in an airtight container between paper towels to absorb any lingering moisture. They’ll keep for 1 week at room temp, but honestly, they’re best eaten within 3-4 days for maximum crunch. Freezing isn’t recommended—it’ll make them soggy.
Why You’ll Love This Recipe
- One Pan Wonder: I just slice the beets, sweet potatoes, and zucchini thin, toss with olive oil, and let the oven do the rest.
- Earthy Sweetness: The beets and sweet potatoes caramelize into this crave-worthy, slightly crispy bite with just a hint of salt.
- Snack or Side: I pack these for lunchboxes or serve them with dips at parties—equally at home in both spots.
- Budget Stretcher: A handful of veggies turns into a big batch of crackers that keeps well for days. Honestly, it’s my new go-to for using up produce.
Step-by-Step Instructions for Vegetable Crackers
Here’s the method. Thin slices, even seasoning, and low heat deliver the perfect crunch.
Step 1: Prepare and Slice the Vegetables
Peel the medium beets and sweet potatoes, then slice them into 1/8-inch thick rounds using a sharp knife or mandoline. For the zucchini, slice them thinly without peeling—this preserves the vibrant green color and subtle texture contrast.
Consistency in thickness is crucial here. I aim for uniform slices so they bake evenly. The beets and sweet potatoes need peeling to remove any tough skin, while the zucchini’s delicate peel adds visual appeal and a mild, fresh flavor to the final product.
Step 2: Season and Arrange on Baking Sheets
In a small bowl, combine the dried rosemary, dried thyme, smoked paprika, garlic powder, coarse sea salt, and freshly ground black pepper. Crush the rosemary between your fingers to release its aromatic oils, ensuring even distribution across the slices.
Lightly brush both sides of each vegetable slice with extra-virgin olive oil, then sprinkle generously with the herb and spice mixture. Arrange the slices in a single layer on parchment-lined baking sheets, ensuring they don’t overlap. This prevents steaming and promotes even crisping.
Step 3: Bake at Low Temperature for Even Crisping
Preheat your oven to 250°F. This low temperature is key—it slowly draws out moisture without burning the thin slices, allowing them to become perfectly crisp. Place the baking sheets in the center of the oven to ensure even heat distribution.
Bake for 2 to 2.5 hours, flipping the slices halfway through the cooking time. You’ll know they’re done when the edges curl slightly and the slices feel dry and firm to the touch. The beets may take a bit longer than the zucchini, so keep an eye on them.
Step 4: Cool Completely and Garnish
Remove the baking sheets from the oven and let the vegetable crackers cool completely on the trays. They’ll continue to crisp up as they cool—this step is non-negotiable. If you try to handle them while warm, they may bend or break.
Once cooled, transfer the crackers to a serving platter and sprinkle with chopped fresh parsley. For an extra touch of rustic flair, add the wild herbs, if using. These fresh elements brighten the flavors and add a pop of color to your garden medley crackers.
Pro Tips For Making Vegetable Crackers
- Slice Paper Thin: Use a mandoline for the beets and sweet potatoes—any thicker than 1/8 inch and they won’t crisp up, no matter how long you bake them. I learned this the hard way after pulling out three trays of chewy “crackers.”
- Press Out Moisture: After grating the zucchini, salt it lightly and let it sit in a colander for 10 minutes, then squeeze out every last drop in a clean towel. Sounds tedious, but it’s the only way to avoid soggy crackers.
- Rotate the Trays: Halfway through baking, switch the top and bottom trays and flip each cracker. This guarantees even crisping—otherwise, you’ll end up with half burnt, half limp batches.
- Oil Generously: Brush both sides of each slice with olive oil—about 2 tablespoons total—before salting. Skimping here leaves them dry and brittle instead of that perfect, flaky snap.
Common Mistakes When Making Perfect Results
Uneven Slicing
Using a dull knife or inconsistent pressure creates slices that bake unevenly. Some will burn while others stay soggy. I always use a mandoline set to 1/8-inch for perfect uniformity. If hand-slicing, use a sharp chef’s knife and check thickness often. 💡
Skipping the Oil
Vegetable slices need a light coating of extra-virgin olive oil to crisp properly and help seasonings stick. I brush both sides with about 1 tsp oil per vegetable. Without it, your crackers will dry out and taste bland.
Overcrowding Pans
Placing slices too close together causes steaming instead of baking. Leave at least ½-inch space between each piece. I use two large baking sheets for a single batch to ensure proper airflow and even crisping.
High Heat Baking
Setting your oven above 250°F burns the outside before the moisture inside evaporates. These crackers need 2-2.5 hours at low heat to dry completely. I check them at the 2-hour mark and adjust as needed.
Early Handling
Removing crackers from the oven too soon can make them bend or break. They crisp up significantly as they cool. I let mine rest on the baking sheet for at least 30 minutes before transferring. Patience pays off with perfect crunch. ✨
Moisture Traps
Storing warm crackers in airtight containers creates condensation and sogginess. Ensure they’re completely cool first. I layer them between paper towels in a glass container to absorb any lingering moisture.
Nutrition Facts
Frequently Asked Questions
Do I need a mandoline for thin slicing?
A mandoline gives the most consistent 1/8-inch slices, but a sharp knife works too. Just focus on keeping all pieces the same thickness for even baking.
Can I use different vegetables?
Try parsnips, carrots, or eggplant. Just remember denser veggies like beets take longer to crisp than zucchini.
How do I keep them crisp after baking?
Cool completely on the tray first, then store in an airtight container with paper towels to absorb moisture. They’ll stay crisp for 3-4 days.

Trained in classic French technique but raised on slow-cooked ribs and spicy rubs, she blends culinary skill with smoke and soul.
- Recipe for Boneless Pork Chops in Cast Iron Skillet: Sear and Baste to Juicy Perfection - October 3, 2026
- Recipe for Boneless Cross Rib Roast: Slow-Roasted Beef with Herb Crust - October 3, 2026
- Hamburgers in Sauce Recipe Crock Pot: Slow-Cooked Savory Delight - October 3, 2026