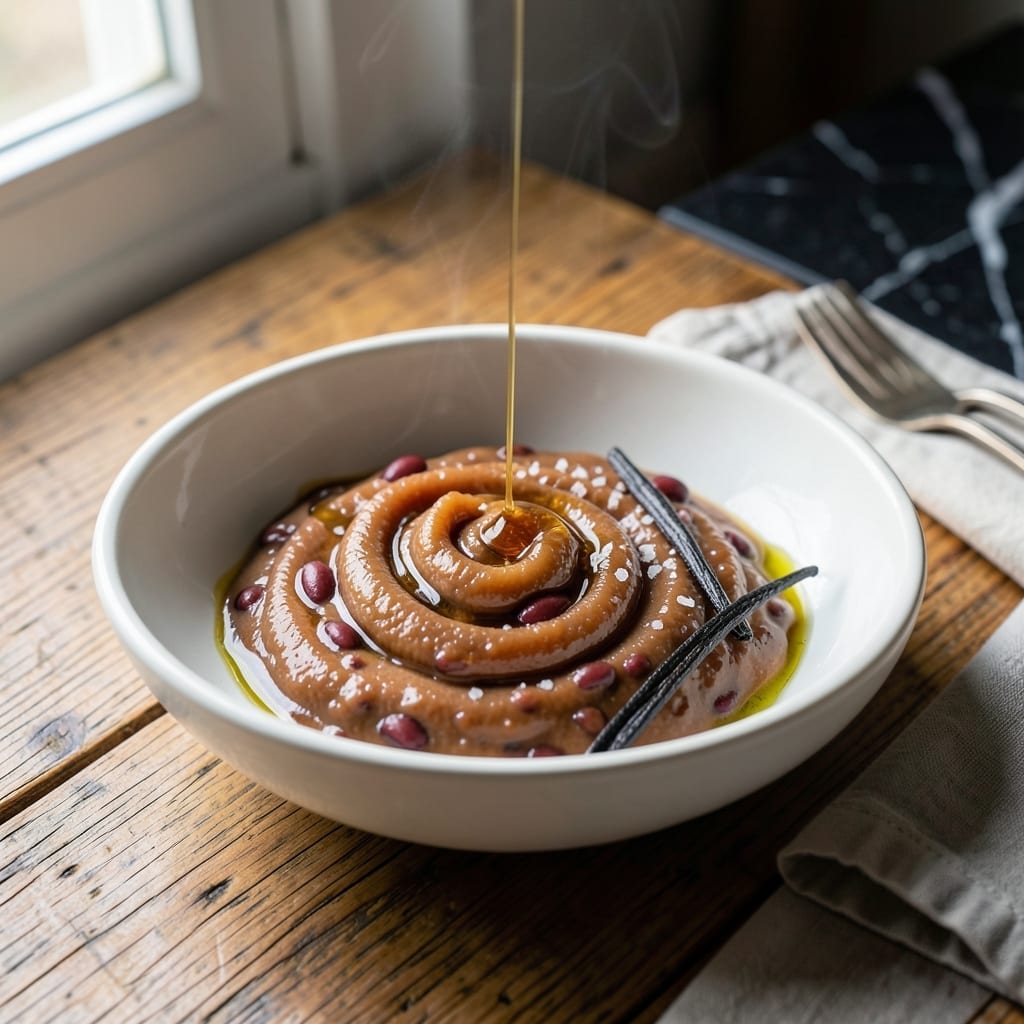
This traditional sweet red bean paste transforms simple adzuki beans into a rich, velvety dessert base that works beautifully in mochi or swirled into ice cream. The process is straightforward yet rewarding, yielding a naturally sweet filling with deep, earthy notes.
I’ve refined this method to require only 5 ingredients and 45 minutes of active cooking, with most of the time spent simmering. The beans soften completely, then blend into a smooth paste that’s subtly sweetened and infused with vanilla.
What you’ll get is a versatile dessert component that’s both elegant and nostalgic. Its smooth texture and balanced sweetness make it perfect for filling pastries or layering into desserts.
Vegan by nature and adaptable to many recipes, this paste keeps well and elevates any treat it touches.
Ingredients for Adzuki Beans Recipe Dessert
Five simple ingredients create this rich, velvety sweet red bean paste base for desserts.
| Ingredient | Amount | Notes |
|---|---|---|
| Dried Adzuki Beans 🌱 | 1 cup | Rinsed and picked over |
| Granulated Sugar 🍚 | ¾ cup | Adjust to taste preference |
| Pure Vanilla Extract 🌿 | 1 tsp | High-quality for best flavor |
| Sea Salt 🧂 | ¼ tsp | Fine grain preferred |
| Water 💧 | 4 cups | For soaking and cooking |
[recipe_ingredient_scaler]
The adzuki beans are the foundation, so source organic dried beans from Whole Foods or a trusted Asian market for the best texture and flavor. Avoid canned beans—they lack the firmness needed for proper paste consistency. Look for beans that are uniformly small and deep red (the vibrant color indicates freshness). I always buy an extra bag—they keep indefinitely in a cool, dark pantry.
No vanilla extract? Vanilla bean paste at half the amount adds beautiful speckles and intense flavor. Prefer less sweetness? Reduce sugar by one-third for a more subtle paste. Some recipes call for a pinch of cinnamon or orange zest—feel free to experiment. The salt is non-negotiable though—it balances all the flavors and prevents the paste from tasting flat.
This paste stores exceptionally well. Transfer to an airtight container and refrigerate for up to 5 days, or freeze for 3 months in portions. The flavor actually deepens over time, making it perfect for meal prep. Thaw overnight in the fridge before using.
Why You’ll Love This Recipe
- Set It & Forget: I toss the beans, water, and sugar in a pot, let them simmer, and walk away—that’s it.
- Sweet Vanilla Kiss: The vanilla hits the sweet red beans just right, warm and cozy like a hug in dessert form.
- Feeds My Sweet Tooth: Honestly, I make a big batch and snack on it all week—breakfast, dessert, or midnight craving.
- Pennies Per Serving: Dried adzuki beans cost almost nothing, and a little sugar goes a long way for this treat.
Step-by-Step Instructions for Sweet Red Bean Paste
This method transforms dried beans into velvety paste with perfect sweetness and texture.
Step 1: Rinse and Soak the Dried Adzuki Beans
Place the 1 cup Dried Adzuki Beans in a fine-mesh strainer and rinse under cold running water. Rub the beans between your fingers to remove any debris. Pick through them to discard any discolored or broken beans.
Transfer the rinsed beans to a large bowl and cover with 4 cups Water. The beans will expand significantly during soaking, so ensure they have plenty of room. Let them soak at room temperature for at least 4 hours or overnight for best results. You’ll notice the beans plump up and the water turns lightly red—this means they’re properly hydrated and ready to cook.
Step 2: Simmer the Beans Until Tender
Drain and rinse the soaked beans, then transfer them to a medium saucepan. Add fresh 4 cups Water—this ensures a clean cooking environment free of the soaking liquid’s starch. Bring to a boil over high heat, then reduce to a gentle simmer.
Cook the beans uncovered for 45-60 minutes, stirring occasionally. You’ll know they’re done when they split open easily when pressed between your fingers and the water has mostly been absorbed. If the water evaporates before the beans are tender, add more hot water 1 cup at a time. The beans should be soft but still hold their shape at this stage.
Step 3: Sweeten and Flavor the Bean Mixture
Once the beans are tender, add the 0.75 cup Granulated Sugar, 0.25 tsp Sea Salt, and 1 tsp Pure Vanilla Extract. Stir well to combine. The sugar will dissolve in the remaining cooking liquid, creating a light syrup that coats the beans.
Return the mixture to a gentle simmer and cook for an additional 10-15 minutes, stirring frequently. This step allows the beans to absorb the sweetness and develop a glossy appearance. You’ll notice the liquid reducing and the mixture thickening as the beans break down slightly. The vanilla adds depth, while the salt enhances all the flavors.
Step 4: Blend to Desired Consistency
Remove the saucepan from heat and let the mixture cool slightly for 5 minutes. This prevents splattering when blending. Transfer the warm bean mixture to a food processor or high-speed blender.
Pulse the mixture 8-10 times for a chunky paste, perfect for ice cream toppings. For a smoother texture ideal for mochi fillings, blend continuously for 2-3 minutes, scraping down the sides as needed. The paste should be thick but still spreadable. If it’s too thick, add a splash of water; if too thin, return it to the pan and simmer briefly to reduce. The color will deepen to a rich, vibrant red as it cools.
Pro Tips For Making Adzuki Beans Recipe Dessert
- Soak Overnight: I learned this the hard way—adzuki beans need a full 8-12 hours in water to soften properly, or you’ll be boiling them forever and still end up with a grainy texture.
- Simmer Low and Slow: After burning my first batch, I realized these beans scorch easily; keep the heat at a gentle simmer and stir every 10 minutes or so.
- Sweeten Gradually: Add the sugar in two or three stages, waiting until the beans are nearly tender—this prevents the skins from toughening up and keeps the texture smooth.
- Salt at the End: Skip the salt until the beans are fully cooked, or it’ll make them stubbornly firm; a pinch of sea salt right before serving actually changes the outcome.
Serving Suggestions for This adzuki beans recipe dessert
Mochi Fillings
Use this paste as a filling for homemade mochi by shaping 1 tbsp portions into small balls. The smooth texture pairs perfectly with chewy mochi dough. I dust my hands with cornstarch to prevent sticking when shaping.
Ice Cream Swirl
Swirl ¼ cup of paste into softened vanilla ice cream for a marbled effect. The contrast between cold ice cream and the rich, earthy paste is amazing. Try it with matcha ice cream for a Japanese-inspired treat. 🍦
Parfait Layers
Layer the paste with whipped coconut cream and fresh berries in clear glasses. The red bean color creates beautiful visual contrast. I add crushed toasted nuts for extra crunch.
Pastries and Buns
Fill sweet buns or pastries with 1-2 tbsp of paste before baking. The paste holds its shape well during baking. Brush finished pastries with a light sugar glaze for extra shine.
For taiyaki (fish-shaped pancakes), use 1½ tbsp of paste in each mold. The paste’s thick consistency prevents it from leaking out. 💛
Beverage Pairing
Serve with hot green tea or matcha latte to balance the sweetness. The bitterness of the tea complements the paste’s natural sweetness beautifully. I prefer jasmine green tea for its floral notes.
Nutrition Facts
Frequently Asked Questions
Can I use canned beans instead of dried?
Not recommended. Canned adzuki beans are too soft for proper paste texture. Dried beans give the perfect consistency after 45-60 minutes of simmering.
How can I make the paste smoother?
Blend continuously for 2-3 minutes in a high-speed blender. Add a splash of water if too thick. A fine-mesh strainer removes any remaining lumps.
Why did my paste turn out bland?
Likely under-salted or under-sweetened. Use the full 0.25 tsp salt and 0.75 cup sugar as a baseline. Vanilla enhances the natural bean flavor.
How long does the paste keep?
Store in an airtight container in the fridge for up to 5 days, or freeze for 3 months. Thaw overnight before using.

Trained in classic French technique but raised on slow-cooked ribs and spicy rubs, she blends culinary skill with smoke and soul.
- Recipe for Boneless Pork Chops in Cast Iron Skillet: Sear and Baste to Juicy Perfection - October 3, 2026
- Recipe for Boneless Cross Rib Roast: Slow-Roasted Beef with Herb Crust - October 3, 2026
- Hamburgers in Sauce Recipe Crock Pot: Slow-Cooked Savory Delight - October 3, 2026