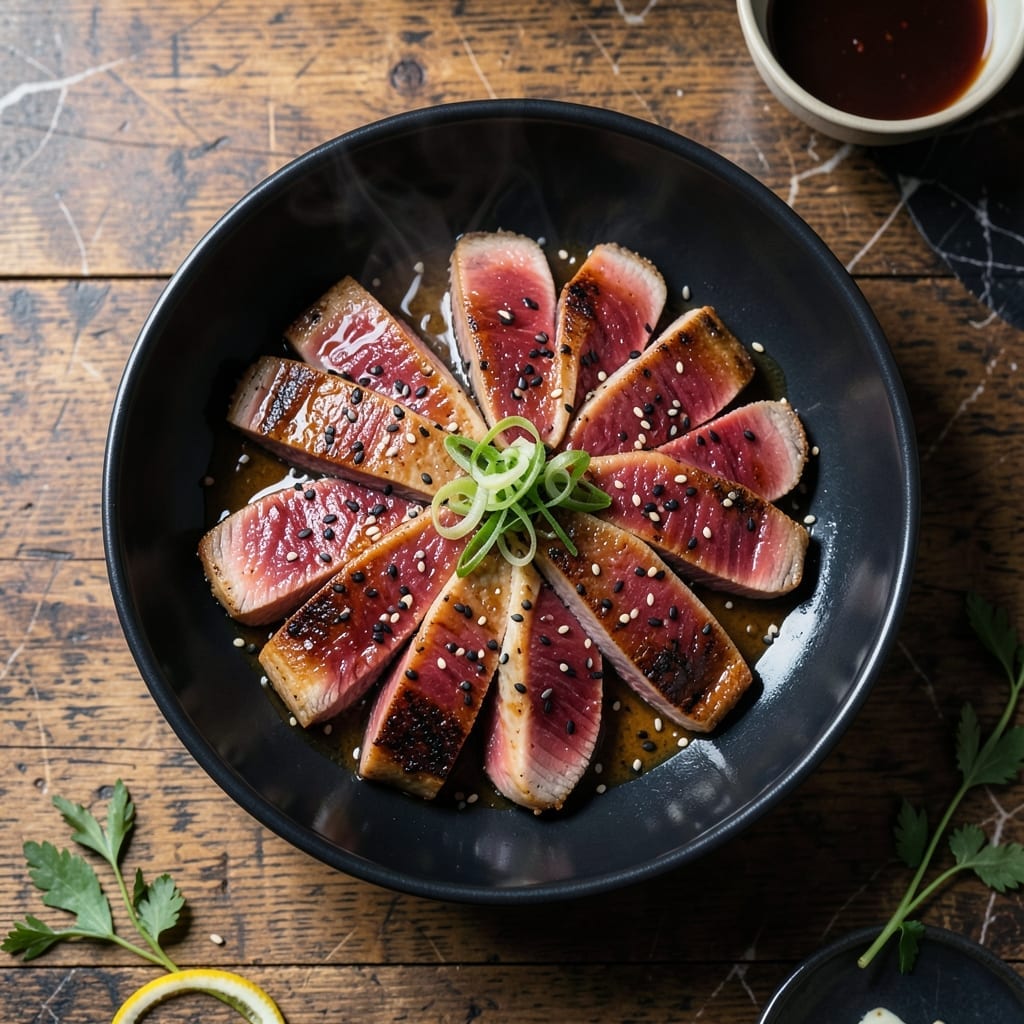
This oven method delivers flaky ahi tuna with a crisp sesame crust every time. The controlled heat ensures perfect doneness without overcooking.
I developed this technique after testing multiple approaches, settling on a simple preparation that highlights the fish’s natural richness while adding textural contrast.
Ingredients for Ahi Tuna Oven
Sushi-grade tuna plus pantry staples create this elegant oven-baked dish with textural contrast.
| Ingredient | Amount | Notes |
|---|---|---|
| Ahi Tuna Steaks 🐟 | 1 ½ lb | Sushi-grade, about 1 inch thick |
| Soy Sauce 🥢 | 3 tbsp | Low-sodium preferred for control |
| Sesame Oil 🫒 | 1 tbsp | Toasted variety for depth |
| Black Sesame Seeds 🌰 | 2 tbsp | Toasted for crunch |
| White Sesame Seeds 🌰 | 2 tbsp | Toasted for crunch |
| Honey 🍯 | 1 tbsp | For glaze balance |
| Fresh Ginger 🌿 | 1 tbsp | Finely grated for zing |
| Garlic Cloves 🧄 | 3 cloves | Minced for aromatic base |
| Rice Vinegar 🍚 | 1 tbsp | For brightness in marinade |
| Scallions 🧅 | 4 whole | Thinly sliced for garnish |
| Vegetable Oil 🫒 | 1 tbsp | High smoke point for searing |
| Kosher Salt 🧂 | ½ tsp | Diamond Crystal preferred |
| Ground Black Pepper 🌶️ | ½ tsp | Freshly cracked for best flavor |
| Lime 🍈 | 1 whole | Cut into wedges for serving |
[recipe_ingredient_scaler]
The tuna quality is non-negotiable here. Sushi-grade ahi from a reputable fishmonger (I rely on Whole Foods or local Asian markets) ensures both safety and texture. Look for vibrant red color and a firm, slightly translucent appearance—avoid anything with a fishy odor. The steaks should be uniformly thick (about 1 inch) for even cooking. If buying frozen, thaw overnight in the refrigerator.
No black sesame seeds? Double the white sesame works fine (toast them well). Substitute agave or maple syrup for honey if needed. The soy sauce can be tamari for gluten-free. Fresh ginger is ideal, but Ground ginger at one-third the amount in a pinch. For extra crunch, add crushed macadamia nuts to the sesame coating.
Prep the marinade up to 24 hours ahead—actually improves flavor. Store raw tuna covered in the fridge for no more than 1 day. Leftovers (if any) keep 2-3 days but are best served immediately. The sesame seeds toast in seconds—watch closely to avoid burning.
Why You’ll Love This Recipe
- Set It and Forget It: I toss the ahi tuna with soy sauce and sesame oil, pop it in the oven, and walk away—no flipping, no stress.
- Umami Bomb: The soy sauce and sesame oil create a rich, savory crust on the tuna that’s downright addictive.
- Weeknight MVP: This dish goes from oven to table in 15 minutes, which honestly saves my sanity on busy evenings.
- Leftovers? Yes Please: Cold ahi tuna slices over salad the next day taste even better—if there’s any left, that is.
Step-by-Step Instructions for Ahi Tuna With Sesame Crust
Achieve restaurant-quality results with this precise oven method for perfectly flaky ahi tuna every time.
Step 1: Prepare the Sesame Crust Mixture
In a shallow dish, combine the 2 tbsp black sesame seeds, 2 tbsp white sesame seeds, 0.5 tsp kosher salt, and 0.5 tsp ground black pepper. I use a fork to mix them thoroughly, ensuring the seasonings distribute evenly through the seeds.
This crust creates a nutty, textured exterior that contrasts beautifully with the tender ahi tuna. The combination of black and white sesame seeds provides visual appeal as well as depth of flavor in each bite.
Step 2: Create the Marinade and Coat the Tuna
In a small bowl, whisk together the 3 tbsp soy sauce, 1 tbsp sesame oil, 1 tbsp honey, 1 tbsp rice vinegar, 1 tbsp fresh ginger, and the 3 cloves garlic cloves minced. The mixture should be well combined with no honey streaks remaining.
Pat the 1.5 lb ahi tuna steaks dry with paper towels to ensure the marinade adheres properly. Coat each steak in the marinade, letting it sit for 10 minutes at room temperature. This brief marinade enhances the flavor without overpowering the delicate taste of the tuna.
Step 3: Sear and Crust the Tuna
Heat the 1 tbsp vegetable oil in an oven-safe skillet over high heat until shimmering. Sear the tuna for 1-2 minutes per side until the surface develops a light crust. The goal is to create a flavorful base layer without cooking the tuna through.
Immediately press each seared tuna steak into the sesame seed mixture, coating all sides completely. The marinade helps the seeds adhere, forming a thick, even crust. Return the crust-coated steaks to the skillet.
Step 4: Finish in the Oven
Transfer the skillet to a preheated 400°F oven. Bake for 6-8 minutes until the tuna reaches an internal temperature of 125-130°F for medium-rare. The crust should be golden brown and the center still cool to the touch.
I check for doneness by pressing the center gently—it should feel slightly springy, not firm. This temperature ensures the tuna remains flaky and moist in the center while the crust becomes fragrant and crisp.
Step 5: Rest and Garnish
Remove the tuna from the oven and let it rest for 3-5 minutes before slicing. This brief rest allows the juices to redistribute, preserving the flaky texture. The internal temperature will rise slightly during this time.
Slice the tuna against the grain into ½-inch thick pieces. Garnish with the 4 whole scallions thinly sliced and serve with lime wedges for a bright, citrusy finish that complements the rich sesame crust.
Pro Tips For Making Ahi Tuna Oven
- Preheat the Oven High: Crank it to 450°F—ahi tuna cooks fast, and high heat gives you that perfect sear on the outside while keeping the inside tender. I learned this the hard way after serving dry tuna at a dinner party.
- Pat the Tuna Dry: Use paper towels to remove every bit of moisture from the steaks before seasoning. Sounds tedious, but it’s the only way to get that golden crust with the sesame seeds.
- Skip Overcooking: Pull the tuna out when it’s still pink in the middle—about 6-8 minutes for 1-inch steaks. After burning a few batches, I finally figured out that ahi turns tough the second it’s fully cooked through.
- Toast the Seeds: Lightly toast the black and white sesame seeds in a dry pan for 30 seconds before using. It adds a nutty depth that raw seeds just can’t match—I was skeptical until I tried it.
Make-Ahead Tips for This ahi tuna oven
Prep Ahead Marinade
Mix the 3 tbsp soy sauce, 1 tbsp sesame oil, 1 tbsp honey, 1 tbsp rice vinegar, 1 tbsp fresh ginger, and 3 cloves minced garlic up to 24 hours ahead. The flavors meld beautifully, saving you time on cooking day.
Seed Toasting
Toast the 2 tbsp black sesame seeds and 2 tbsp white sesame seeds the morning of serving. They stay fresh in an airtight container at room temperature for 1 week. David swears he can taste the difference with fresh-toasted seeds.
Tuna Prep
Pat the 1.5 lb ahi tuna steaks dry and store uncovered on a plate in the fridge for up to 1 day before cooking. This dries the surface slightly for better searing. I learned this trick working in Asheville farm-to-table kitchens.
Equipment Ready
Set out your oven-safe skillet and preheat the oven to 400°F 30 minutes before cooking. Having everything ready prevents the fish from sitting too long after marinating. 💡
Garnish Prep
Slice the 4 scallions and cut the lime into wedges up to 4 hours ahead. Store covered in the fridge. This small step makes plating effortless when guests arrive.
Leftovers Plan
While best served immediately, cooked tuna keeps in the fridge for 2-3 days. Store in an airtight container and serve cold in salads or wraps. The sesame crust softens but retains great flavor.
Nutrition Facts
Frequently Asked Questions
What’s the best internal temperature for this dish?
Aim for 125-130°F for perfect medium-rare doneness. This keeps the center flaky and moist while ensuring safety. Use a meat thermometer for accuracy.
Can I prepare this without an oven-safe skillet?
Yes! Sear in a regular pan, then transfer to a baking dish for the oven. Preheat the dish first to prevent sticking. The crust will still develop beautifully.
How do I know when it’s done without a thermometer?
Press the center gently—it should feel slightly springy, not firm. The crust will be golden brown and the center still cool to the touch. Let it rest 3-5 minutes before slicing.

Trained in classic French technique but raised on slow-cooked ribs and spicy rubs, she blends culinary skill with smoke and soul.
- Recipe for Boneless Pork Chops in Cast Iron Skillet: Sear and Baste to Juicy Perfection - October 3, 2026
- Recipe for Boneless Cross Rib Roast: Slow-Roasted Beef with Herb Crust - October 3, 2026
- Hamburgers in Sauce Recipe Crock Pot: Slow-Cooked Savory Delight - October 3, 2026