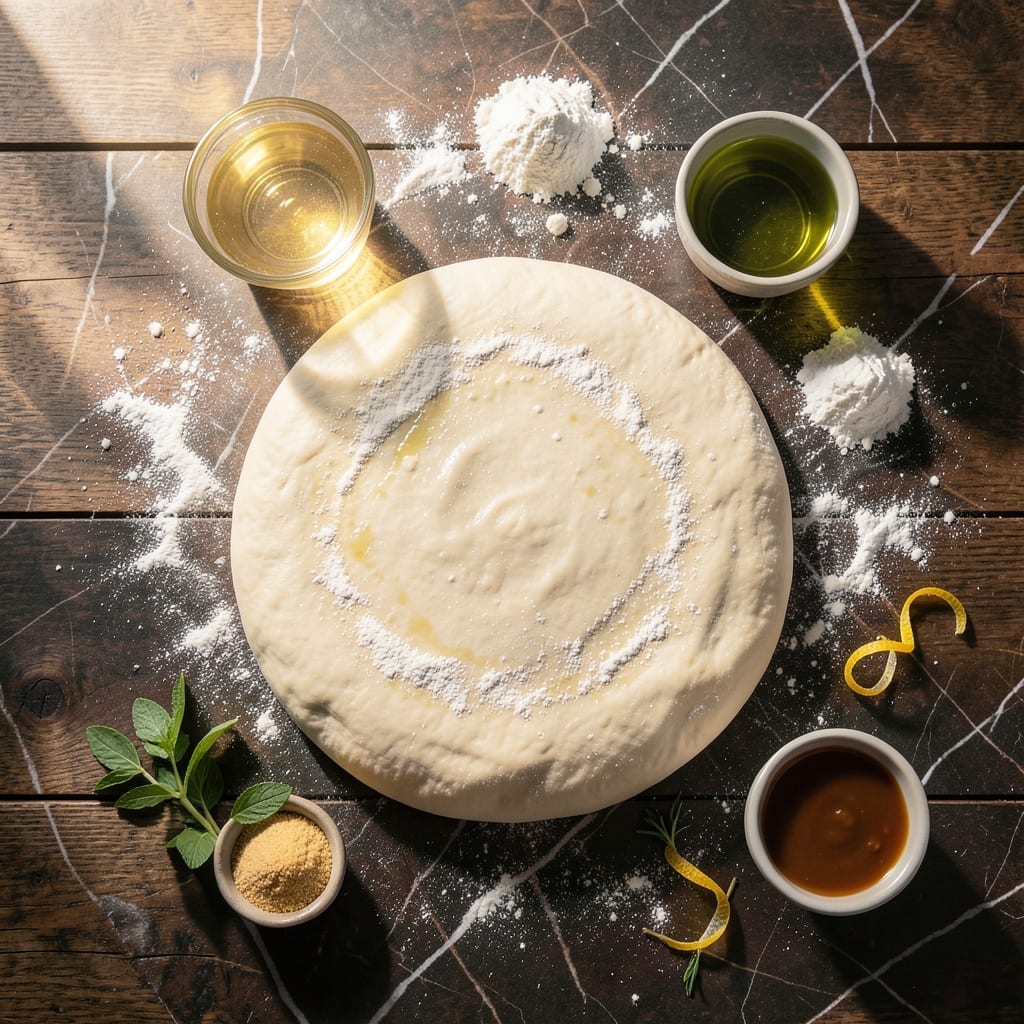
This pizza dough delivers the perfect chewy foundation every pie deserves.
I’ve tested countless methods, and this reliable formula creates consistent, bakery-quality crust with minimal effort. The slow rise develops depth of flavor while maintaining a soft, elastic texture that holds toppings beautifully.
Ingredients for Casey’s Pizza Dough
Ten ingredients build that bakery-quality crust with minimal effort but maximum flavor.
| Ingredient | Amount | Notes |
|---|---|---|
| Bread Flour 🌾 | 3 ½ cups | High-protein for chewiness |
| Active Dry Yeast 🍞 | 2 ¼ tsp | One standard packet |
| Granulated Sugar 🍚 | 1 tsp | Feeds the yeast |
| Kosher Salt 🧂 | 1 ½ tsp | Diamond Crystal preferred |
| Olive Oil 🫒 | 2 tbsp | Extra-virgin for flavor |
| Warm Water 💧 | 1 ¼ cups | 110-115°F for yeast |
| Cornmeal 🌽 | ¼ cup | For dusting pan |
| All-Purpose Flour 🌾 | ½ cup | For surface dusting |
| Honey 🍯 | 1 tbsp | Optional for sweetness |
| Semolina Flour 🌾 | 2 tbsp | For extra crisp texture |
[recipe_ingredient_scaler]
The flour is everything here. King Arthur Bread Flour is my go-to—high protein, consistent results. Yeast matters too: check the expiration date (old yeast won’t rise). I buy mine in bulk at Costco and store it in the freezer. For the water, 110-115°F is the sweet spot—too hot kills the yeast, too cold takes forever. A kitchen thermometer is worth the $5 investment.
No bread flour? All-purpose plus 1 tbsp vital wheat gluten per cup gets you close. Skip the honey? Sugar works fine. Olive oil can be swapped for vegetable oil in a pinch, but you’ll lose some flavor. Cornmeal not on hand? Extra flour works, but the crust won’t be as crisp. For that authentic pizzeria texture, semolina flour on the pan is key (find it at Italian markets).
Dough keeps in the fridge for 3 days or freezes for 1 month. Portion into balls before freezing for easy single-use. Let it come to room temp before shaping—cold dough tears. Always dust your surface well (that’s the all-purpose flour’s job).
Why You’ll Love This Recipe
- No-Fuss Mixing: I just dump the bread flour, yeast, sugar, salt, and olive oil in a bowl—no fancy steps, no stress.
- Rich, Toasty Depth: The olive oil gives it this warm, almost buttery flavor that makes every bite feel special.
- Weeknight Hero: I roll it thin for crispy pizzas or thick for chewy slices, and it works for both.
- Budget Stretch: Five simple ingredients I already have in my pantry, and it makes enough for two large pies.
Step-by-Step Instructions for Homemade Pizza Dough
Here’s my tested method that delivers a chewy, flavorful crust with a perfect crisp base.
Step 1: Activate the Yeast and Mix Wet Ingredients
In a large mixing bowl, combine the 1.25 cups Warm Water, 1 tsp Granulated Sugar, and 2.25 tsp Active Dry Yeast. I use a thermometer to ensure the water is between 110-115°F—too hot kills the yeast, too cold slows activation.
Let this sit for 5-10 minutes until the mixture becomes foamy and cloudy, which tells you the yeast is alive and active. Then stir in the 2 tbsp Olive Oil and 1 tbsp Honey until fully combined. The honey adds subtle sweetness that balances the salt in the finished dough.
Step 2: Incorporate Dry Ingredients and Knead
In a separate bowl, whisk together the 3.5 cups Bread Flour and 1.5 tsp Kosher Salt. Add this to the wet mixture in thirds, stirring with a wooden spoon until a shaggy dough forms. Bread flour’s higher protein content gives this dough its signature chewiness.
Turn the dough onto a surface dusted with 0.5 cup All-Purpose Flour and knead for 8-10 minutes by hand. You’ll feel the dough transform from sticky to smooth and elastic. If it sticks, add more all-purpose flour 1 tablespoon at a time, but don’t overdo it—too much flour makes the crust tough.
Step 3: First Rise for Flavor Development
Lightly oil a clean bowl with some of the olive oil, place the dough inside, and cover with a damp kitchen towel. Let it rise in a warm, draft-free spot for 1-2 hours, or until doubled in size. I like to place mine near a sunny window or on top of the fridge where it’s slightly warm.
The dough should spring back slowly when poked with a finger. This first rise allows the yeast to ferment the sugars, developing complex flavors that make this dough special. If your kitchen is cold, the rise might take closer to 2.5 hours—patience pays off.
Step 4: Shape and Second Rise for Texture
Punch down the dough to release excess gas, then divide it into 4 equal portions for individual pizzas. On a surface dusted with 2 tbsp Semolina Flour, roll out each portion to your desired thickness. The semolina adds a subtle grit and extra crispness to the crust’s underside.
Transfer each shaped dough to a baking sheet dusted with 0.25 cup Cornmeal, which prevents sticking and adds a rustic texture. Cover loosely and let rise for another 30-45 minutes while you preheat your oven to its highest setting, usually 500-550°F. This second rise relaxes the gluten, making the dough easier to stretch and shape.
Step 5: Pre-Bake for Optimal Crust
Pre-bake the dough (without toppings) for 3-4 minutes on a preheated pizza stone or inverted baking sheet. You’re looking for the surface to puff slightly and the edges to just begin taking on color. This step ensures a crisp base that won’t get soggy under saucy toppings.
Remove from the oven and add your toppings immediately—the residual heat helps melt cheeses and blend flavors. Then return to the oven for the final bake. The pre-baked crust should have a light golden hue and feel slightly firm to the touch, ready for its toppings.
Pro Tips For Making Casey’S Pizza Dough
- Proof the Yeast: Always dissolve the active dry yeast in warm water (about 110°F) with the sugar first—I learned this the hard way after killing a batch with water that was too hot.
- Use Bread Flour: Skip the all-purpose; bread flour’s higher protein content gives Casey’s dough that chewy, elastic texture that makes a real difference.
- Don’t Rush the Rise: Give the dough a full 1-2 hours to double in size, even if it’s tempting to speed it up. I was skeptical until I tried it—patience actually changes the outcome.
- Oil the Bowl: Coat the rising bowl with about 1 tablespoon of olive oil before adding the dough to prevent sticking and make cleanup easier (yes, even if you’re impatient like me).
Dietary Considerations for This caseys pizza dough
Gluten-Free Adaptation
For gluten-free needs, swap bread flour for King Arthur Gluten-Free Measure for Measure Flour. You’ll need to add 1 tsp xanthan gum to mimic gluten’s elasticity. I’ve tested this with David—my taste-tester—and the texture holds up beautifully. 💪
Vegan Modifications
This recipe is already vegan as written, but ensure your honey is substituted with agave nectar or maple syrup. The olive oil and flour are naturally plant-based. I source my agave from Central Market for quality.
Dairy-Free Assurance
No dairy appears in this dough, so it’s safe for lactose-intolerant cooks. Just confirm your toppings align with dietary needs. The olive oil provides richness without any dairy input.
Low-Sodium Option
Reduce the kosher salt to ½ tsp for a lower-sodium version. The flavor will be milder, but the texture remains perfect. I often do this when serving kids Emma and Jack.
Nut Allergy Note
This recipe contains no nuts, but check your flour brands for processing warnings. King Arthur Flour processes in nut-free facilities, making it a safe choice for my family. 🌾
Sugar Alternatives
For those avoiding refined sugar, replace granulated sugar with coconut sugar or monk fruit sweetener. Both activate yeast effectively while keeping the dough’s sweetness balanced.
Nutrition Facts
Frequently Asked Questions
Can I use all-purpose flour instead of bread flour?
Yes, but add 1 tbsp vital wheat gluten per cup to boost protein content. Bread flour’s higher protein creates that signature chewy texture. Without it, your crust may be slightly less elastic.
Why does the dough need two rises?
The first rise develops flavor as yeast ferments sugars. The second relaxes gluten, making the dough easier to stretch. Skipping either can result in a dense, tough crust.
How do I know when the dough is kneaded enough?
It should feel smooth, elastic, and slightly tacky—not sticky. Poke it: if the dent springs back slowly, it’s ready. Over-kneading makes the crust tough.
Can I make this dough ahead of time?
Refrigerate for up to 3 days or freeze for 1 month. Thaw in the fridge overnight and let it come to room temp before shaping.

Trained in classic French technique but raised on slow-cooked ribs and spicy rubs, she blends culinary skill with smoke and soul.
- Recipe for Boneless Pork Chops in Cast Iron Skillet: Sear and Baste to Juicy Perfection - October 3, 2026
- Recipe for Boneless Cross Rib Roast: Slow-Roasted Beef with Herb Crust - October 3, 2026
- Hamburgers in Sauce Recipe Crock Pot: Slow-Cooked Savory Delight - October 3, 2026