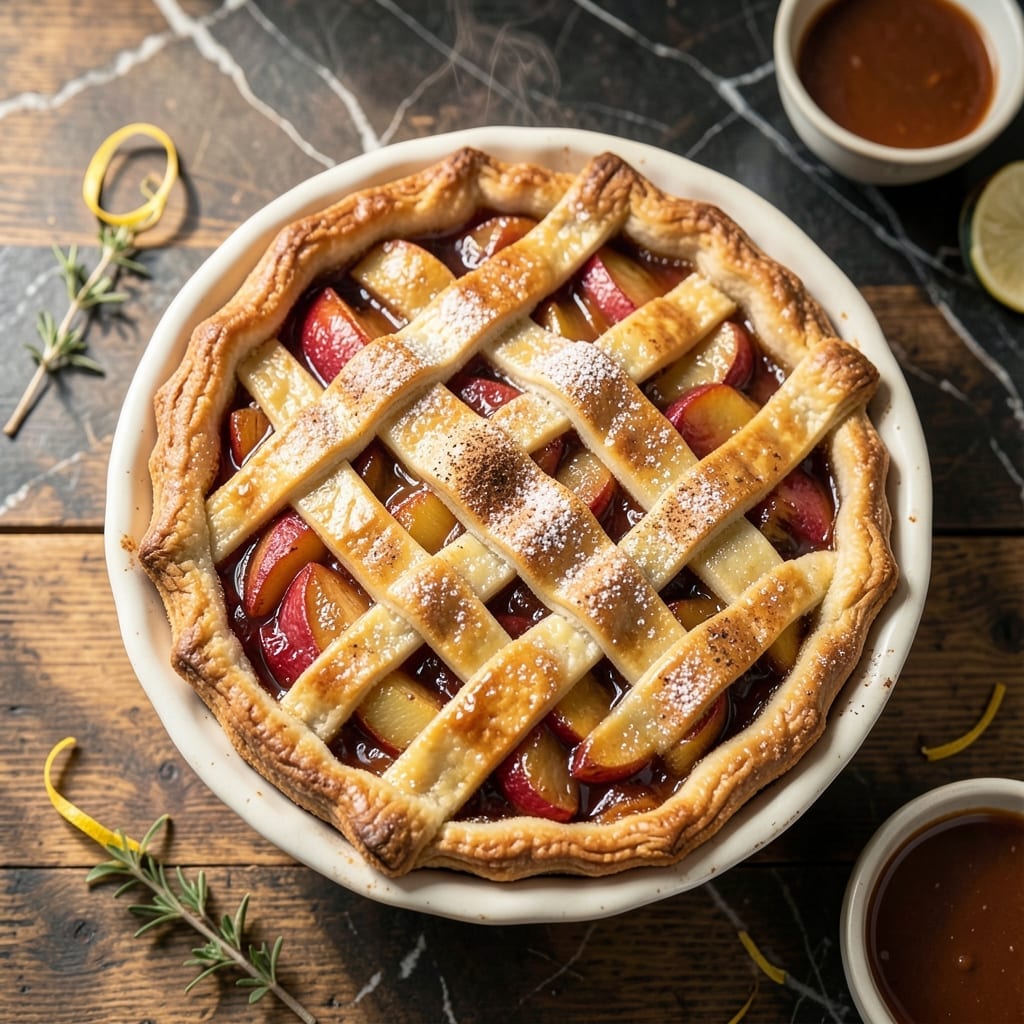
This recipe proves that a flaky crust and perfect apple filling don’t require hours in the kitchen. I developed this method for busy days when I still crave homemade quality.
The secret is using canned filling as a base, then enhancing it with a touch of cinnamon and vanilla. The result is a pie that tastes made-from-scratch with a fraction of the effort.
Ingredients for Apple Pie Recipe Using Canned Pie Filling
A few pantry staples plus canned filling create this flaky, crowd-pleasing dessert.
| Ingredient | Amount | Notes |
|---|---|---|
| Canned Apple Pie Filling 🍎 | 2 cans | 21 oz each, undrained |
| All-Purpose Flour 🌾 | 2 ½ cups | Plus extra for dusting |
| Unsalted Butter 🧈 | 1 cup | Cold, cubed for crust |
| Ice Water 💧 | ½ cup | For pie dough |
| Granulated Sugar 🍚 | 2 tbsp | For filling enhancement |
| Ground Cinnamon 🌿 | 1 tsp | Fresh for best flavor |
| Vanilla Extract 🌿 | 1 tsp | Pure vanilla preferred |
| Salt 🧂 | ½ tsp | Fine grain for dough |
| Large Egg 🥚 | 1 whole | For egg wash finish |
| Lemon Juice 🍋 | 1 tbsp | Fresh for brightness |
| Granulated Sugar 🍚 | 1 tbsp | For sprinkling on crust |
[recipe_ingredient_scaler]
The crust hinges on cold butter—Land O’Lakes or Plugrá are reliable. Use the highest fat content you can find (82% or better) for that flaky texture. All-purpose flour from King Arthur or Gold Medal works perfectly. If your kitchen runs warm, chill the flour too (20 minutes in the freezer). That extra step prevents the butter from softening before it hits the oven.
No vanilla extract? Vanilla bean paste at half the amount works, but avoid imitation vanilla—it tastes flat here. The canned filling can be Comstock or Luck’s (both have good apple pieces). If you want extra spice, add one-quarter teaspoon nutmeg. The egg wash can be swapped for 2 tbsp milk or cream, but the egg gives the best shine and color.
The pie keeps 2-3 days at room temperature (covered with foil). For longer storage, refrigerate up to 5 days. Freeze slices for up to 3 months—thaw overnight before serving. Best eaten the day it’s baked, honestly, but leftovers still disappear fast.
Why You’ll Love This Recipe
- No-Fuss Prep: I skip peeling and slicing entirely—the canned filling does the work for me.
- Buttery Crust Joy: That flaky, golden crust from the butter and flour? It’s the perfect wrapper for the sweet, spiced apples.
- Crowd-Pleasing Classic: I bring this to potlucks, and it’s always the first dessert gone.
- Budget-Friendly Win: Honestly, it costs less than fresh apples and still tastes like a bakery pie.
Step-by-Step Instructions for Apple Pie Using Canned Pie Filling
This method delivers a flaky crust with minimal effort and maximum flavor.
Step 1: Prepare the Pie Dough
In a large bowl, combine the 2.5 cups All-Purpose Flour with the 0.5 tsp Salt. Add the 1 cup Unsalted Butter, cubed and cold, and cut it into the flour using a pastry cutter or your fingers until the mixture resembles coarse crumbs with pea-sized butter pieces visible.
Gradually drizzle in the 0.5 cup Ice Water, one tablespoon at a time, mixing gently with a fork until the dough just comes together. Avoid overworking it—this is the secret to a flaky texture. The dough should hold when pressed but still look slightly shaggy.
Step 2: Enhance the Filling
Open the 2 cans Canned Apple Pie Filling and transfer the contents to a bowl. Stir in the 2 tbsp Granulated Sugar, 1 tsp Ground Cinnamon, 1 tsp Vanilla Extract, and 1 tbsp Lemon Juice until well combined.
The lemon juice brightens the sweetness, while the cinnamon and vanilla add depth. This step transforms store-bought filling into something homemade-tasting. Let the mixture sit while you roll out the dough.
Step 3: Assemble the Pie
Divide the dough in half and roll each portion into a 12-inch circle on a lightly floured surface. Transfer one round to a 9-inch pie dish, pressing it gently into the bottom and up the sides. Trim any excess dough, leaving a ½-inch overhang.
Pour the enhanced Canned Apple Pie Filling into the crust. Roll out the second dough round and place it over the filling. Trim to leave a ½-inch overhang, then fold the edges under and crimp with a fork or your fingers to seal.
Step 4: Add Finishing Touches and Bake
In a small bowl, whisk the 1 whole Large Egg with 1 tablespoon of water to create an egg wash. Brush this evenly over the top crust. Sprinkle the 1 tbsp Granulated Sugar on top for added crunch and shine.
Cut 4-5 slits in the center to allow steam to escape. Place the pie on a baking sheet to catch drips and bake at 375°F for 50-60 minutes, until the crust is deep golden brown and the filling is bubbling through the vents.
Step 5: Cool and Serve
Transfer the pie to a wire rack and let it cool for at least 2 hours before slicing. This resting time allows the filling to set, making it easier to serve neat slices without a runny mess.
The crust should be crisp and flaky, while the filling remains thick and fragrant. Serve warm with vanilla ice cream or whipped cream for the ultimate experience.
Pro Tips For Making Apple Pie Recipe Using Canned Pie Filling
- Chill the Dough: Work the butter into the flour until pea-sized crumbs form, then add ice water a tablespoon at a time—this keeps the crust flaky instead of tough. I learned this the hard way after my first three pies came out like crackers.
- Drain the Filling: Dump the canned filling into a strainer for 5 minutes to remove excess syrup, or your pie will be soggy. Sounds tedious, but it actually changes the outcome.
- Vent the Top: Cut at least 4-5 slits in the top crust, or steam will build up and make the filling bubble out. My grandmother swore by this, and she was right.
- Brush with Sugar: Sprinkle a teaspoon of granulated sugar over the crust before baking for a golden, caramelized finish. I was skeptical until I tried it—now it’s non-negotiable.
Essential Equipment for apple pie recipe using canned pie filling
Dough Essentials
I swear by my OXO pastry cutter for working cold butter into flour—it’s faster than my fingers and keeps the butter in perfect pea-sized pieces. A large stainless steel mixing bowl from my collection helps too, as it stays cold longer than glass. 💡
Rolling Tools
A French rolling pin without handles gives me better control for even 12-inch circles. I dust my marble pastry board with just enough flour to prevent sticking without toughening the dough. The marble stays cool, which helps maintain that flaky texture.
Pie Assembly
My 9-inch glass pie dish lets me monitor the bottom crust’s browning. For crimping, I use a fork for quick sealing or my fingers for a more decorative edge. A pastry brush is essential for applying that egg wash evenly.
Baking Gear
A half-sheet pan catches any filling drips and makes transfer easier. I always use an oven thermometer to confirm my oven’s 375°F—home ovens can be off by 25°F or more. A wire cooling rack ensures air circulates beneath the pie. 🔥
Finishing Touches
A fine-mesh sieve helps dust that final 1 tbsp sugar evenly over the crust. I also keep a pie shield handy to prevent over-browning if the edges cook faster than the center.
Nutrition Facts
Frequently Asked Questions
Can I use a pre-made crust instead?
A store-bought 9-inch pie crust works in a pinch. Just follow the same baking time and temperature, but check for doneness at 45 minutes as pre-made crusts can brown faster.
Why add lemon juice to the filling?
The 1 tbsp lemon juice brightens the sweetness and balances the flavors. It also helps prevent the filling from becoming too cloying, giving it a fresher taste.
How do I prevent a soggy bottom crust?
Bake the pie on the lower oven rack and place a baking sheet underneath to catch drips. Also, let the pie cool for at least 2 hours before slicing to allow the filling to set fully.
Can I make this pie ahead of time?
Yes! Bake the pie as directed, then store it at room temperature for up to 2 days. For longer storage, refrigerate for up to 5 days or freeze for up to 3 months.

Trained in classic French technique but raised on slow-cooked ribs and spicy rubs, she blends culinary skill with smoke and soul.
- Recipe for Boneless Pork Chops in Cast Iron Skillet: Sear and Baste to Juicy Perfection - October 3, 2026
- Recipe for Boneless Cross Rib Roast: Slow-Roasted Beef with Herb Crust - October 3, 2026
- Hamburgers in Sauce Recipe Crock Pot: Slow-Cooked Savory Delight - October 3, 2026