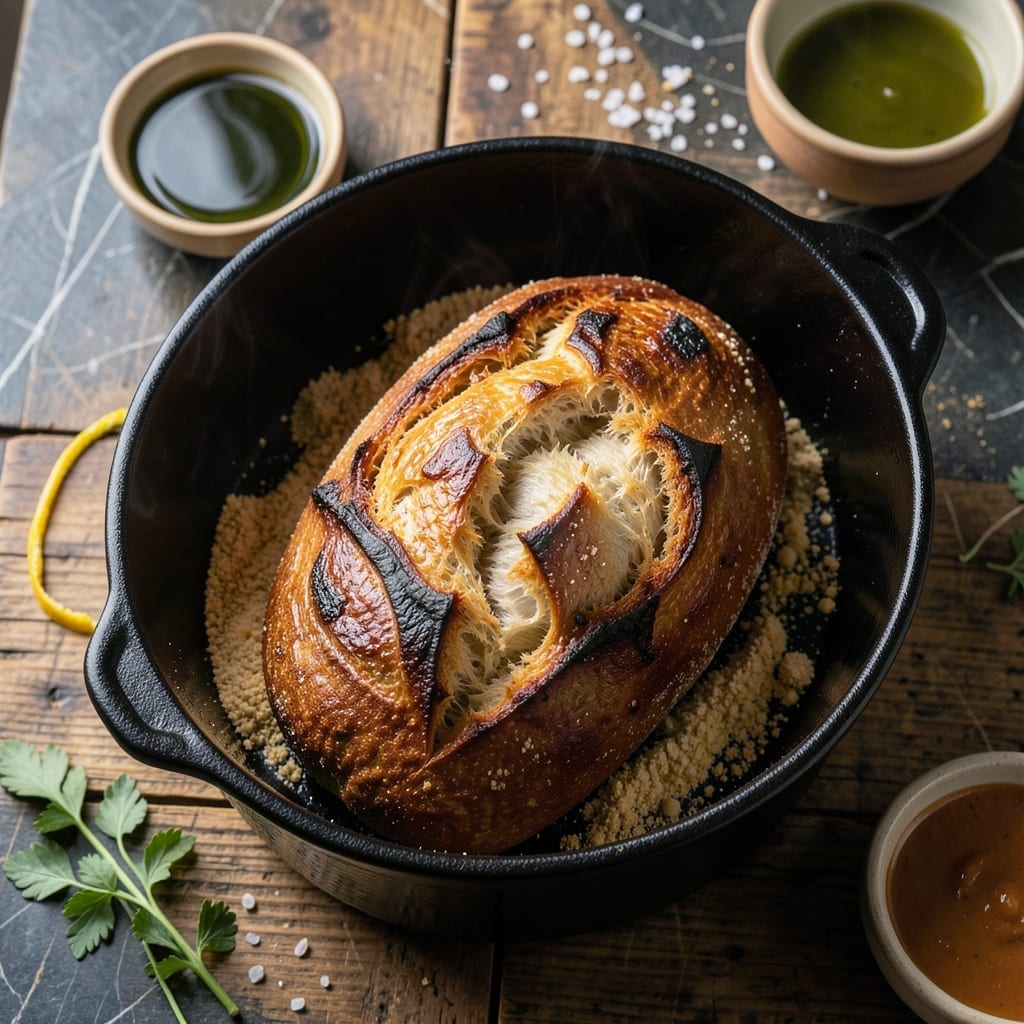
This Dutch oven method delivers bakery-quality bread with a crusty exterior and airy interior. The steam created inside the pot mimics professional ovens for perfect rise.
With just four ingredients and minimal hands-on time, you’ll achieve a golden loaf that rivals any artisan bakery. No kneading, no fuss—just great bread.
Ingredients for Artisan Bread Recipe Dutch Oven
Four core ingredients plus a few pantry staples for that perfect crusty golden loaf.
| Ingredient | Amount | Notes |
|---|---|---|
| Bread Flour 🌾 | 3 ½ cups | High-protein for structure |
| Active Dry Yeast 🍞 | ¼ oz | Or 2 1/4 tsp from packet |
| Sea Salt 🧂 | 2 tsp | Fine grain preferred |
| Filtered Water 💧 | 1 ½ cups | Warm, about 110°F |
| Olive Oil 🫒 | 1 tbsp | For greasing bowl |
| Cornmeal 🌽 | 2 tbsp | For dusting pot |
| All-Purpose Flour 🌾 | ½ cup | For dusting surface |
[recipe_ingredient_scaler]
The flour is critical here. King Arthur Bread Flour is ideal for its consistent 12.7% protein content, which gives the dough the right structure. Yeast freshness matters—check the expiration date and store unopened packets in the freezer. Diamond Crystal sea salt is my go-to for its clean flavor and easy dissolution. Most grocery stores carry these, but Whole Foods has bulk bins if you want to buy in smaller quantities.
No bread flour? All-purpose flour works in a pinch (reduce water by 1 tbsp). Active dry yeast and instant yeast are interchangeable here—just skip the proofing step with instant. Sea salt can be swapped for kosher salt at 1:1 ratio, but avoid iodized table salt. For the water, filtered is best, but tap works if it’s not heavily chlorinated.
Store flour in an airtight container for up to 6 months. Yeast keeps in the freezer for 1 year. The dough can be refrigerated overnight for a slower rise and deeper flavor—just let it come to room temperature before baking.
Why You’ll Love This Recipe
- Hands-Off Magic: I mix the dough the night before, let it rise while I sleep, and the Dutch oven does the rest—no kneading, no fuss.
- Crispy Crust Perfection: The Dutch oven traps steam so the crust shatters with every bite, while the inside stays soft and airy.
- Weeknight Hero: I’ve served it with soups, as garlic bread, and even as toast with jam—honestly, it fits every meal.
- Penny-Wise Loaf: Four basic ingredients, zero special tools beyond a Dutch oven, and it tastes like a $8 bakery loaf. I’ll be real: it’s saved my grocery budget.
Step-by-Step Instructions for Artisan Bread Dutch Oven
This method delivers a bakery-quality loaf with a crisp crust and airy interior.
Step 1: Activate the Yeast and Mix the Dough
In a large mixing bowl, combine the 0.25 oz Active Dry Yeast with the 1.5 cups Filtered Water warmed to about 110°F. Let it sit for 5-10 minutes until the mixture becomes frothy and cloudy—this confirms the yeast is active and ready to work.
Add the 3.5 cups Bread Flour and 2 tsp Sea Salt to the bowl. Using a wooden spoon or dough whisk, mix until the ingredients come together into a shaggy dough. The texture will be sticky and rough; this is exactly what you want at this stage. Avoid overmixing, as this can develop too much gluten before the bulk fermentation.
Step 2: Bulk Fermentation for Flavor Development
Cover the bowl with a damp kitchen towel or plastic wrap and let the dough rise at room temperature for 8-12 hours. I prefer an 8-hour fermentation for a milder flavor or 12 hours for a more developed, tangy taste. The dough should roughly double in size and become bubbly and jiggly.
This long, slow fermentation is what gives artisan bread its characteristic depth of flavor. The yeast works gradually, breaking down the bread flour and creating those complex flavors that make this loaf special. If your kitchen is cool, the process might take a bit longer—be patient and let the dough dictate the timeline.
Step 3: Shape the Dough and Prepare for Proofing
Lightly dust a clean work surface with the 0.5 cup All-Purpose Flour. Turn the dough out onto the floured surface and gently fold the edges toward the center to form a round, taut ball. The dough will still be sticky, so use a bench scraper or wet hands to help shape it without tearing.
Place the shaped dough seam-side down on a piece of parchment paper. Lightly grease a large bowl with the 1 tbsp Olive Oil, then place the dough and parchment into the bowl. Cover and let it proof at room temperature for 1-2 hours until it has risen by about 50% and holds a slight indentation when pressed gently with a finger.
Step 4: Preheat the Dutch Oven and Bake
About 30 minutes before the proofing is complete, place your Dutch oven (with lid) in the oven and preheat to 450°F. Once the dough has finished proofing, carefully remove the hot Dutch oven from the oven. Sprinkle the 2 tbsp Cornmeal into the bottom of the pot to prevent sticking and add a subtle crunch.
Using the parchment paper, transfer the dough into the Dutch oven. Score the top of the dough with a sharp knife or razor blade in a cross pattern to allow for expansion. Cover with the lid and bake for 30 minutes. Then, remove the lid and bake for an additional 15-20 minutes until the loaf is deep golden brown and sounds hollow when tapped on the bottom.
Step 5: Cool and Enjoy
Carefully remove the bread from the Dutch oven and transfer it to a wire rack. Let it cool for at least 1 hour before slicing. This cooling period is crucial—it allows the interior to set and the flavors to fully develop. Slicing too soon can result in a gummy texture.
Once cooled, your loaf will have a crisp, golden crust and a light, open crumb structure. Serve warm with butter or enjoy as is. Store any leftovers in a bread box or paper bag to maintain the crust’s texture.
Pro Tips For Making Artisan Bread Recipe Dutch Oven
- Preheat the Dutch Oven: I learned this the hard way—put your Dutch oven in the oven for at least 30 minutes at 475°F before adding the dough. A screaming-hot pot is what gives you that bakery-style rise and crust.
- Use Room-Temp Water: Skip the cold tap water and use filtered water at about 75-80°F. It wakes up the yeast faster and gives you a more consistent bulk fermentation, especially with bread flour.
- Skip the Over-Flouring: Resist the urge to dump extra flour on your work surface when shaping. Too much bench flour can toughen the dough—just enough to prevent sticking, about 1-2 tablespoons max.
- Add Oil Last: Sounds weird, but it works: mix your olive oil into the dough at the very end of kneading. This keeps the gluten strands from getting coated too early, so you get better structure in your artisan loaf.
Essential Equipment for This Dish
Dutch Oven Essentials
I swear by my Lodge 5-quart Dutch oven—its heavy cast iron retains heat perfectly for even baking. The deep pot creates the ideal steam environment for that signature crust. Look for one with a tight-fitting lid; Le Creuset is pricier but offers enameled surfaces that resist sticking. 🔥
Parchment Paper
Don’t skip pre-cut parchment rounds—they make transferring the dough seamless. I use 12-inch rounds to fit my pot. Standard grocery store brands work fine, but Reynolds Kitchens parchment has a non-stick coating that’s especially reliable.
Dough Tools
A bench scraper is my secret weapon for shaping sticky dough without tearing. I also keep a dough whisk from OXO for mixing—it cuts through thick dough better than a spoon. Both are under $20 at most kitchen stores.
Temperature Control
An oven thermometer is non-negotiable for accuracy. I’ve found my home oven runs 25°F hot, so I adjust accordingly. ThermoWorks makes reliable ones for under $10. This ensures your 450°F bake stays consistent.
Scoring Tools
For that bakery look, use a lamé or a sharp serrated knife. I keep a single-edge razor blade in my toolkit—it’s cheap and gives clean, precise cuts. Score just before baking to control the loaf’s expansion.
Cooling Rack
A simple wire cooling rack prevents soggy bottoms. I use a stainless steel one from Wilton—it’s sturdy and easy to clean. Let your loaf cool completely here to maintain that crisp crust you worked so hard to achieve.
Nutrition Facts
Frequently Asked Questions
Why use a Dutch oven for this bread?
The pot traps steam during baking, creating a crisp, golden crust. It also distributes heat evenly for a perfect rise every time.
Can I use all-purpose flour instead of bread flour?
Yes, but reduce water by 1 tablespoon. The texture will be slightly less chewy but still delicious.
My bread didn’t rise—what went wrong?
Old yeast or a cold kitchen are common culprits. Ensure yeast is fresh and dough rises in a warm spot for 8-12 hours.
How do I know when it’s done?
Look for a deep golden brown crust and a hollow sound when tapped. An internal temperature of 205-210°F confirms doneness.

Trained in classic French technique but raised on slow-cooked ribs and spicy rubs, she blends culinary skill with smoke and soul.
- Recipe for Boneless Pork Chops in Cast Iron Skillet: Sear and Baste to Juicy Perfection - October 3, 2026
- Recipe for Boneless Cross Rib Roast: Slow-Roasted Beef with Herb Crust - October 3, 2026
- Hamburgers in Sauce Recipe Crock Pot: Slow-Cooked Savory Delight - October 3, 2026