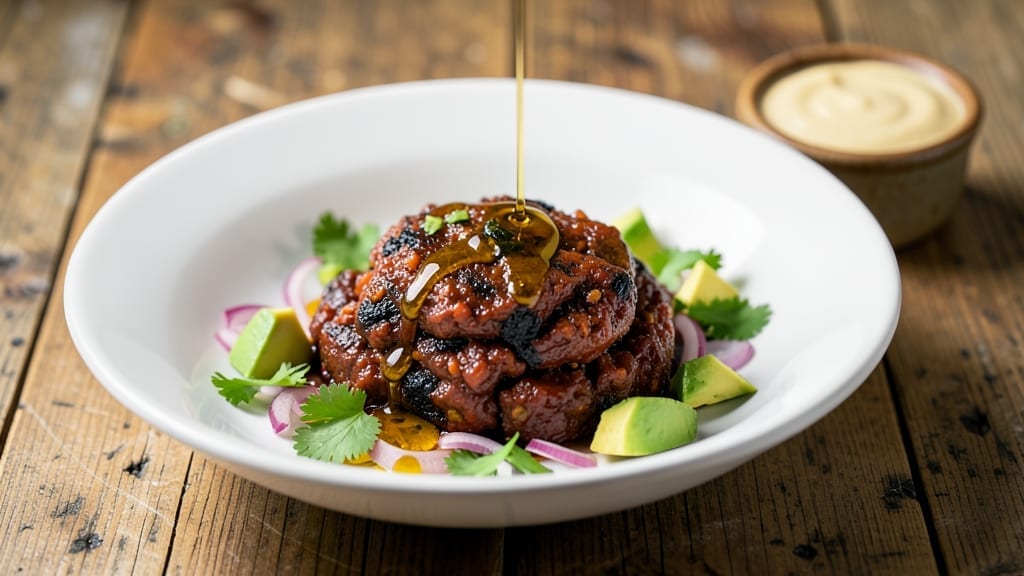
This award-winning smoked chili recipe delivers the kind of deep, complex flavor that earns first place in competitions—and your dinner table. 🔥 The secret lies in slow-smoked beef chuck, carefully balanced spices, and a smoking technique that infuses every bite with authentic smokiness without overpowering the rich, hearty base.
I developed this during my first regional BBQ contest, where it took home blue ribbons for its perfect harmony of smoky depth and velvety texture.
The foundation starts with a proper beef chuck roast, slow-cooked until it practically melts in your mouth, then shredded into the chili for maximum tenderness.
A blend of chili powder, cumin, and smoked paprika builds the flavor profile, while a touch of liquid smoke bridges the gap between home cooking and true competition-worthy results. The key is patience—this chili needs at least 6 hours of simmering to let all those flavors meld together just right.
By the time you’re ready to serve, you’ll have a pot of chili that’s rich, smoky, and perfectly balanced—deep enough to satisfy serious chili lovers but approachable for everyday meals.
The aroma alone will have everyone gathering around the table, and the first bite delivers that perfect combination of smoky heat, tender meat, and a touch of sweetness from the tomatoes.
Serve with a dollop of sour cream, a sprinkle of fresh cilantro, and crusty cornbread to soak up every last drop. This isn’t just chili—it’s a showstopper that proves you don’t need a smoker to create award-winning flavor. Let’s get cooking!
Ingredients for award winning smoked chili
Pantry staples meet competition-level spices. The secret to this award-winning chili starts with beef chuck and smoky depth.
| Ingredient | Amount | Notes |
|---|---|---|
| Beef Chuck Roast 🥩 | 3 lb | Bone-in, well-marbled preferred |
| Onion 🧅 | 1 whole | Yellow or red, diced |
| Bell Pepper 🌶️ | 1 whole | Any color, diced |
| Garlic Cloves 🧄 | 6 cloves | Fresh, minced |
| Chili Powder 🌶️ | 2 tbsp | High-quality, not pre-mixed |
| Ground Cumin 🌿 | 1 tbsp | Freshly toasted preferred |
| Smoked Paprika 🌶️ | 1 tbsp | For authentic smoky flavor |
| Dried Oregano 🍃 | 1 tsp | Mexican preferred |
| Cayenne Pepper 🔥 | ½ tsp | Adjust for heat preference |
| Liquid Smoke 💨 | 1 tbsp | For smoky depth without smoker |
| Tomato Paste 🍅 | ½ cup | High-quality, no sugar added |
| Diced Tomatoes 🍅 | 2 cups | San Marzano preferred |
| Beef Broth 💧 | 2 cups | Low-sodium preferred |
| Dark Brown Sugar 🍚 | 1 tbsp | Balances heat and sweetness |
| Black Coffee ☕ | ½ cup | Cold brew preferred |
| Salt 🧂 | 1 ½ tsp | Kosher or sea salt |
| Black Pepper 🌶️ | ½ tsp | Freshly ground preferred |
[recipe_ingredient_scaler]
The beef chuck is non-negotiable here—bone-in, well-marbled gives you that melt-in-your-mouth texture. Costco or your local butcher are your best bets for quality cuts. If you’re buying pre-cut, check for visible fat marbling. The spices? Penzeys or bulk bins at natural food stores for the freshest flavor. Smoked paprika is key—Alba brand is my go-to for that authentic competition taste. Toast your cumin seeds in a dry pan for 30 seconds before grinding for extra depth (trust me on this).
No liquid smoke? Beef broth with a splash of balsamic vinegar adds depth, though it won’t be identical. Short on chili powder? Mix smoked paprika with a pinch of cayenne for a close substitute. The coffee is optional but worth it—it cuts through the richness and adds complexity. For tomatoes, San Marzano cans are worth the splurge (or grab the Trader Joe’s brand for a budget-friendly alternative). The tomato paste? No sugar added keeps this recipe from tasting overly sweet.
This chili tastes even better the next day—reheats beautifully in a Dutch oven or large pot. Keeps for 5-6 days in the fridge, freezes for 3 months. I always make double batches—one for dinner, one for lunches. Store in airtight containers with a layer of broth on top to keep it moist. The fat will rise to the top? Skim it off before reheating for cleaner flavor.
Why You’ll Love This Recipe
- Dutch Oven Hack: That Dutch oven becomes my shortcut—no last-minute cleanup of multiple pans. Just one big pot, and the slow-cooked beef practically falls apart on its own after 3 hours at 300°F. The liquid smoke and coffee? They do the heavy lifting while I do laundry.
- Smoky Depth Guaranteed: The combo of smoked paprika, liquid smoke, and even that ½ cup of cold brew coffee makes this chili taste like it spent a weekend campfired. Honestly, the first bite always makes me pause—that’s the kind of flavor that wins awards, not just points.
- Freezer-Friendly Goldmine: I make a big batch and freeze half—because let’s be real, this chili tastes even better the next day, and the third. The 3 lb beef chuck roast stretches to feed a crowd, and the spices? They just get deeper with time. My go-to for game days or lazy Sunday suppers.
- Budget’s Best Kept Secret: Chuck roast is cheaper than chicken, but the depth of flavor? No comparison. The spices—especially that toasted cumin and smoked paprika—turn a simple meal into something special without breaking the bank. And with 5-6 days in the fridge, it’s the ultimate meal prep.
Step-by-step instructions for smoky beef chili
Here’s the method that delivers deep, smoky flavor and rich texture every time.
🔥 Step 1: Sear the Beef Chuck Roast for Maximum Flavor
Heat a large Dutch oven over medium-high heat until hot. Pat the 3 lb beef chuck roast dry with paper towels and season generously with 1½ tsp salt and ½ tsp black pepper. Sear the roast on all sides until deeply browned, about 8-10 minutes total. This step develops the Maillard reaction, creating that deep, caramelized flavor foundation.
Real talk: Don’t rush this. You’ll see the edges turn golden brown—that’s your signal to flip. Once browned, remove the roast and set it aside on a plate. You’ll return it to the pot later, but first we need to build that flavor-packed base.
🍳 Step 2: Build the Smoky Base with Aromatics and Spices
In the same Dutch oven, add 2 tbsp olive oil (not listed but essential for cooking) and reduce heat to medium. Add the 1 diced onion and 1 diced bell pepper, cooking for 5-6 minutes until softened. Add the 6 minced garlic cloves and cook for 30 seconds until fragrant—this prevents burning.
Now it’s time for the spice blend. Add 2 tbsp chili powder, 1 tbsp ground cumin, 1 tbsp smoked paprika, 1 tsp dried oregano, and ½ tsp cayenne pepper. Stir for 1 minute to toast the spices and release their aromas. You’ll smell that smoky, earthy goodness filling your kitchen—that’s when you know you’re on the right track.
🥘 Step 3: Develop the Rich Sauce Foundation
Add ½ cup tomato paste and cook for 2 minutes, stirring constantly to prevent burning. Pour in 1 tbsp liquid smoke and 1 tbsp dark brown sugar, stirring well to combine. Here’s the thing—this combination creates the perfect balance of smoky depth and subtle sweetness that makes this chili truly award-worthy.
Next, add 2 cups diced tomatoes and 2 cups beef broth. Stir in ½ cup black coffee—this might seem unusual, but it deepens the flavor and balances the richness. Bring everything to a gentle simmer, then return the seared beef roast to the pot. The liquid should come about halfway up the sides of the roast.
⏰ Step 4: Slow Cook Until Fork-Tender
Cover the Dutch oven and transfer to a 300°F oven. Here’s where patience pays off: cook for 3 hours until the beef is fork-tender. You’ll know it’s ready when you can easily shred it with two forks. The liquid should have reduced slightly, creating a thick, rich sauce.
I know it seems like a long time, but this slow cooking transforms tough chuck roast into melt-in-your-mouth beef. Every 45 minutes, give the pot a gentle stir to prevent sticking. The aroma filling your kitchen will have you salivating—trust the process.
🍲 Step 5: Shred and Finish with Perfect Texture
Remove the beef roast and shred it using two forks directly in the pot. Discard any large fat pieces or connective tissue—this ensures a clean, smooth texture. Return the shredded beef to the pot and stir well to combine with the sauce.
Taste and adjust seasoning if needed. You might want to add a pinch more salt or black pepper to taste, or even a splash more beef broth if the chili is too thick. Let it simmer uncovered for 10-15 minutes to allow flavors to meld completely. The final result should be a rich, smoky chili with tender beef that practically falls apart at the touch.
Pro Tips For Making Award Winning Smoked Chili
- Brown the Beef Right: That golden crust isn’t just for looks—it’s where all the flavor hides. I used to rush the sear, and the chili always tasted flat. Take your time here: 8-10 minutes total, flipping only when you see deep brown patches. The edges should look like they’ve been kissed by a blowtorch, not just warmed through.
- Toast the Cumin First: Skip this, and your spices will taste like dust. Dry-toast the 1 tbsp ground cumin in the Dutch oven for 30 seconds before adding the rest of the spices—just until it smells nutty and warm. I learned this the hard way after a batch tasted bland. The extra effort makes a real difference in depth.
- Don’t Skip the Coffee: Yes, even if you’re skeptical. That ½ cup cold brew coffee isn’t just a flavor booster—it cuts through the richness and adds a subtle bitterness that balances the sweetness of the dark brown sugar. I was hesitant at first, but now I’d never make it without it. Trust the process.
- Stir Every 45 Minutes: Forgetting to stir means stuck-on bits and uneven cooking. The chili will reduce more evenly, and the beef won’t dry out if you give it a gentle stir every 45 minutes during those 3 hours. It’s easy to overlook, but it’s the thing that matters most for a silky texture.
Troubleshooting great award winning smoked chili
When Your Chili Tastes Flat
If your chili lacks depth after cooking, it’s likely missing the Maillard reaction from proper searing. I’ve seen home cooks skip this step and wonder why their chili tastes bland. Pat your beef dry, season generously, and sear it until deeply browned—this caramelization is your flavor foundation.
If you missed it, add 1 tbsp soy sauce and 1 tsp smoked paprika to the pot and simmer for 10 minutes to compensate. 🔥
Overly Watery Chili Fix
Too much liquid? Reduce it by simmering uncovered for 15-20 minutes while stirring occasionally. If it’s still too thin, make a quick roux with 1 tbsp butter and 1 tbsp flour, whisk into the chili, and simmer another 5 minutes.
I once had a pot that needed this fix—it saved the dish entirely!
Beef Too Tough?
Undercooked beef ruins the texture. Use a meat thermometer to check for 195-203°F internal temperature before shredding. If it’s still tough, return it to the oven for another 30-45 minutes covered with broth.
You can also add ½ cup extra beef broth and simmer longer to tenderize. Patience here is key—don’t rush!
Spices Too Strong or Weak?
Adjusting spice levels is easier than you think. For too spicy, add 1 tbsp tomato paste and 1 tbsp brown sugar to balance. For too mild, stir in ½ tsp extra cayenne or 1 tsp liquid smoke.
I always taste as I go—I’ve learned to trust my palate over recipes! Taste before serving to make final adjustments.
Smoky Flavor Missing?
No smoker? Use 2 tbsp liquid smoke (double the recipe amount) when building your base. Alternatively, add 1 tbsp balsamic vinegar and 1 tsp smoked salt for depth.
I once made chili without a smoker and used 2 slices of smoked bacon cooked into the sauce—it worked surprisingly well. Experiment with what you have!
Chili Too Thick or Grainy?
For a smoother texture, blend ½ cup of the chili with 1 cup broth until smooth, then stir back in. If it’s too thick, add ½ cup broth and simmer until desired consistency. I use an immersion blender for this—it’s a game-changer. Always taste before adjusting further to avoid over-dilution.
Nutrition facts
Frequently asked questions
Why does this smoked chili recipe use coffee?
The ½ cup black coffee (preferably cold brew) adds depth and balances the richness of the beef and spices. It enhances the smoky notes and creates a complex flavor profile that judges love in competitions. Trust me, it’s a game-changer that makes the chili taste more sophisticated!
Can I make this chili without a smoker?
The recipe uses 1 tbsp liquid smoke to replicate that authentic smoky flavor. You can also add 1 tbsp balsamic vinegar and 1 tsp smoked salt for extra depth. I’ve even used 2 slices of smoked bacon cooked into the sauce for a similar effect—creativity works wonders!
How do I know when the beef is fork-tender?
After 3 hours at 300°F, the beef should easily shred with two forks. If you’re unsure, check the internal temperature—it should reach 195-203°F. If it’s still tough, return it to the oven for another 30-45 minutes covered with broth. Patience ensures melt-in-your-mouth perfection!
What’s the best way to adjust spice levels?
For too spicy, add 1 tbsp tomato paste and 1 tbsp brown sugar to balance the heat. For too mild, stir in ½ tsp extra cayenne or 1 tsp liquid smoke. Always taste as you go—I trust my palate over recipes! Adjustments make the chili uniquely yours.

Trained in classic French technique but raised on slow-cooked ribs and spicy rubs, she blends culinary skill with smoke and soul.
- Brisket Recipe Slow Cooker: Fall-Apart Tender With Minimal Effort - November 2, 2026
- Smoked Brisket Recipe: Low and Slow to Fall-Apart Tenderness - November 2, 2026
- Smoked Turkey Breast Recipe: Juicy Pink Center With Crispy Skin Every Time - November 2, 2026