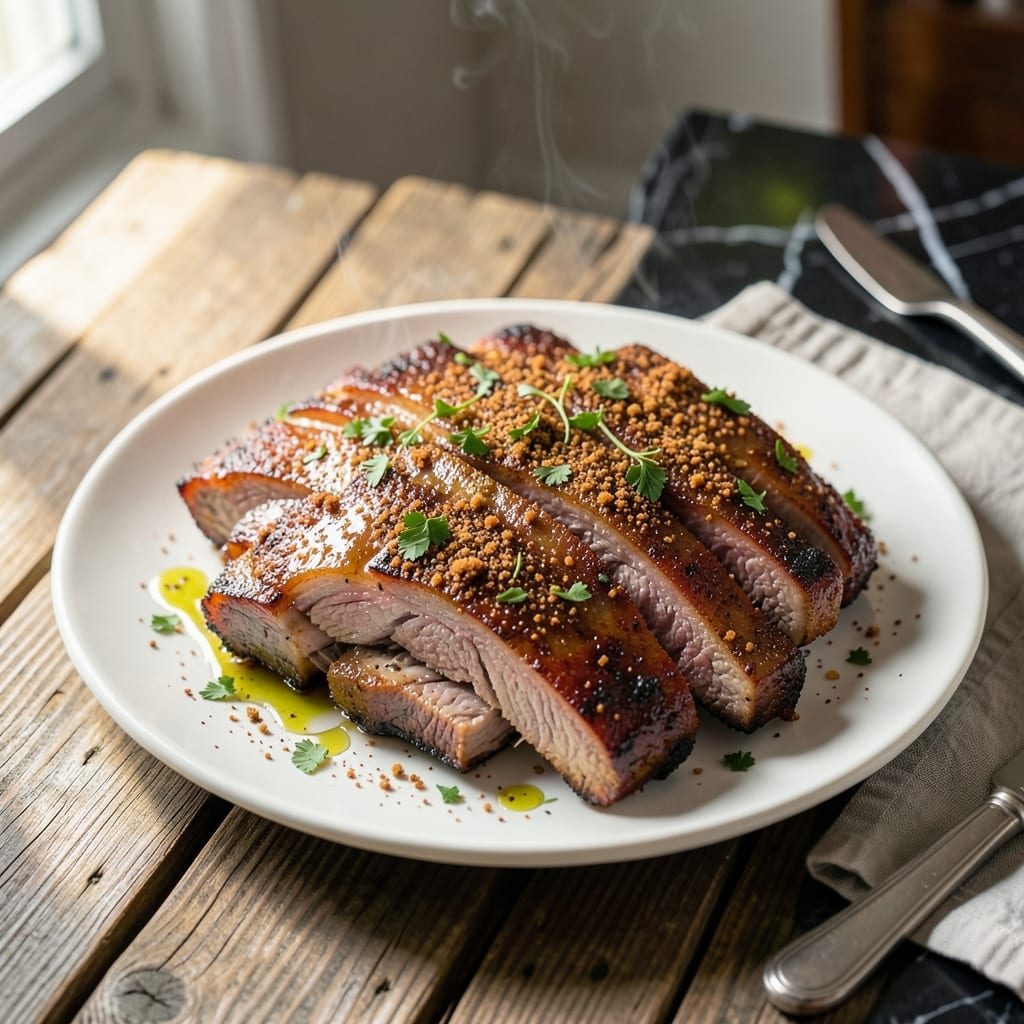
Achieving fall-off-the-bone back pork ribs without a smoker is entirely possible with the right oven technique. I’ve spent years refining this method, drawing from both my pitmaster roots and French training.
This approach uses a low-and-slow baking method to break down the collagen, ensuring the meat becomes tender while maintaining its natural juices. A dry rub with simple, bold spices enhances the flavor without overpowering the pork.
The result is ribs that pull away from the bone with minimal effort, just like they would from a smoker. The oven does all the work, so you can focus on perfecting your sides.
No special equipment is needed—just your oven, a baking sheet, and a little patience.
Ingredients for Back Pork Ribs Recipe Oven
Simple dry rub plus ribs equals slow-cooked perfection in your oven.
| Ingredient | Amount | Notes |
|---|---|---|
| Pork Back Ribs 🥩 | 3 lb | Full rack, membrane removed |
| Brown Sugar 🍚 | ½ cup | Light or dark variety |
| Paprika 🌶️ | 2 tbsp | Sweet or smoked variety |
| Garlic Powder 🧄 | 1 tbsp | Not garlic salt |
| Onion Powder 🧅 | 1 tbsp | Fresh ground preferred |
| Ground Black Pepper 🌶️ | 1 tbsp | Freshly ground for best flavor |
| Kosher Salt 🧂 | 1 tbsp | Diamond Crystal preferred |
| Chili Powder 🌶️ | 1 tsp | Mild or hot variety |
| Cayenne Pepper 🔥 | ½ tsp | Adjust for heat preference |
| Apple Cider Vinegar 🍏 | ¼ cup | For tenderizing rub |
| Olive Oil 🫒 | 2 tbsp | For rubbing on ribs |
| Barbecue Sauce 🍯 | 1 cup | For basting, optional |
[recipe_ingredient_scaler]
The ribs are the star—look for full racks with good marbling at Costco or your local butcher. I always remove the membrane myself (just slide a butter knife under it and pull). The brown sugar in the rub caramelizes beautifully, so don’t skip it. Paprika adds color and depth, but smoked paprika gives that extra layer of flavor if you’ve got it.
No brown sugar? White sugar plus a splash of molasses works in a pinch. Out of apple cider vinegar? White vinegar at half the amount or even lemon juice can substitute. The spice mix is flexible—add a pinch of cumin or mustard powder if you’re feeling adventurous. For the barbecue sauce, any store-bought kind is fine, but Stubb’s or Sweet Baby Ray’s are crowd-pleasers.
Ribs taste even better the next day (if they last that long). Wrap leftovers tightly in foil—they’ll keep in the fridge for 3-4 days or freeze for up to 3 months. Reheat in the oven wrapped in foil to keep them moist.
Why You’ll Love This Recipe
- Set It and Forget: That’s the beauty of oven ribs—season, wrap, and let the oven do the work while I catch up on my show.
- Sweet and Smoky: Brown sugar caramelizes with paprika for that sticky, finger-licking glaze I crave every time.
- Crowd Pleaser: From game day to Sunday dinner, these ribs disappear faster than I can make them.
- Budget Friendly Feast: Pork back ribs stretch further than steak, and I get two meals out of one rack without breaking the bank.
Step-by-Step Instructions for Back Pork Ribs Oven
Here’s how I make ribs that are tender, flavorful, and ready in a fraction of the time.
Step 1: Prepare and Season the Ribs
Start by patting the 3 lb Pork Back Ribs dry with paper towels to remove any excess moisture. This helps the rub adhere better and promotes even browning. Make sure the membrane has been removed—this ensures the seasoning penetrates the meat directly.
In a bowl, combine 0.5 cup Brown Sugar, 2 tbsp Paprika, 1 tbsp Garlic Powder, 1 tbsp Onion Powder, 1 tbsp Ground Black Pepper, 1 tbsp Kosher Salt, 1 tsp Chili Powder, and 0.5 tsp Cayenne Pepper. Stir until evenly mixed. Rub this mixture all over the ribs, pressing firmly so it sticks. Let them sit at room temperature for 30 minutes to absorb the flavors.
Step 2: Wrap and Slow-Cook in the Oven
Preheat your oven to 275°F. Lay out a large sheet of heavy-duty foil and place the ribs meat-side down on it. Drizzle 0.25 cup Apple Cider Vinegar over the ribs—this helps tenderize the meat and balance the richness of the rub. Then, tightly wrap the ribs in the foil, creating a sealed packet.
Place the foil-wrapped ribs on a baking sheet and bake for 2.5 hours. This low-and-slow method breaks down the collagen in the meat, giving you that fall-off-the-bone texture. You’ll know they’re ready when the meat starts to pull away from the bones slightly when you peek inside the foil.
Step 3: Finish with a Glaze Under the Broiler
Carefully unwrap the foil and transfer the ribs to a clean baking sheet, meat-side up. Brush generously with 1 cup Barbecue Sauce if using, or a mix of 2 tbsp Olive Oil for a simpler finish. This step adds a sticky, caramelized layer that’s full of flavor.
Turn the oven to broil on high heat and place the ribs under the broiler for 4-5 minutes, watching closely to prevent burning. The sugar in the rub and sauce will bubble and char slightly, creating a delicious crust. The ribs are done when they’re deeply browned and the sauce has thickened into a glossy glaze.
Step 4: Rest and Serve
Remove the ribs from the oven and let them rest for 10 minutes before slicing. This allows the juices to redistribute, so every bite stays moist and flavorful. Resting also makes them easier to cut and serve without falling apart.
Slice the ribs between the bones and serve immediately. The meat should be so tender that it nearly slides off with a gentle tug. Pair with extra barbecue sauce on the side if you like it saucy, or enjoy them just as they are—packed with smoky, spicy, and sweet flavors.
Pro Tips For Making Back Pork Ribs Recipe Oven
- Low and Slow First: Start at 275°F for 2.5 hours to tenderize the ribs before cranking the heat—this prevents dry, tough meat. I learned this the hard way after my first batch came out chewy.
- Pat Ribs Dry: Blot the ribs with paper towels before rubbing with spices so the brown sugar and paprika stick instead of sliding off. Sounds obvious, but I skipped it once and ended up with a sad, wet mess.
- Skip the Overcrowding: Give each rack its own space on the baking sheet or they’ll steam instead of caramelize. After burning three batches from piling them in, I finally figured out the spacing matters most.
- Broil to Finish: Move the ribs to the top rack and broil for 3-4 minutes at the end to get that sticky, caramelized crust on the brown sugar glaze. It’s the easiest way to make them look and taste like they came off a smoker.
Regional Styles of back pork ribs recipe oven
Memphis Dry Rub
In Memphis, they keep it simple but bold. I use extra paprika for that signature red hue and add 1 tsp celery salt to the rub for depth. The ribs are cooked dry—no sauce—letting the spice mix shine. Serve with vinegar-based slaw on the side. 🌶️
Kansas City Style
This is all about the sauce. After the initial cook, I brush on a thick layer of Sweet Baby Ray’s and return to the oven for 10 minutes to set. The result is sticky, sweet, and slightly smoky—just like the pits in KC. Use 2 tbsp brown sugar extra in the rub.
Texas Twist
Texas loves its heat, so I amp up the cayenne to 1 tsp and add 1 tsp cumin for a southwestern kick. The ribs get a final dusting of rub after unwrapping the foil. I learned this trick at a local BBQ competition along the coast.
Carolina Vinegar
For a tangy change, I swap the apple cider vinegar in the wrap for white vinegar and add 1 tsp red pepper flakes. The ribs come out bright and zesty, perfect with a vinegar-pepper sauce on the side. This reminds me of my first cookout with the family.
St. Louis Sweet
St. Louis ribs are meatier, so I increase the brown sugar to ¾ cup and add 1 tbsp molasses to the rub. The extra sweetness caramelizes beautifully under the broiler. I pick up my ribs from a local butcher shop for the best cut.
Nutrition Facts
Frequently Asked Questions
Do I need to remove the membrane?
Yes, always remove the membrane for the best texture and flavor penetration. Slide a butter knife under it, lift, and pull it off in one piece. This step takes 2 minutes and makes a huge difference.
Can I cook the ribs without foil?
You can, but they may dry out. Foil traps steam, which keeps the meat moist during the 2.5 hours of cooking. For crispier results, uncover for the last 30 minutes of baking.
How do I know when they’re done?
The meat should pull back from the bones by about 1/4 inch and reach 195°F internally. If it bends easily when picked up with tongs, they’re ready.
Can I use a different vinegar?
White vinegar or even lemon juice work in a pinch. Use the same 0.25 cup amount, but reduce by half if using lemon juice.

Trained in classic French technique but raised on slow-cooked ribs and spicy rubs, she blends culinary skill with smoke and soul.
- Recipe For Fried Pork Chops In An Iron Skillet: Crispy Crust With Juicy Centers - October 3, 2026
- Recipe for Fully Cooked Spiral Ham: Sweet Glaze and Effortless Elegance - October 3, 2026
- Recipe for Cream of Rice: Silky Smooth Breakfast Comfort - October 3, 2026