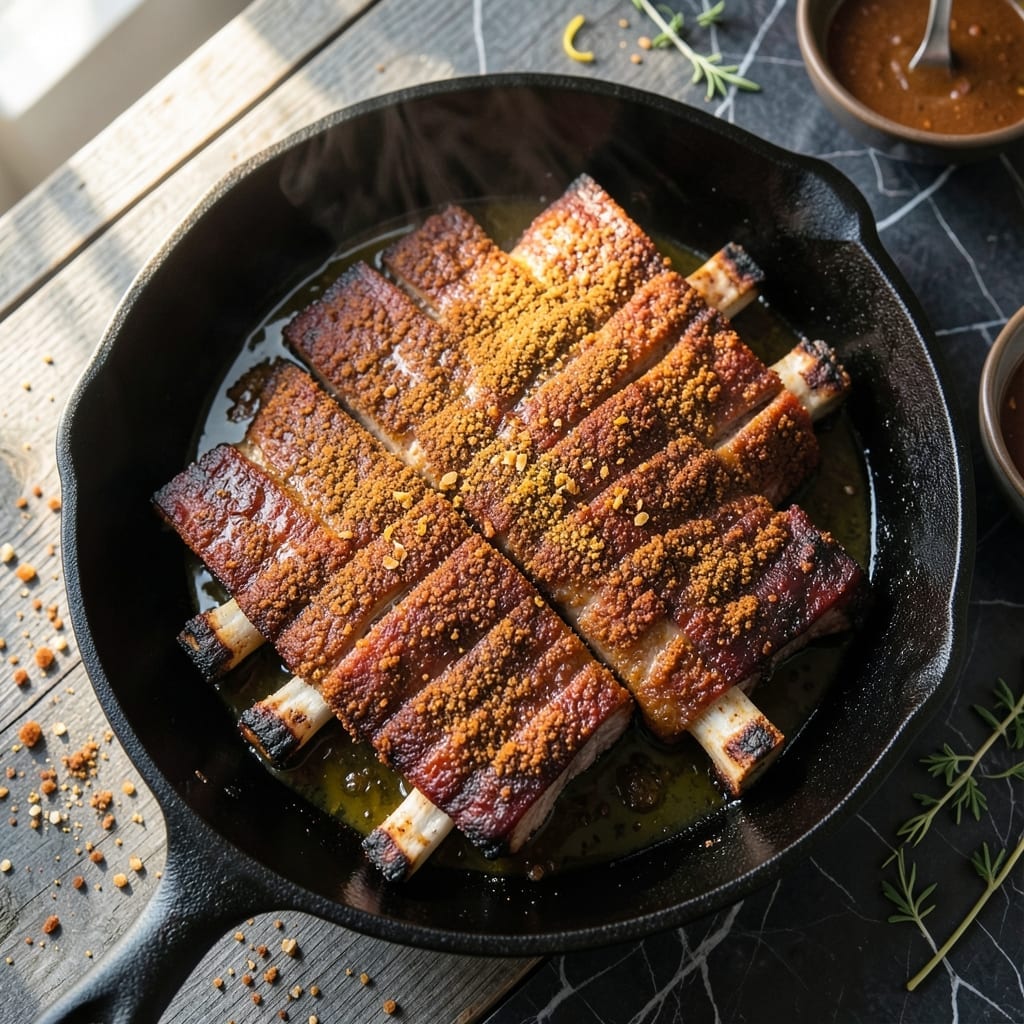
Achieving fall-off-the-bone ribs without a smoker is possible with this oven method. I developed this technique after years of perfecting my dry rub blends.
This approach delivers tender meat with a caramelized crust using simple ingredients and precise timing. The result rivals traditional smoking methods.
Ingredients for St Louis Ribs Dry Rub Oven
Quality ribs plus a well-balanced dry rub create that signature caramelized crust and tender meat.
| Ingredient | Amount | Notes |
|---|---|---|
| St Louis Style Pork Ribs 🥩 | 2 lb | Rack, membrane removed |
| Brown Sugar 🧈 | ½ cup | Light or dark variety |
| Smoked Paprika 🌶️ | 2 tbsp | Sweet or hot variety |
| Garlic Powder 🧄 | 1 tbsp | Fresh ground preferred |
| Onion Powder 🧅 | 1 tbsp | Fine texture preferred |
| Ground Cumin 🌿 | 1 tsp | Toasted for depth |
| Chili Powder 🌶️ | 1 tbsp | Mild to medium heat |
| Kosher Salt 🧂 | 1 tbsp | Diamond Crystal preferred |
| Black Pepper 🌶️ | 1 tsp | Freshly ground preferred |
| Mustard Powder 🟡 | 1 tsp | Dry ground variety |
| Apple Cider Vinegar 🍏 | ¼ cup | For spice paste binder |
| Olive Oil 🫒 | 2 tbsp | For rib coating |
| Liquid Smoke 🔥 | 1 tsp | Optional for smokiness |
[recipe_ingredient_scaler]
The ribs are everything here. St Louis style means the cartilage and sternum bone are removed, giving you that perfect rectangular rack. Most butchers sell them pre-trimmed, or ask at the meat counter. Look for racks with good marbling—Costco or Sam’s Club have consistent quality. The membrane on the bone side? Peel it off (use a paper towel for grip).
No smoked paprika? Regular paprika plus a pinch of chipotle powder works. Missing mustard powder? Dijon mustard at half the amount in the paste does the trick. Liquid smoke is optional but Wright’s brand is the standard. For the vinegar, any type works—apple cider just adds a touch of sweetness. Don’t skip the olive oil; it helps the rub adhere.
The dry rub keeps in an airtight container for 6 months. Ribs? Cook within 3 days of purchase or freeze for up to 3 months. Leftovers reheat beautifully—wrap in foil with a splash of water, warm at 300°F for 20 minutes.
Why You’ll Love This Recipe
- Oven Does All: I rub the ribs, pop them in, and let the oven work its magic—no babysitting required.
- Smoky Sweet Perfection: Brown sugar caramelizes with smoked paprika for that sticky, finger-licking crust.
- Feeds a Hungry Crowd: St. Louis ribs are meaty enough to satisfy a weekend BBQ or a lazy Sunday supper.
- Leftovers? Even Better: Honestly, the flavors deepen overnight—if they last that long.
Step-by-Step Instructions for St Louis Ribs Dry Rub Oven Recipe
This method ensures tender, flavorful ribs with a perfect caramelized crust every time.
Step 1: Prepare the Dry Rub Mixture
In a medium bowl, combine the 0.5 cup Brown Sugar, 2 tbsp Smoked Paprika, 1 tbsp Garlic Powder, 1 tbsp Onion Powder, 1 tsp Ground Cumin, 1 tbsp Chili Powder, 1 tbsp Kosher Salt, 1 tsp Black Pepper, and 1 tsp Mustard Powder.
Whisk the mixture thoroughly until all spices are evenly distributed and the brown sugar is completely incorporated. The rub should appear uniform in color with no visible streaks of individual spices. This blend creates a balanced sweet and smoky profile that adheres perfectly to the ribs.
Step 2: Create the Spice Paste and Coat the Ribs
In a small bowl, mix the 0.25 cup Apple Cider Vinegar, 2 tbsp Olive Oil, and 1 tsp Liquid Smoke until fully combined. Place the 2 lb St Louis Style Pork Ribs on a clean work surface with the meaty side facing up.
Using a basting brush, apply the vinegar mixture evenly over all surfaces of the ribs, including the edges. The vinegar acts as a binder while adding a subtle tang that complements the sweetness of the rub. Immediately sprinkle the dry rub mixture generously over both sides of the ribs, pressing it into the meat to ensure maximum adhesion.
Step 3: Rest and Prepare for Roasting
Place the seasoned ribs on a wire rack set over a rimmed baking sheet. This elevation allows air to circulate around the ribs, promoting even cooking and preventing the meat from steaming in its own juices. Cover the ribs loosely with plastic wrap and let them rest at room temperature for 30 minutes.
This resting period allows the rub to penetrate the surface of the meat slightly, enhancing flavor development. Meanwhile, preheat your oven to 275°F to establish the low-and-slow cooking environment that yields fall-off-the-bone tenderness.
Step 4: Slow Roast to Perfection
Once the oven reaches temperature, transfer the baking sheet with the ribs to the middle rack. Roast uncovered for 2.5 to 3 hours. The low temperature breaks down the connective tissue gradually without drying out the meat.
About halfway through cooking, carefully flip the ribs using tongs to ensure even cooking on both sides. The ribs are done when the meat has shrunk back from the bones by about ¼ inch and a meat thermometer inserted between the bones reads 195-203°F.
Step 5: Finish with a Caramelized Glaze
Remove the ribs from the oven and increase the temperature to 400°F. Brush the ribs with any accumulated juices from the baking sheet, then return them to the oven for 5-7 minutes.
This final high-heat step creates a beautiful, sticky glaze on the surface. Watch closely to prevent burning. The ribs should have a deep mahogany color with slightly charred edges on the sugar crust. Remove from the oven and let rest for 10 minutes before slicing between the bones to serve.
Pro Tips For Making St Louis Ribs Dry Rub Oven
- Preheat to 275°F: Low and slow is non-negotiable—I learned this the hard way after my first batch came out tough. Give the ribs 3-4 hours at this temp for fall-off-the-bone tenderness.
- Pat Ribs Dry: Sounds weird, but it works: blot the ribs with paper towels before applying the dry rub. The spices stick better and form a proper crust instead of sliding off.
- Skip the Foil: Resist the urge to wrap them—St Louis ribs in the oven do fine uncovered if you keep the temperature steady. I used to foil mine and ended up with steamed ribs instead of caramelized edges.
- Rest Before Slicing: After pulling them out, tent the ribs with foil and let them sit for 10 minutes. This keeps the juices inside where they belong, not all over your cutting board.
Health Benefits of This Dish
Rich Protein Source
Pork ribs are packed with high-quality protein, offering about 25 grams per 3-ounce serving. This supports muscle growth and repair, essential for active lifestyles. I notice my energy levels stay steady after enjoying this dish.
Essential B Vitamins
Ribs provide a significant dose of B vitamins, particularly B12 and B6, which are vital for metabolism and nervous system health. A 3-ounce serving delivers about 20% of your daily B12 needs. These nutrients help convert food into energy efficiently.
Iron and Zinc
Pork is rich in heme iron, which your body absorbs more easily than plant-based iron. It also contains zinc, crucial for immune function. I always feel like I’m giving my body a nutrient boost with this meal. 💪
Low in Saturated Fat
Compared to other cuts, St. Louis ribs are relatively lean, with about 3 grams of saturated fat per serving. Trimming visible fat before cooking can reduce this further. This makes them a better choice for heart health.
Collagen Benefits
Slow cooking breaks down collagen in the ribs into gelatin, which supports joint health and skin elasticity. The fall-off-the-bone tenderness you achieve means you’re also getting these benefits with every bite.
Energy Boost
The combination of protein and healthy fats in ribs provides sustained energy. I find this dish keeps me full and energized for hours, perfect for those long coastal rides on my motorcycle. ✨
Nutrition Facts
Frequently Asked Questions
Can I use baby back ribs instead?
Yes, baby back ribs work but require 30-45 minutes less cooking time due to their smaller size. Check for doneness at 2 hours and adjust accordingly.
Why rest the ribs before cooking?
Resting for 30 minutes lets the dry rub adhere better and penetrate the meat surface. This enhances flavor development and prevents the spices from falling off during cooking.
How can I make the bark crispier?
For extra crisp, broil for 2-3 minutes after the final glaze step. Watch closely to avoid burning. The sugar in the rub caramelizes beautifully under high heat.

Trained in classic French technique but raised on slow-cooked ribs and spicy rubs, she blends culinary skill with smoke and soul.
- Recipe for Fried Pork Chops With Flour: Crispy Crust and Juicy Centers - October 3, 2026
- Octopus Recipe Pan Fried: Crispy Edges With Tender Bites - October 3, 2026
- Recipe For Fried Pork Chops In An Iron Skillet: Crispy Crust With Juicy Centers - October 3, 2026