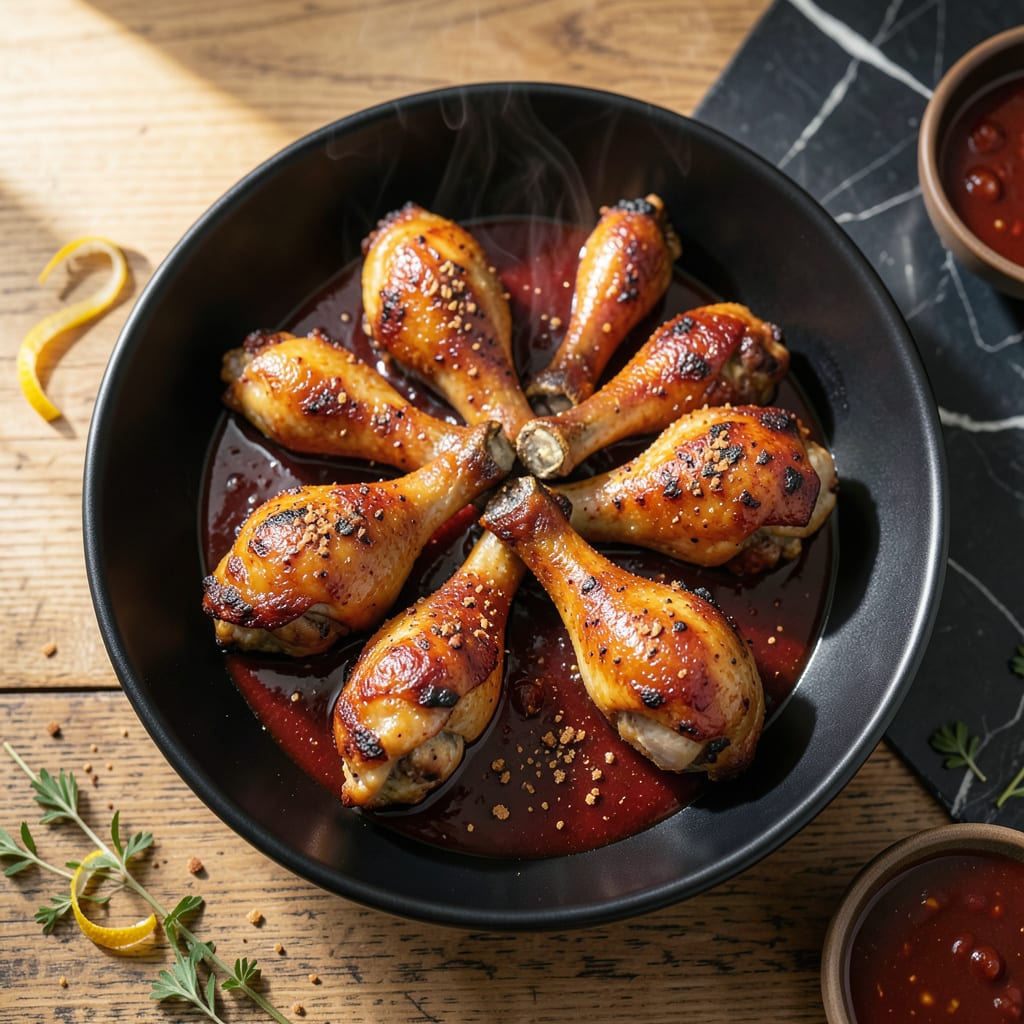
This baked BBQ chicken legs recipe delivers sticky, sweet glaze without firing up the grill. The oven does all the work, creating tender meat with a caramelized exterior.
Using a two-step process of baking then glazing ensures every bite is packed with flavor. The result is restaurant-quality chicken legs with minimal effort and easy cleanup.
Ingredients for Baked Bbq Chicken Legs
Simple staples transform into restaurant-quality baked chicken with minimal effort and maximum flavor.
| Ingredient | Amount | Notes |
|---|---|---|
| Chicken Legs 🍗 | 2 ½ lb | Skin-on, bone-in for best results |
| BBQ Sauce 🍯 | 1 ½ cups | Thick, sweet variety preferred |
| Olive Oil 🫒 | 2 tbsp | Extra-virgin for richness |
| Brown Sugar 🧈 | 2 tbsp | Light or dark variety |
| Apple Cider Vinegar 🍏 | 1 tbsp | For acidity balance |
| Garlic Powder 🧄 | 1 tsp | Fresh minced works too |
| Onion Powder 🧅 | 1 tsp | Adds depth of flavor |
| Smoked Paprika 🌶️ | 1 tsp | Essential for smoky flavor |
| Salt 🧂 | 1 tsp | Kosher or sea salt |
| Black Pepper 🌶️ | ½ tsp | Freshly ground preferred |
| Dijon Mustard 🟡 | 1 tbsp | Smooth, tangy variety |
| Worcestershire Sauce 🍶 | 1 tbsp | Adds umami depth |
[recipe_ingredient_scaler]
The chicken legs are the foundation—opt for skin-on, bone-in as they render fat during baking, creating that sticky, caramelized exterior. Costco and Sam’s Club offer bulk packages at great value. For the BBQ sauce, Sweet Baby Ray’s and Stubb’s Original deliver consistent quality. Avoid low-sugar varieties as they won’t caramelize as effectively.
No BBQ sauce on hand? Mix 1 cup ketchup with 2 tbsp brown sugar and 1 tbsp vinegar for a quick substitute. Smoked paprika can be replaced with regular paprika plus a pinch of liquid smoke (use sparingly). For extra heat, add 1/4 tsp cayenne. The apple cider vinegar can be swapped for white vinegar if necessary.
Leftovers keep beautifully in the fridge for up to 4 days. Reheat in the oven at 350°F for 15-20 minutes to maintain crispiness. For meal prep, bake the chicken plain and glaze just before serving to prevent sogginess.
Why You’ll Love This Recipe
- One Pan Wonder: I toss everything on a single sheet pan—legs, sauce, a drizzle of olive oil—and the oven does the rest.
- Sticky Sweet Perfection: The brown sugar caramelizes with the BBQ sauce, and that apple cider vinegar cuts right through the richness.
- Crowd Pleaser: I’ve served these at backyard parties and weeknight dinners alike—even the picky eaters go back for seconds.
- Budget Stretch: A big batch costs pennies per serving, and leftovers taste just as good the next day, cold or reheated.
Step-by-Step Instructions for Baked BBQ Chicken Legs
Here’s the method. Straightforward, tested, works every time.
Step 1: Season and Prepare the Chicken Legs
Pat the 2.5 lb chicken legs dry with paper towels to ensure crispy skin. In a small bowl, combine the 1 tsp salt, 0.5 tsp black pepper, 1 tsp garlic powder, 1 tsp onion powder, and 1 tsp smoked paprika. Rub this mixture evenly over all sides of the chicken legs, pressing gently to adhere.
Drizzle the 2 tbsp olive oil over the seasoned chicken and toss to coat. This creates a base layer that helps the skin crisp while keeping the meat moist. Arrange the legs in a single layer on a parchment-lined baking sheet, skin-side up.
Step 2: Create the Sticky BBQ Glaze
In a medium bowl, whisk together the 1.5 cups BBQ sauce, 2 tbsp brown sugar, 1 tbsp apple cider vinegar, 1 tbsp Dijon mustard, and 1 tbsp Worcestershire sauce until smooth. The vinegar and mustard balance the sweetness of the sauce while adding complexity.
Taste the glaze and adjust seasoning if needed, though the blend should already be well-balanced. This mixture will caramelize beautifully in the oven, creating that signature sticky coating.
Step 3: Bake the Chicken to Perfection
Preheat your oven to 400°F. Place the chicken legs in the oven and bake for 25 minutes. After this time, remove the baking sheet and brush a generous layer of the BBQ glaze over each piece, coating all sides thoroughly.
Return the chicken to the oven and bake for another 15-20 minutes, brushing with additional glaze every 5 minutes, until the internal temperature reaches 175°F and the skin is deeply caramelized and sticky to the touch.
Step 4: Rest and Serve
Remove the chicken legs from the oven and let them rest for 5 minutes on the baking sheet. This allows the juices to redistribute and the glaze to set slightly. The skin should be glossy and deeply browned, with some charred edges where the sugar caramelized.
Transfer to a serving platter and drizzle with any remaining glaze from the baking sheet. Serve immediately while hot—the contrast between the crispy skin and tender meat underneath is at its peak right out of the oven.
Pro Tips For Making Baked Bbq Chicken Legs
- Pat Them Dry: I learned this the hard way—wet chicken legs steam instead of crisp. Blot them with paper towels before oiling and seasoning.
- Start Hot, Finish Low: Crank the oven to 425°F for the first 20 minutes to get that skin blistered, then drop to 375°F so the BBQ sauce doesn’t burn.
- Skip the Early Sauce: Resist the urge to coat the legs in BBQ sauce from the start. Brush it on only in the last 15 minutes to keep it from turning bitter.
- Vinegar in the Glaze: Mix 1 tablespoon of apple cider vinegar into your BBQ sauce—cuts the sweetness and balances the brown sugar perfectly.
Make-Ahead Tips for Leftovers
Prep the Chicken
Pat the 2.5 lb chicken legs dry and season with the rub mixture the night before. Store uncovered in the fridge to let the skin dry out, which ensures maximum crispiness when baked. This step makes all the difference for that perfect texture. 💡
Make the Glaze
Prepare the BBQ glaze up to 2 days ahead and store in an airtight container in the fridge. The flavors meld beautifully over time, enhancing the depth of the sauce when you’re ready to use it.
Bake Ahead
Bake the chicken legs plain (without glaze) up to 24 hours ahead. Refrigerate after cooling, then glaze and finish baking just before serving. This keeps the skin crisp and the glaze fresh.
Reheat Properly
For leftovers, reheat in a 400°F oven on a wire rack for 10-12 minutes. This prevents sogginess by allowing air circulation. Avoid microwaving, which can make the skin rubbery. 🔥
Freeze for Later
Freeze baked and glazed chicken legs in a single layer first, then transfer to a freezer bag. They’ll keep for up to 3 months. Thaw overnight in the fridge before reheating.
Glaze on Demand
For meal prep, store baked chicken and glaze separately. Reheat the chicken, then brush with glaze and broil for 2-3 minutes to caramelize fresh. This method keeps every bite as sticky as day one.
Nutrition Facts

Trained in classic French technique but raised on slow-cooked ribs and spicy rubs, she blends culinary skill with smoke and soul.
- Recipe for Boneless Pork Chops in Cast Iron Skillet: Sear and Baste to Juicy Perfection - October 3, 2026
- Recipe for Boneless Cross Rib Roast: Slow-Roasted Beef with Herb Crust - October 3, 2026
- Hamburgers in Sauce Recipe Crock Pot: Slow-Cooked Savory Delight - October 3, 2026