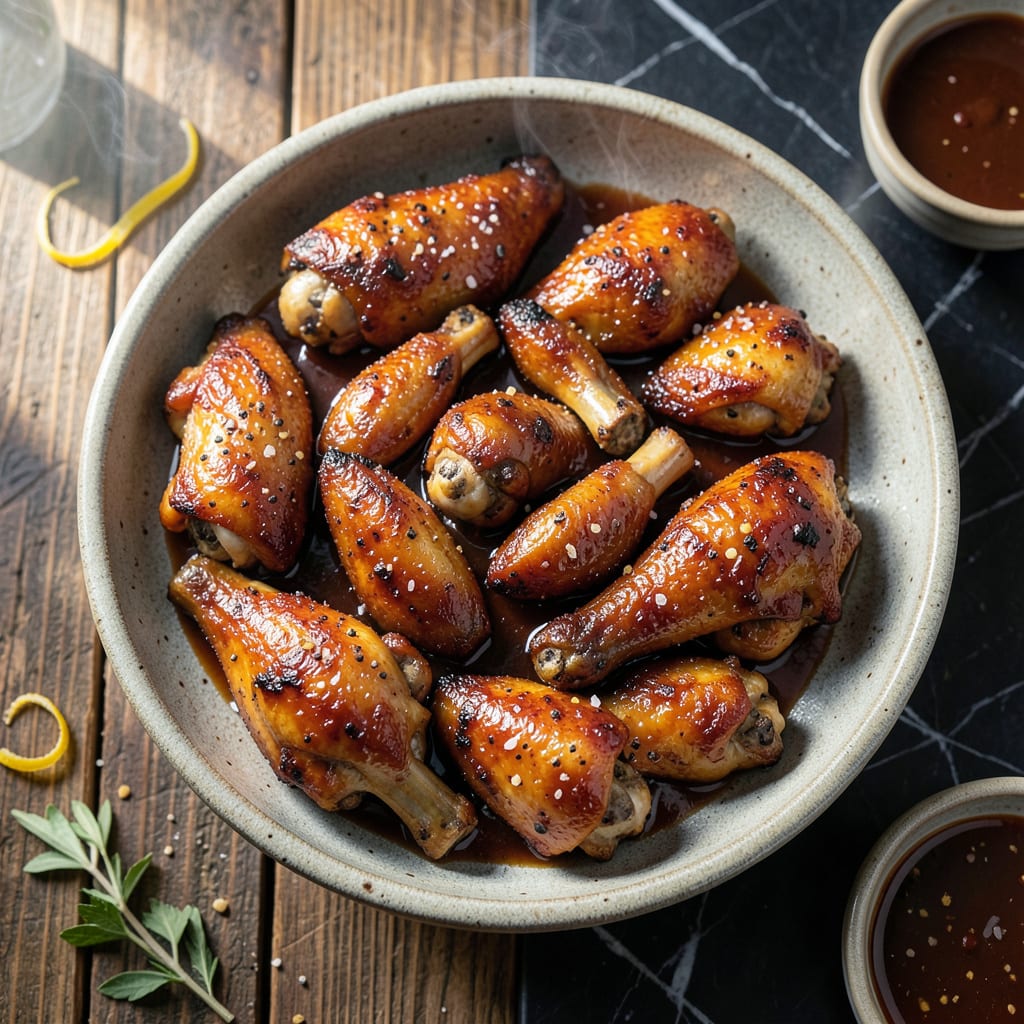
I still remember that first whiff of hickory smoke at my family’s backyard cookout. These wings bring that same smoky BBQ flavor indoors with a stick-to-your-fingers glaze.
Baking at high heat gives them a crispy exterior while keeping the meat juicy. The secret is in the double-coat of sauce—once before baking, once after for maximum flavor.
Ingredients for Baked Bbq Chicken Wings
Pantry staples and a quick grocery stop for the wings themselves.
| Ingredient | Amount | Notes |
|---|---|---|
| Chicken Wings 🍗 | 2 lb | Split into drumettes and flats |
| Barbecue Sauce 🍯 | 1 ½ cups | Hickory-smoked preferred |
| Baking Powder 🧂 | 1 tbsp | For extra crispiness |
| Kosher Salt 🧂 | 1 tsp | Diamond Crystal preferred |
| Black Pepper 🌶️ | ½ tsp | Freshly ground |
| Garlic Powder 🧄 | 1 tsp | Not garlic salt |
| Onion Powder 🧅 | 1 tsp | Adds depth to dry rub |
| Smoked Paprika 🌶️ | 1 tsp | Enhances smoky flavor |
| Brown Sugar 🧈 | 1 tbsp | Optional for caramelization |
| Olive Oil 🫒 | 1 tbsp | For tossing wings |
| Apple Cider Vinegar 🍏 | 1 tbsp | Balances sweetness |
| Worcestershire Sauce 🍶 | 1 tsp | Umami depth booster |
[recipe_ingredient_scaler]
The wings are the star here. Split them yourself or buy them pre-cut—drumettes and flats cook most evenly. I grab mine from Costco for bulk savings, but any supermarket will do. Look for plump, moist pieces (avoid the dried-out ones lurking at the bottom of the package). The baking powder is key for that extra-crispy skin—don’t skip it, and make sure it’s fresh (old baking powder loses its oomph).
No hickory-smoked BBQ sauce? Any bold, tangy sauce works—just add a dash of liquid smoke for that backyard vibe. Swap brown sugar for honey if that’s what you’ve got. Vegetarian Worcestershire keeps it meat-free if needed. The vinegar can be white or red wine in a pinch. Fresh garlic? Go for it, but powder blends better into the dry rub. Out of onion powder? Double the garlic powder—not ideal, but it’ll do.
Wings stay fresh in the fridge for 3-4 days (reheat in the oven to keep them crispy). The dry rub keeps indefinitely. BBQ sauce? 2 weeks in the fridge once opened. Always let the wings sit at room temp for 10 minutes before baking—ensures even cooking.
Why You’ll Love This Recipe
- One Pan Magic: I toss the wings with baking powder, salt, and pepper, bake, then slather with BBQ sauce—no frying, no mess.
- Crispy & Sticky: The baking powder trick gives them that perfect crunch, while the sauce caramelizes into a finger-licking glaze.
- Crowd Pleaser: Honestly, these disappear faster than I can make them, whether it’s game day or a casual dinner.
- Budget Win: A big batch costs pennies per serving, and leftovers reheat beautifully for lunch the next day.
Step-by-Step Instructions for Baked BBQ Chicken Wings
Here’s the method I’ve perfected for crispy, saucy wings with minimal effort and maximum flavor.
Step 1: Season and Coat the Wings for Crispiness
Pat the 2 lb Chicken Wings completely dry with paper towels—this is non-negotiable for achieving that coveted crisp. In a large bowl, combine the 1 tbsp Baking Powder, 1 tsp Kosher Salt, 0.5 tsp Black Pepper, 1 tsp Garlic Powder, 1 tsp Onion Powder, and 1 tsp Smoked Paprika.
Add the chicken wings to the bowl and toss until every piece is evenly coated. The baking powder is the secret here—it raises the pH of the skin, helping it brown and crisp beautifully in the oven. Drizzle the 1 tbsp Olive Oil over the wings and toss again to ensure full coverage.
Step 2: Bake Until Golden and Crisp
Arrange the wings on a wire rack set over a baking sheet, leaving space between each piece so air can circulate. This setup prevents steaming and ensures all sides crisp up. Bake in a preheated 425°F oven for 45 minutes, flipping halfway through.
You’ll know they’re ready when the skin is deep golden brown and the wings release easily from the rack. The baking powder will give the skin a slightly rough texture, which helps the sauce cling later. Don’t skip the rack—it’s what makes the difference between crispy and soggy.
Step 3: Toss in the BBQ Glaze
While the wings bake, prepare the glaze. In a saucepan, combine the 1.5 cups Barbecue Sauce, 1 tbsp Brown Sugar, 1 tbsp Apple Cider Vinegar, and 1 tsp Worcestershire Sauce. Simmer over medium-low heat for 5 minutes, stirring occasionally, until slightly thickened.
Once the wings are out of the oven, transfer them to a clean bowl and pour the warm glaze over the top. Toss gently until every wing is thoroughly coated. The vinegar and Worcestershire add depth, balancing the sweetness of the sauce with a tangy kick.
Step 4: Broil for the Final Glaze Set
Return the glazed wings to the wire rack and place them under the broiler for 2-3 minutes. Watch them closely—the sugar in the sauce can burn quickly. You’re aiming for a sticky, glossy finish that caramelizes slightly at the edges.
This final step locks in the glaze, giving the wings that finger-licking quality the title promised. Let them rest for 2 minutes before serving to allow the sauce to set fully.
Pro Tips For Making Baked Bbq Chicken Wings
- Dry the Wings: Pat the wings completely dry before seasoning—sounds tedious, but it’s the only way to get that crispy skin without frying.
- Use Baking Powder: Don’t confuse it with baking soda; a teaspoon of baking powder per pound of wings actually changes the outcome by breaking down proteins for extra crispiness.
- Flip Halfway Through: After 20 minutes at 425°F, flip the wings to guarantee even browning and prevent the bottoms from sticking to the pan.
- Toss After Baking: Toss the wings in barbecue sauce right after they come out of the oven—I learned this the hard way, as saucing too early makes them soggy instead of sticky.
Essential Equipment for Perfect Results
Wire Rack Setup
For crispy wings, a wire rack over a baking sheet is non-negotiable. I use a Nordic Ware rack—it’s sturdy and allows air to circulate under the wings, preventing soggy bottoms. This setup ensures even browning on all sides. 🔥
Baking Sheet Choice
A heavy-duty half-sheet pan (like 18×13 inches) is ideal. Avoid non-stick pans—they can’t handle the high heat needed for crispiness. I line mine with aluminum foil for easy cleanup, but it’s not required.
Tongs for Tossing
Use long-handled tongs to flip wings halfway through baking. I prefer OXO Good Grips for their comfortable grip. They also help toss wings in the glaze without making a mess.
Saucepan for Glaze
A 2-quart saucepan is perfect for simmering the BBQ glaze. I use a stainless steel pan—it distributes heat evenly and won’t react with acidic ingredients like vinegar. Simmer on medium-low heat to avoid burning.
Basting Brush
A silicone basting brush helps apply glaze evenly if you prefer brushing over tossing. I keep one dedicated to BBQ sauces to avoid flavor transfer. Look for heat-resistant bristles that won’t melt.
Cooling Rack Alternative
No wire rack? Use crinkled foil on the baking sheet to elevate wings slightly. It’s not as effective but works in a pinch. Space wings 1 inch apart to ensure proper air circulation.
Nutrition Facts

Trained in classic French technique but raised on slow-cooked ribs and spicy rubs, she blends culinary skill with smoke and soul.
- Recipe for Boneless Pork Chops in Cast Iron Skillet: Sear and Baste to Juicy Perfection - October 3, 2026
- Recipe for Boneless Cross Rib Roast: Slow-Roasted Beef with Herb Crust - October 3, 2026
- Hamburgers in Sauce Recipe Crock Pot: Slow-Cooked Savory Delight - October 3, 2026