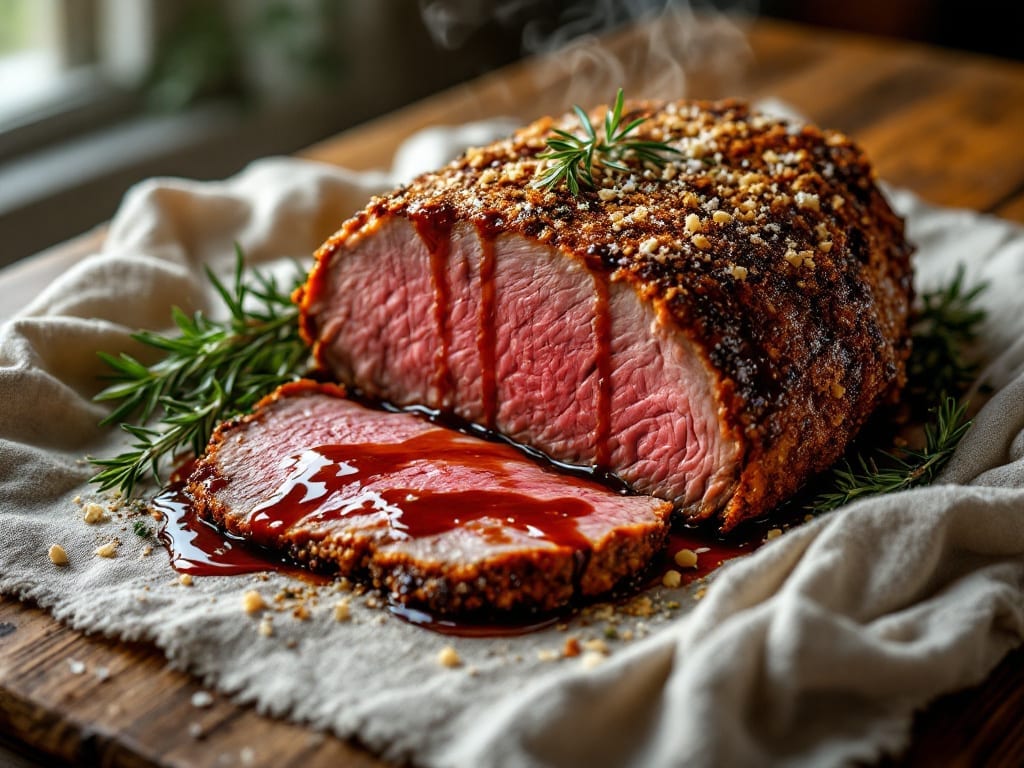
This baked beef brisket recipe delivers restaurant-quality tenderness without needing a smoker. The key lies in slow-braising until the meat practically falls apart, creating a rich crust and melt-in-your-mouth texture that transforms tough cuts into something extraordinary.
I developed this method after years of perfecting oven techniques that mimic my family’s backyard cookouts—where the first whiff of hickory smoke still makes my mouth water.
The secret begins with a dry rub of smoked paprika, garlic powder, and coarse salt, which forms a flavorful bark while the brisket slowly tenderizes in its own juices. Unlike traditional smoked brisket, this method uses just a baking sheet and oven—no special equipment needed.
The result? A brisket so tender it slices like butter, with a deep, caramelized crust that holds every spice perfectly.
By the time you pull it from the oven, you’ll have a centerpiece that commands the table—juicy, flavorful, and effortlessly impressive. The slow cook transforms even the toughest brisket into fork-tender perfection, making it ideal for holiday gatherings or when you want to impress without hours at the grill.
Let’s get started on creating your masterpiece.
Pair this brisket with classic sides like creamy mashed potatoes or tangy coleslaw for a complete meal. The beauty of this recipe is its versatility—it works equally well for sandwiches, tacos, or served whole with all the fixings.
Every bite delivers that perfect balance of smoky depth and melt-in-your-mouth tenderness you’ve been searching for.
Ingredients for baked beef brisket
Six ingredients transform tough brisket into melt-in-your-mouth perfection—no smoker needed.
| Ingredient | Amount | Notes |
|---|---|---|
| Beef Brisket 🥩 | 4 lb | Whole packer cut, fat cap intact |
| Smoked Paprika 🌶️ | 2 tbsp | High-quality for deep flavor |
| Garlic Powder 🧄 | 1 ½ tbsp | Freshly ground preferred |
| Coarse Kosher Salt 🧂 | 1 ½ tbsp | Diamond Crystal preferred |
| Ground Black Pepper 🌶️ | 1 tbsp | Freshly cracked for best flavor |
| Brown Sugar 🍯 | 1 tbsp | Light or dark variety |
| Onion Powder 🧅 | 1 tbsp | For depth of flavor |
| Fresh Rosemary 🌿 | ½ tsp | Chopped, or 1 tsp dried |
| Beef Broth 💧 | 1 ½ cups | Low-sodium preferred |
| Olive Oil 🫒 | 2 tbsp | Extra-virgin for richness |
| Yellow Onion 🧅 | 1 whole | Sliced into 1/2-inch pieces |
| Garlic Cloves 🧄 | 4 cloves | Smashed, not minced |
| Fresh Thyme 🌿 | ¼ cup | Leaves only, chopped |
[recipe_ingredient_scaler]
The brisket is everything here. Whole packer cuts from Costco or local butchers have the best marbling—look for thick fat caps. If you can’t find whole, ask for a 4-pound piece with the fat intact. The thicker the fat, the better the crust. I always grab mine from Whole Foods when I’m doing a big batch, but the regular supermarket stuff works fine. Just make sure it’s bright red, not gray or yellowish. That’s your first sign of quality. The fat cap should be at least 1/4-inch thick—don’t skimp on this part.
No smoked paprika? Regular paprika plus a pinch of cayenne works in a pinch. Fresh rosemary? Dried at one-third the amount gets you close. The beef broth should be low-sodium—Kirkland Signature or Swanson are my go-tos. For the onion, yellow or red both work, but yellow has a slightly sweeter flavor. The garlic cloves should be plump, not shriveled. If you’re short on time, jarred minced garlic works (just drain it well), but fresh is always better. The thyme leaves should be vibrant green—no brown stems or wilted leaves.
This brisket keeps beautifully. Wrap the cooked brisket tightly in foil and store in the fridge for 4-5 days. For longer storage, portion into freezer bags with the juices and freeze for up to 3 months. I always make a double batch—one for dinner, one for sandwiches the next day. The leftovers reheat perfectly in the oven at 300°F until warmed through. The crust gets even better after resting overnight, so plan ahead if you can.
Why You’ll Love This Recipe
- One-Pan Magic: I swear by this for lazy Sundays—just toss the brisket on a sheet, sprinkle the smoked paprika and garlic powder, and let the oven do the work. No messy marinades or hours of babysitting; it’s all about that hands-off crust.
- Smoky Depth: Honestly, the combo of smoked paprika and coarse kosher salt transforms tough brisket into something tender and ridiculously flavorful. That dry rub clings like a second skin, giving every bite a warm, earthy punch without overpowering.
- Leftovers That Shine: Between us, this is my go-to for meal prep—shred the cooled brisket, and it’s perfect for tacos, sandwiches, or even a quick stir-fry later in the week. (Yes, even on a Tuesday night.)
- Budget Hero: A whole brisket feeds six for less than takeout, and the spices cost pennies. I’ll be real: this is how I stretch my grocery budget without sacrificing taste—plus, the leftovers stretch further than any other protein I’ve tried.
Step-by-step instructions for baked beef brisket
This method delivers melt-in-your-mouth tenderness with a rich, caramelized crust every time.
Prepare the Brisket for Maximum Flavor
Begin by trimming the fat cap of the 4 lb beef brisket to about ¼-inch thickness using a sharp knife. Leave the fat intact on the edges—this will baste the meat during cooking. Pat the entire surface dry with paper towels, including the cavity, to ensure a proper sear later.
In a small bowl, combine the 2 tbsp smoked paprika, 1.5 tbsp garlic powder, 1.5 tbsp coarse kosher salt, 1 tbsp ground black pepper, 1 tbsp brown sugar, and 1 tbsp onion powder. Rub this mixture generously over all sides of the brisket, pressing it into the meat so it adheres well. For the fresh rosemary, sprinkle the 0.5 tsp chopped leaves evenly over the surface. Let the seasoned brisket sit at room temperature for 30 minutes while you prepare the rest of your ingredients.
Sear the Brisket for Deep Flavor
Heat a large Dutch oven over medium-high heat and add the 2 tbsp olive oil. Once the oil shimmers, place the brisket fat-side down and sear for 5-6 minutes until deeply browned. Flip the brisket and sear the other side for another 4-5 minutes. Remove the brisket and set it aside on a plate.
In the same Dutch oven, add the sliced 1 whole yellow onion and smashed 4 cloves garlic. Cook for 3-4 minutes until the onions soften and the garlic becomes fragrant. Pour in the 1.5 cups beef broth, scraping up any browned bits from the bottom of the pan. This step captures all the flavor that would otherwise stick to the pot.
Braise Until Fork-Tender
Return the brisket to the Dutch oven, fat-side up, and pour the 0.25 cup chopped fresh thyme over the top. Bring the liquid to a gentle simmer, then reduce heat to low. Cover tightly with a lid and transfer to a preheated 300°F oven. Braise for 3 hours, checking occasionally to ensure there’s always some liquid in the pan.
After 3 hours, check the internal temperature using a meat thermometer—it should read 195°F. If it’s not there yet, continue cooking for another 30-60 minutes. The meat should be fork-tender, with the juices running clear when you pierce it. If the liquid has evaporated significantly, add a splash of water or broth to maintain moisture.
Rest and Slice for Perfect Texture
Once the brisket reaches the proper temperature, remove it from the oven and transfer it to a cutting board. Tent loosely with foil and let it rest for at least 15 minutes. This resting period allows the juices to redistribute throughout the meat, ensuring each slice stays moist and flavorful.
After resting, slice the brisket against the grain into ½-inch thick pieces. The grain runs horizontally across the flat and point, so cutting perpendicular to these lines gives you the most tender texture. Serve immediately with the braising liquid spooned over the top, or use it as a sauce for mashed potatoes, biscuits, or crusty bread.
Pro Tips For Making Baked Beef Brisket
- Trim the Fat Cap: If your brisket has a thick layer of fat, trim it down to about ¼-inch—enough to render but not so much it turns greasy. I learned this the hard way when my first batch turned into a soggy, greasy mess instead of a crispy, flavorful centerpiece.
- Salt the Night Before: Apply the kosher salt at least 12 hours before baking—yes, even if you’re impatient like me. This lets the salt penetrate deep, seasoning the meat evenly without drying it out. Skip this, and you’ll end up with flavor only on the surface.
- Start Hot, Then Slow: Roast the brisket at 425°F for the first 30 minutes to kickstart the crust, then drop to 275°F. I used to bake it low and slow from the start, and while it was safe, it never got that caramelized, smoky edge that makes brisket irresistible.
- Use a Meat Thermometer: Pull the brisket at 195°F—yes, even if it looks undercooked. The internal temp is the only reliable way to judge doneness, and cutting into it early will turn your perfectly tender meat into a chewy disaster. (Your future self will thank you.)
Make-ahead tips for this baked beef brisket
Prep Ahead Like a Pro
The key to stress-free brisket is prepping the night before. I always trim and season the brisket at least 12 hours ahead—this lets the spices penetrate deeply while the meat rests at fridge temps.
Store it in a sealed container with a paper towel underneath to catch any juices. This step makes all the difference in flavor development. 💫
Freezer-Friendly Prep
For those busy weeks, freeze the raw brisket with its rub up to 3 months ahead of time. Thaw it overnight in the fridge—never at room temp—then proceed with the recipe.
I’ve even frozen the fully cooked brisket for up to 4 months by wrapping it tightly in foil and plastic wrap. The texture stays perfect when reheated slowly in the oven.
Sauce Prep Shortcut
Make the onion-garlic broth base ahead and store it in the fridge for up to 3 days or freeze it for 2 months. When ready to cook, just heat it up and add the fresh thyme.
This saves you 15 minutes of prep time on the day you cook. I always double the batch—it’s perfect for mashed potatoes or gravy later.
Leftovers Game Plan
Brisket leftovers are even better the next day. I slice the cooked brisket into ½-inch pieces and store them in airtight containers with the braising liquid. Reheat portions in a skillet with a splash of broth until warmed through.
For sandwiches, I keep the brisket refrigerated for up to 5 days—it stays juicy and flavorful.
Holiday Prep Strategy
If you’re cooking for a crowd, I recommend making this brisket 2 days ahead of serving. The flavors deepen overnight, and the crust gets even better. Store it in the fridge, then reheat gently in the oven at 300°F for 1-2 hours before serving.
This ensures your brisket is at its peak when guests arrive. 🌟
Portioning for Meals
For easy meal prep, divide the cooked brisket into individual portions (about ½ lb per serving) and store them with a spoonful of the braising liquid. Freeze these portions for up to 3 months.
When ready to eat, thaw overnight in the fridge and reheat in a skillet or microwave. This makes quick lunches or dinner prep a breeze.
Nutrition facts
Frequently asked questions
How do I know when my brisket is fully cooked?
Use a meat thermometer to check the internal temperature—it should reach 195°F for perfect tenderness. The meat should also pull apart easily with a fork and have clear juices when pierced. Pro tip: If you don’t have a thermometer, cut into the thickest part and check for tenderness.
Can I use a different cut of beef instead of brisket?
While this recipe is designed for brisket, you could try a chuck roast or short ribs for similar results. However, the cooking time may vary—chuck roast typically takes 2-3 hours at 300°F, while short ribs may need 3-4 hours. Adjust based on your meat’s size and doneness.
Why did my brisket turn out dry?
Overcooking or skipping the 15-minute rest are the most common causes. Always check the internal temperature at 195°F and let it rest before slicing. If it’s still dry, try adding a splash of beef broth to the pan during cooking to keep it moist.
What’s the best way to reheat leftover brisket?
Slice the brisket into ½-inch pieces and reheat in a skillet with a splash of beef broth or water over medium-low heat until warmed through. For oven reheating, wrap slices in foil with a little broth and bake at 300°F for 15-20 minutes. Never microwave—it dries out the meat!
How can I make this brisket spicier?
Add ½ teaspoon cayenne pepper or 1 teaspoon chili powder to the rub, or sprinkle ½ teaspoon smoked paprika over the top during the last 30 minutes of cooking. For heat lovers, a dash of hot sauce in the braising liquid also works well. Adjust to taste!

Trained in classic French technique but raised on slow-cooked ribs and spicy rubs, she blends culinary skill with smoke and soul.
- Jamie Oliver’s Fast and Simple Brisket Recipe: Smoky-Sweet One-Pan Magic - October 15, 2026
- Best Smoked Oxtail Recipe: Deep-Rich Flavor After Low-and-Slow Cooking - October 14, 2026
- Pit Boss Smoked Prime Rib Roast Recipe: Bark-to-Bone Crispness in 4 Hours - October 14, 2026