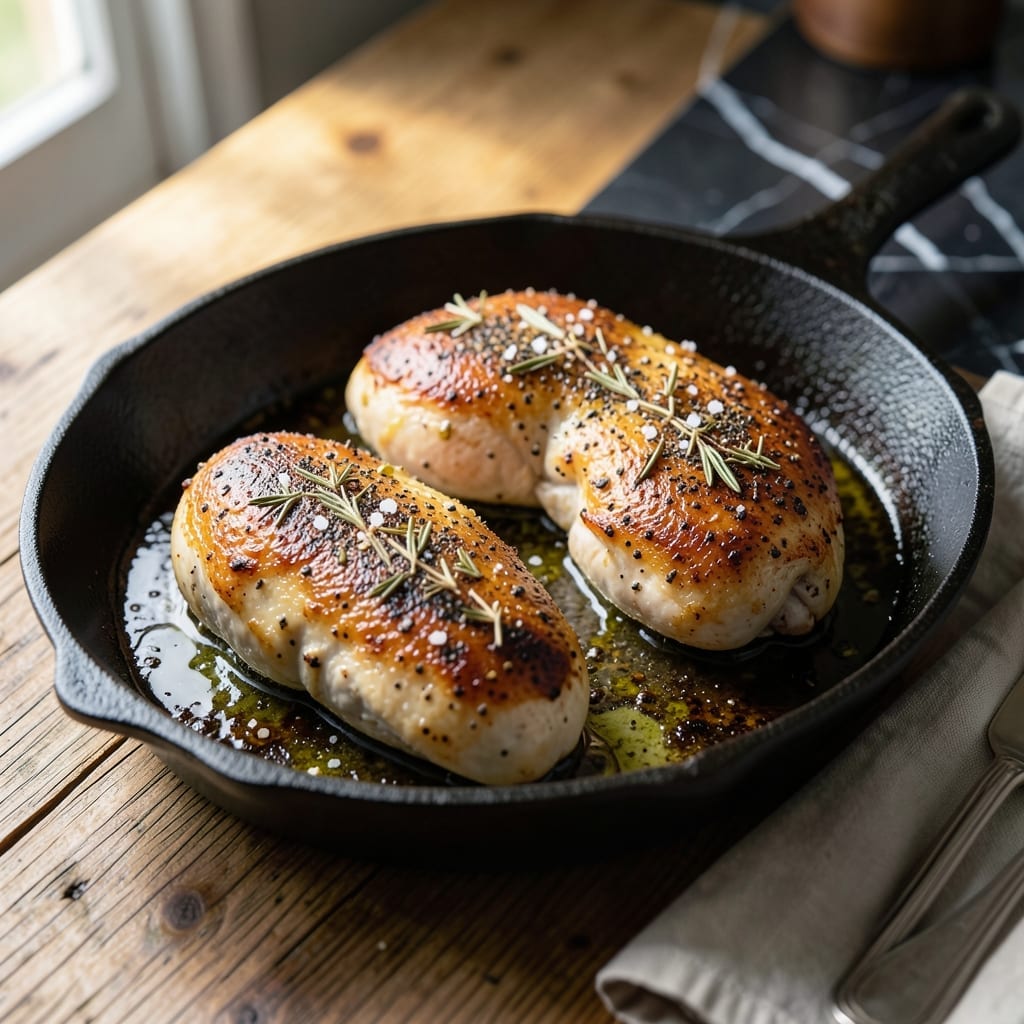
My grandmother never wrote down her chicken recipe—she measured everything by feel and instinct. This method delivers juicy results every time with minimal effort.
Cast iron is the secret to achieving a golden crust while keeping the meat tender. Preheating the skillet ensures even cooking and prevents sticking.
Season simply with salt, pepper, and herbs for maximum flavor impact. The high heat locks in moisture, creating slices that are never dry.
Resting the chicken after baking guarantees perfect texture. This technique transforms basic ingredients into a meal worth savoring.
Ingredients for Baked Chicken Breast Recipe Cast Iron Skillet
Cast iron, simple seasonings, and chicken transform into something extraordinary with this method.
| Ingredient | Amount | Notes |
|---|---|---|
| Chicken Breasts 🍗 | 1 ½ lb | Boneless, skinless, pounded even |
| Kosher Salt 🧂 | 1 ½ tsp | Diamond Crystal preferred for texture |
| Freshly Ground Black Pepper 🌶️ | 1 tsp | Coarse grind for crust |
| Garlic Powder 🧄 | 1 tsp | Not garlic salt substitute |
| Dried Thyme 🌿 | 1 tsp | Rubbed between fingers to release oils |
| Dried Rosemary 🍃 | 1 tsp | Crushed for better distribution |
| Olive Oil 🫒 | 2 tbsp | Extra-virgin for high heat tolerance |
| Unsalted Butter 🧈 | 2 tbsp | Melted for basting crust |
| Fresh Lemon 🍋 | 1 whole | Zested and juiced for brightness |
| Fresh Parsley 🌿 | ¼ cup | Chopped fine for garnish |
[recipe_ingredient_scaler]
The chicken quality is paramount. Air-chilled, organic chicken breasts from Whole Foods or Trader Joe’s yield the juiciest results due to higher moisture retention. For cast iron, a well-seasoned Lodge skillet is ideal—its heat retention creates that golden crust. Always bring meat to room temperature before cooking; this ensures even doneness throughout. Pounding to uniform thickness prevents dry spots.
No dried herbs? Fresh thyme and rosemary at double the amount work beautifully (strip leaves, discard stems). Out of garlic powder? Two fresh cloves minced per teaspoon does the trick. Butter can be swapped for ghee if avoiding dairy. For extra flavor depth, add half teaspoon smoked paprika to the seasoning mix. The olive oil must tolerate high heat—avoid extra-virgin if it’s not labeled for high-smoke applications.
Cooked chicken keeps in an airtight container for 3-4 days refrigerated. For longer storage, freeze in portions for up to 3 months. Reheat gently in a skillet with a splash of chicken broth to restore moisture. Always rest the chicken 10 minutes before slicing—this step is non-negotiable for juiciness.
Why You’ll Love This Recipe
- One Pan Magic: I toss the chicken in, sprinkle the salt, pepper, garlic powder, and thyme, then let the cast iron do the rest.
- Crispy Herb Crust: That combo of garlic powder and dried thyme gives it this ridculously good golden crust.
- Meal Prep Hero: I make a double batch on Sunday and it’s my lunch all week—still juicy, never dry.
- Budget Friendly: Chicken breasts are cheap, the spices are pantry staples, and one skillet means less cleanup.
Step-by-Step Instructions for Baked Chicken Breast in Cast Iron Skillet
Here is the method to achieve juicy, golden-crusted chicken with minimal effort and maximum flavor.
Step 1: Season and Prepare the Chicken Breasts
Begin by patting the 1.5 lb Chicken Breasts completely dry with paper towels. Even moisture prevents proper browning, so be thorough. Place the breasts between sheets of plastic wrap and pound to an even ¾-inch thickness—this ensures uniform cooking.
In a small bowl, combine the 1.5 tsp Kosher Salt, 1 tsp Freshly Ground Black Pepper, 1 tsp Garlic Powder, 1 tsp Dried Thyme, and 1 tsp Dried Rosemary. Rub this mixture evenly over all surfaces of the chicken, pressing gently to adhere. The herbs should coat the meat completely for maximum flavor infusion.
Step 2: Sear in Cast Iron for Crust Development
Place a cast iron skillet in the oven and preheat to 400°F. Once hot, carefully add the 2 tbsp Olive Oil to the skillet—it should shimmer immediately. Add the chicken breasts and sear undisturbed for 3-4 minutes per side until golden brown.
The cast iron retains heat beautifully, creating a perfect crust. Watch for the edges to turn opaque and the surface to develop a deep golden color. This initial sear locks in juices and builds the foundation of flavor for your finished dish.
Step 3: Finish in Oven with Butter Baste
After searing, add the 2 tbsp Unsalted Butter to the skillet. As it melts, tilt the pan slightly and baste the chicken with the foaming butter for 30 seconds. This step adds richness and promotes even browning.
Transfer the skillet to the preheated oven. Bake for 10-12 minutes or until the internal temperature reaches 165°F on an instant-read thermometer. The chicken should feel firm to the touch but still yield slightly when pressed.
Step 4: Rest and Garnish for Service
Remove the chicken from the skillet and transfer to a cutting board. Let it rest for 5-10 minutes—this allows the juices to redistribute throughout the meat. Tent loosely with foil to keep warm.
While the chicken rests, zest the 1 whole Fresh Lemon over the pan drippings, then squeeze in the juice. Stir to combine, creating a bright, flavorful sauce. Slice the chicken against the grain into ½-inch thick pieces, arrange on a platter, and spoon the lemon butter sauce over the top. Garnish with the 0.25 cup Fresh Parsley, chopped fine, for a pop of color and freshness.
Pro Tips For Making Baked Chicken Breast Recipe Cast Iron Skillet
- Preheat the Skillet: Get your cast iron ripping hot before adding the chicken—about 5 minutes on medium-high. I learned this the hard way after too many pale, soggy breasts.
- Pound Even Thickness: Use a rolling pin or heavy pan to pound the breasts to ¾-inch thickness. Sounds tedious, but it guarantees even cooking and no dry edges.
- Skip Cold Chicken: Pull the breasts from the fridge 20-30 minutes before cooking. After burning a few batches, I finally realized room temp meat sears better and cooks more evenly.
- Use Butter in Oil: Add 1 tablespoon of butter to your oil in the skillet—it browns the skin beautifully and adds a depth that oil alone can’t. My grandmother swore by this, and she was right.
Creative Variations of This baked chicken breast recipe cast iron skillet
Herb-Crusted Variation
Swap the dried herbs for a fresh blend of 2 tbsp chopped rosemary and 2 tbsp chopped thyme mixed with 1 tbsp grated Parmesan. Press this mixture onto the chicken before searing to create a fragrant, crispy crust. I learned this trick from my grandmother’s handwritten notes. 🌿
Spicy Cajun Twist
Combine 1 tbsp smoked paprika, 1 tsp cayenne pepper, and 1 tsp onion powder with the original seasonings for a bold Louisiana-inspired kick. The cast iron enhances the smoky depth of these spices.
Lemon-Herb Butter
Melt the butter with 1 tbsp lemon zest and 1 tbsp fresh parsley before basting. This brightens the dish and pairs perfectly with the golden crust. I often add a pinch of red pepper flakes for subtle heat.
Garlic-Lover’s Version
Add 4 minced garlic cloves to the butter during basting for an intense aromatic boost. The garlic caramelizes slightly in the cast iron, infusing every bite with rich, savory flavor.
Honey-Mustard Glaze
Whisk 2 tbsp honey and 1 tbsp Dijon mustard into the pan drippings before serving. Drizzle over sliced chicken for a sweet-tangy finish that balances the savory crust. 💛
Parmesan Crust
Sprinkle ¼ cup grated Parmesan over the chicken during the last 2 minutes of baking. The cheese melts into a crispy, golden layer that adds umami depth to the dish.
Nutrition Facts
Frequently Asked Questions
Why preheat the cast iron skillet?
Preheating ensures even cooking and prevents sticking. A hot skillet creates a perfect sear, locking in juices for tender, flavorful chicken.
Can I use boneless thighs instead of breasts?
Yes! Adjust cooking time to 8-10 minutes in the oven since thighs cook faster. They’ll be juicier but may need trimming to fit the skillet.
What if my chicken sticks to the pan?
Your skillet may not be hot enough or the chicken wasn’t dry before searing. Use tongs to gently release it—never force it. Next time, heat the pan 5 minutes longer first.
How do I know when it’s done?
Use a meat thermometer—165°F in the thickest part means it’s safe. The juices should run clear, and the meat should feel firm but springy.

Trained in classic French technique but raised on slow-cooked ribs and spicy rubs, she blends culinary skill with smoke and soul.
- Recipe for Boneless Pork Chops in Cast Iron Skillet: Sear and Baste to Juicy Perfection - October 3, 2026
- Recipe for Boneless Cross Rib Roast: Slow-Roasted Beef with Herb Crust - October 3, 2026
- Hamburgers in Sauce Recipe Crock Pot: Slow-Cooked Savory Delight - October 3, 2026