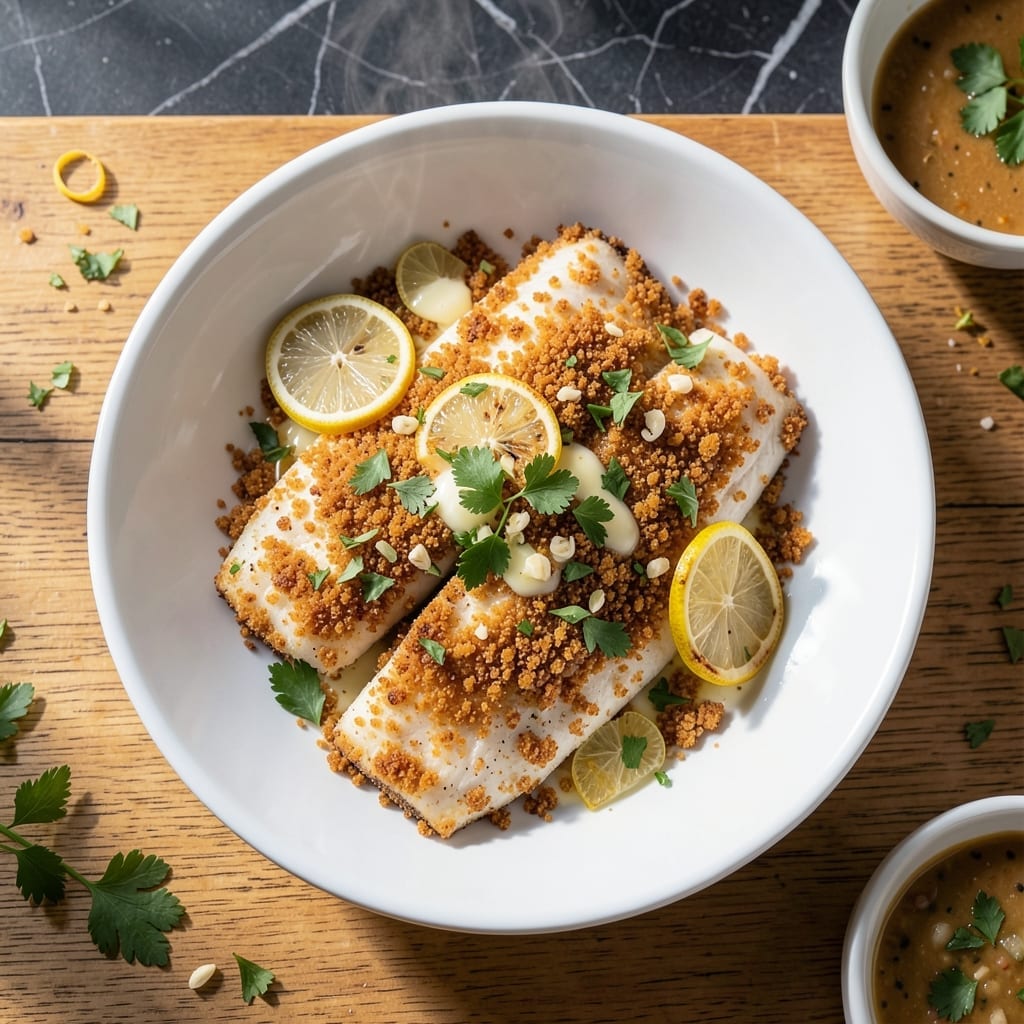
This baked flounder delivers crispy panko topping and flaky white fish in every bite. After testing multiple breading methods, I found panko creates the perfect golden crust without overpowering the delicate fish.
The technique is simple: coat fillets with seasoned panko, then bake at high heat. This ensures the topping browns beautifully while keeping the flounder moist and tender. The result is a restaurant-quality dish with minimal effort.
You’ll love how the breadcrumbs stay crunchy, even after baking. The flounder remains perfectly flaky, with a texture that melts in your mouth. This method guarantees consistent results every time.
Ready in under 20 minutes, it’s ideal for a quick, impressive weeknight dinner. The contrast between the crisp topping and tender fish makes this a standout dish.
Ingredients for Baked Flounder Recipe Panko
Fresh flounder, crispy panko, and bright lemon make this dish shine with minimal effort.
| Ingredient | Amount | Notes |
|---|---|---|
| Flounder Fillets 🐟 | 1 ½ lb | Skinless, boneless, fresh or thawed |
| Panko Breadcrumbs 🍞 | 1 ½ cups | Japanese-style for extra crunch |
| Unsalted Butter 🧈 | ½ cup | Melted for binding topping |
| Fresh Lemon 🍋 | 1 whole | Zested and juiced |
| Garlic Cloves 🧄 | 3 cloves | Minced finely for even distribution |
| Fresh Parsley 🌿 | ¼ cup | Finely chopped, for garnish |
| Dijon Mustard 🟡 | 2 tbsp | For tangy depth in topping |
| Paprika 🌶️ | 1 tsp | Sweet or smoked variety |
| Dried Thyme 🍃 | ½ tsp | For earthy aroma |
| Salt 🧂 | ¾ tsp | Diamond Crystal kosher preferred |
| Black Pepper 🌶️ | ½ tsp | Freshly ground for best flavor |
| Olive Oil 🫒 | 1 tbsp | For greasing baking dish |
| Lemon Zest 🍋 | 1 tsp | From fresh lemon |
[recipe_ingredient_scaler]
The flounder is the star here—look for skinless, boneless fillets at your seafood counter. I get mine from Whole Foods (they have great sustainable options), but any reputable fishmonger works. Freshness is key: the fish should smell like the ocean, not fishy. Wild-caught is ideal if available. The panko (found in the Asian aisle at most supermarkets) needs to be Japanese-style for that signature crunch.
No flounder? Haddock or cod work just as well—they hold up to baking similarly. Out of panko? Regular breadcrumbs in a pinch, but they won’t be as crispy. For the butter, vegan butter works if you’re avoiding dairy. The Dijon adds a nice tang, but regular yellow mustard at half the amount is fine. Fresh herbs? Dried parsley at one-third the quantity gets the job done.
Bake and serve immediately—panko loses its crunch if it sits. Leftovers keep in the fridge for 2-3 days (reheat gently in the oven). The topping mixture can be prepped ahead and stored in the fridge for 24 hours before baking. Always bring fish to room temp before cooking for even doneness.
Why You’ll Love This Recipe
- Ready in 20: I can have this from fridge to table faster than takeout arrives. One pan, one oven, zero stress.
- Garlic Butter Crunch: That panko crust gets golden and crispy while the butter and garlic melt into every bite. Ridiculously good.
- Weeknight Hero: It’s my go-to for busy evenings, but fancy enough for company. Honestly, I serve it both ways.
- Budget-Friendly Feast: Flounder stays affordable, and panko stretches further than regular breadcrumbs. Feeds four without breaking the bank.
Step-by-Step Instructions for Baked Flounder with Panko
This method guarantees crispy topping and perfectly flaky fish every single time.
Step 1: Prepare the Flounder and Season Lightly
Preheat your oven to 400°F to ensure it’s fully hot when the fish goes in. Lightly grease a baking dish with the 1 tbsp olive oil, making sure to coat the bottom and sides evenly. This prevents the fish from sticking and helps the topping crisp up nicely.
Pat the 1.5 lb Flounder Fillets completely dry with paper towels—this is crucial for achieving that perfect flaky texture. Arrange them in the prepared baking dish in a single layer, ensuring they don’t overlap. Season both sides lightly with 0.75 tsp salt and 0.5 tsp black pepper. The seasoning should be subtle since the topping brings bold flavors.
Step 2: Create the Crispy Panko Topping
In a medium bowl, melt the 0.5 cup unsalted butter and let it cool slightly. Stir in the 2 tbsp Dijon mustard, 3 cloves minced garlic cloves, 1 tsp paprika, 0.5 tsp dried thyme, and 1 tsp lemon zest. This mixture adds tangy, savory depth to the topping.
Add the 1.5 cups Panko Breadcrumbs to the butter mixture and toss until every crumb is evenly coated. The Panko should look moist but still loose—if it’s too dry, the topping won’t adhere properly. Here’s the thing—this step ensures maximum crunch and flavor in every bite.
Step 3: Top the Flounder and Bake to Perfection
Spoon the Panko mixture evenly over the flounder fillets, pressing down gently to help it adhere. The topping should form a thick, even layer that covers the fish completely. Don’t press too hard, or you’ll compact the crumbs and lose that signature crispiness.
Bake in the preheated oven for 12-15 minutes, or until the topping is golden brown and the fish flakes easily with a fork. The fish is done when it reaches an internal temperature of 145°F and the Panko is crispy to the touch. Keep an eye on it—overbaking can dry out the flounder.
Step 4: Garnish and Serve Immediately
Remove the dish from the oven and let it rest for 2-3 minutes. This brief rest allows the juices to redistribute in the fish, keeping it moist and tender. Meanwhile, finely chop the 0.25 cup fresh parsley and zest the 1 whole fresh lemon if you haven’t already.
Sprinkle the chopped parsley over the top and serve with lemon wedges on the side for a bright, fresh finish. The parsley adds color and a touch of freshness, while a squeeze of lemon enhances the flaky fish and crispy topping. This dish is best enjoyed right away while the topping is at its crispiest.
Pro Tips For Making Baked Flounder Recipe Panko
- Preheat the Pan: I learned this the hard way—always preheat your baking sheet or pan for 10 minutes at 400°F before adding the flounder. It guarantees a crispy panko crust from the first minute.
- Pat Fillets Dry: Sounds tedious, but drying the flounder with paper towels before coating makes a real difference. Wet fish steams instead of crisps, even with panko.
- Skip the Overcrowding: After burning three batches, I finally figured out: leave at least an inch between fillets. Crowding traps steam and turns your panko to soggy breadcrumbs.
- Melt Butter First: My grandmother swore by this: melt the butter and mix it with panko before coating. It saves time and ensures every crumb sticks where it should.
Health Benefits of This baked flounder recipe panko
Lean Protein Source
Flounder is an excellent source of lean protein, with about 20 grams per 4-ounce serving. This helps build and repair tissues without adding excess fat to your diet. I love how it keeps me full without feeling heavy. 💪
Low-Calorie Option
At roughly 100 calories per 4-ounce serving, flounder is perfect for anyone watching their calorie intake. The panko topping adds minimal calories while delivering maximum crunch and flavor.
Rich in Vitamins
This fish provides vitamin B12 for energy metabolism and vitamin D for bone health. A single serving can cover a significant portion of your daily needs for these essential nutrients.
Heart-Healthy Choice
Flounder contains omega-3 fatty acids, which support heart health and reduce inflammation. The baked preparation method preserves these benefits while keeping the dish light and nutritious.
Plus, it’s naturally low in saturated fat, making it a smart choice for cardiovascular health. 💛
Mineral Boost
You’ll also get important minerals like selenium and phosphorus from flounder. Selenium acts as a powerful antioxidant, while phosphorus supports strong bones and teeth.
Nutrition Facts
Frequently Asked Questions
Can I use regular breadcrumbs instead of panko?
Panko creates the best crunch, but regular breadcrumbs work in a pinch. They’ll be slightly less crispy, so press them firmly onto the fish before baking.
How do I know when the fish is done?
Look for a golden brown topping and fish that flakes easily with a fork. The internal temperature should reach 145°F. Overbaking dries it out, so check at 12 minutes.
Can I make this ahead of time?
Prepare the topping mixture up to 24 hours ahead and refrigerate. Assemble and bake just before serving for maximum crispiness.
What sides pair well with this dish?
Light sides like roasted asparagus or a simple green salad complement the rich, buttery topping. A squeeze of lemon ties everything together.

Trained in classic French technique but raised on slow-cooked ribs and spicy rubs, she blends culinary skill with smoke and soul.
- Recipe for Boneless Pork Chops in Cast Iron Skillet: Sear and Baste to Juicy Perfection - October 3, 2026
- Recipe for Boneless Cross Rib Roast: Slow-Roasted Beef with Herb Crust - October 3, 2026
- Hamburgers in Sauce Recipe Crock Pot: Slow-Cooked Savory Delight - October 3, 2026