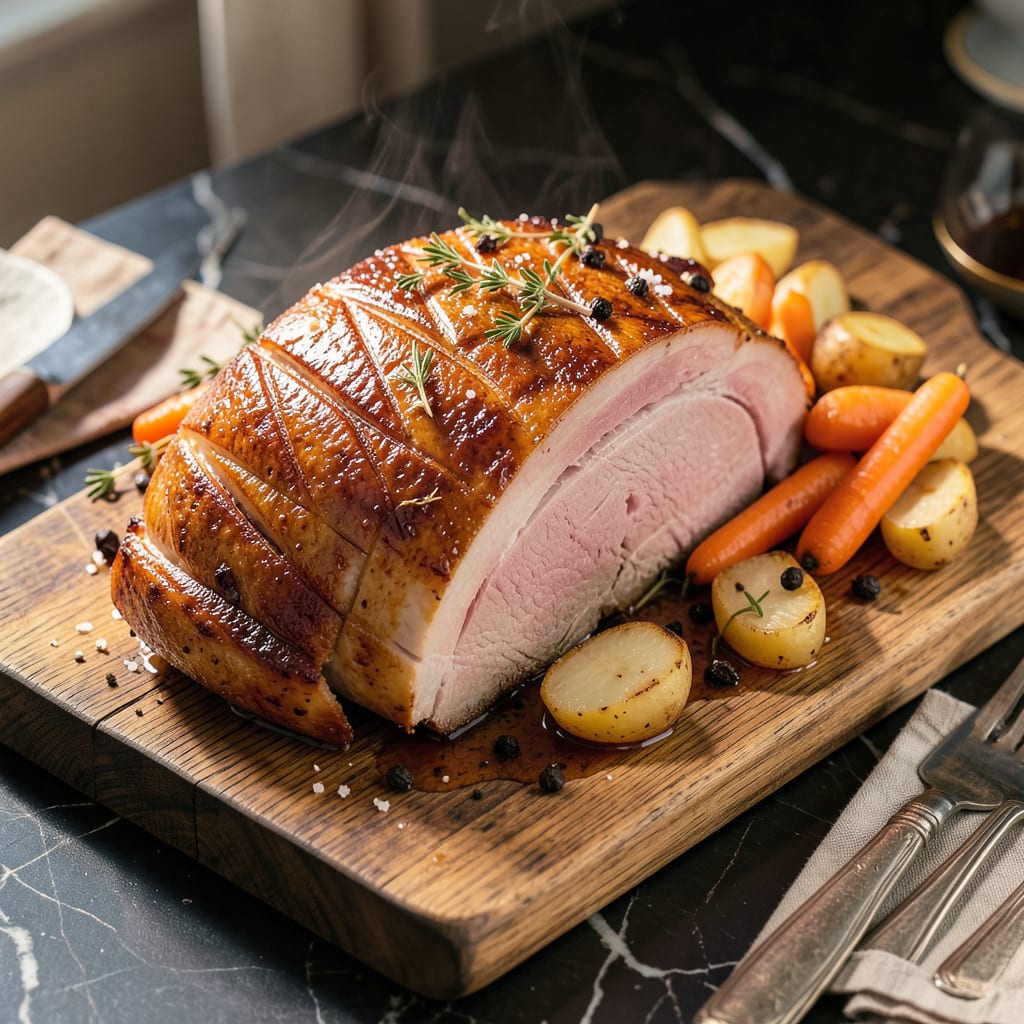
Here’s the thing—I’ve baked more hams than I can count, and the frozen ones always made me nervous until I cracked the code. No thawing, no stress, just perfectly juicy results straight from the freezer to your table. That first time I pulled a golden, glistening ham out of the oven after starting it completely frozen? Game changer. Seriously.
The secret is all in the timing and temperature control. We’re talking low and slow with a few smart tricks to prevent dryness—like adding extra moisture to the pan and wrapping it tight during part of the cooking. I’ve tested this method on everything from spiral-cut to bone-in hams, and it works every single time. No more last-minute thawing panic when guests are on their way.
What you’ll get is ham that’s tender throughout with that classic caramelized exterior, whether you go for a sweet glaze or just simple seasoning. The meat stays moist, the flavors develop beautifully, and you’ll have a centerpiece that looks (and tastes) like you spent all day prepping. My family now requests this method even when we have time to thaw properly.
Perfect for holiday feasts or Sunday suppers, this technique means you can keep hams stocked in your freezer ready for whenever inspiration strikes. Let me show you exactly how to nail it—no defrosting required.
📚 In This Guide
- What You’ll Need
- Instructions
- Tips and Common Mistakes
What Youll Need
- ● 1 frozen ham (bone-in or boneless, 8–12 lbs for even cooking; spiral-cut saves time!)
- ● Aluminum foil (heavy-duty, enough to fully wrap the ham)
- ● Baking dish or roasting pan (with 2–3-inch sides to catch juices)
- ● Meat thermometer (instant-read for accuracy—no guesswork!)
- ● 1 cup liquid (water, apple juice, or broth to keep it moist)
- ○ Glaze (optional) (½ cup honey, brown sugar, or maple syrup + 1 tbsp mustard for extra flavor)
- ● Kitchen twine or toothpicks (to secure glaze toppings like pineapple rings or cloves)
- ● Basting brush (for even glaze application)
- ● Oven mitts (trust us—that pan gets hot!)
- ● Carving knife & fork (sharp enough for clean slices)
Instructions for Baking Frozen Ham
Here’s how to transform your frozen ham into a juicy centerpiece without any thawing time.
Prep the Oven and Pan
Start by positioning your oven rack in the lower third of the oven. This placement ensures even heat distribution while protecting the top of the ham from drying out. Preheat your oven to 325°F – this lower temperature is crucial for gently cooking the ham through without overcooking the outer layers.
While the oven heats, prepare your roasting pan. I like to use a rack inside the pan to elevate the ham, allowing hot air to circulate completely around it. If you don’t have a rack, create a makeshift one using chopped vegetables like onions or carrots – this keeps the ham out of its own juices while adding subtle flavor.
Prepare the Frozen Ham for Roasting
Remove the frozen ham from its packaging and place it directly in your prepared roasting pan. Don’t worry about rinsing it – that would add unnecessary moisture. Instead, pat the surface dry with paper towels to help the seasoning adhere better.
Here’s the thing – frozen ham needs help retaining moisture. I’ve found that scoring the surface in a diamond pattern (about ¼-inch deep) creates more surface area for flavor absorption and helps the fat render evenly. Rub the entire surface with olive oil or mustard – this creates a flavorful barrier that locks in juices.
Season and Begin the Long Cook
Season the ham generously with your choice of dry rub or simply with salt and pepper. I like to add a mix of brown sugar, garlic powder, and paprika for extra flavor. The sugar will caramelize beautifully as the ham cooks.
Cover the ham tightly with heavy-duty aluminum foil, creating a seal around the edges of the pan. This creates a steam environment that helps cook the ham gently from frozen. Place it in the preheated oven and set your timer for 20 minutes per pound. For a typical 8-pound ham, that means about 2 hours and 40 minutes of initial cooking time.
Uncover and Finish for Perfect Texture
After the initial cooking time, carefully remove the foil. You’ll notice the ham has released quite a bit of liquid – that’s good! It means the ice crystals have melted and the ham is cooking in its own juices. Increase the oven temperature to 375°F to help create that beautiful caramelized exterior.
Return the ham to the oven, uncovered, for an additional 15-20 minutes. You’re looking for the surface to develop a rich, golden-brown color. The internal temperature should reach at least 145°F when measured at the thickest part, away from any bone. I always check multiple spots to ensure even doneness.
Rest and Serve for Maximum Juiciness
Transfer the ham to a cutting board and tent loosely with foil. Let it rest for at least 15 minutes before carving. This resting period is crucial – it allows the juices to redistribute throughout the meat instead of running out onto your cutting board when you slice it.
When you’re ready to serve, slice the ham against the grain for the most tender results. The meat should be moist and flavorful throughout, with a slightly caramelized exterior. Serve with the pan juices spooned over the top – they’re packed with concentrated ham flavor that will take your dish to the next level.
Tips and Common Mistakes for Perfect Baking Frozen Ham
Here’s what I’ve learned from years of cooking frozen hams – these details make all the difference between dry meat and a juicy masterpiece.
Temperature Strategy: The initial 325°F cooking temperature in Step 3 is absolutely crucial. This gentle heat allows the frozen center to thaw gradually without drying out the outer layers. I’ve found that maintaining this exact temperature throughout the covered cooking phase prevents that tough, overcooked ring you sometimes get with frozen meats. When you increase to 375°F in Step 4, watch carefully – this higher heat should only be used for the final uncovered phase to create that perfect caramelized crust.
Moisture Retention: In Step 2, when you’re scoring the ham, don’t be shy about making those cuts ¼-inch deep. This precise depth allows the fat to render properly while creating channels for the seasonings to penetrate. I always rub the scored surface with olive oil first, then apply my seasoning mix – this creates a flavorful barrier that locks in moisture during the long cook. The foil cover in Step 3 then traps all that moisture, essentially steaming the ham in its own juices.
Timing Precision: The 20 minutes per pound rule in Step 3 isn’t arbitrary – it accounts for the time needed to safely bring a frozen ham up to temperature. For an 8-pound ham, that 2 hours and 40 minutes might seem long, but it’s what ensures even cooking throughout. I always set a timer for the exact calculated time, then check the internal temperature in multiple spots before moving to Step 4. The final 15-20 minutes uncovered is just enough to develop that golden crust without drying out the meat.
Resting Period: Don’t skip the 15-minute rest in Step 5 – I learned this the hard way. That resting time allows the muscle fibers to relax and reabsorb all the juices that get pushed to the center during cooking. If you cut into it too soon, you’ll lose about 30% of those juices onto your cutting board. I tent mine loosely with foil during this time to keep it warm while still allowing some steam to escape.
Pro Tips for Baking Frozen Ham
- Here’s what I’ve learned from years of cooking frozen hams – these details make all the difference between dry meat a…
- Temperature Strategy: The initial 325°F cooking temperature in Step 3 is absolutely crucial. This gentle heat allows …
- Moisture Retention: In Step 2, when you’re scoring the ham, don’t be shy about making those cuts ¼-inch deep. This pr…
Frequently Asked Questions
Can I bake a frozen ham without thawing it first?
Yes! Baking a frozen ham is totally doable—just add 50% more cooking time than the recipe suggests for thawed ham. Use a meat thermometer to ensure it reaches 145°F internally for safety. Covering it with foil helps lock in moisture while it cooks evenly.
How long does it take to bake a frozen ham?
A fully frozen ham (10–12 lbs) typically takes 3–4 hours at 325°F. For smaller hams (5–7 lbs), plan for 2–2.5 hours. Always check the internal temp—never guess! Pro tip: Let it rest 15 minutes before slicing for juicier results.
Will a frozen ham turn out dry or tough?
Not if you prep it right! Brushing with glaze (honey, brown sugar, or pineapple juice) every 30 minutes keeps it moist. Wrap tightly in foil for the first 2/3 of cooking time, then uncover to crisp the outside. A water pan in the oven adds humidity too!
What if my ham is only partially frozen?
No problem! Reduce cooking time by 25–30% compared to fully frozen. Use a thermometer to monitor progress—partial thawing means the center heats faster. If the outside browns too quickly, tent it with foil to prevent burning.
Are there safer alternatives to baking a frozen ham?
If you’re short on time, try these:
- Cold-water thawing: Submerge the sealed ham in cold water (change every 30 mins) for 30 mins per pound.
- Slow cooker: Cook on Low for 6–8 hours with broth or juice for tenderness.
- Instant Pot: Use the “Meat” setting for 20–25 mins per pound (with liquid).
Always verify internal temp hits 145°F!
Baking a frozen ham doesn’t have to be stressful—with the right prep and timing, you can serve a juicy, flavorful centerpiece straight from the freezer! 🍖✨ Remember: adjust cook times, use a meat thermometer, and let it rest for the best results. Ready to impress? Grab that ham, preheat the oven, and get baking—your next holiday feast or weeknight dinner just got a whole lot easier!

Trained in classic French technique but raised on slow-cooked ribs and spicy rubs, she blends culinary skill with smoke and soul.
- Recipe for Boneless Pork Chops in Cast Iron Skillet: Sear and Baste to Juicy Perfection - October 3, 2026
- Recipe for Boneless Cross Rib Roast: Slow-Roasted Beef with Herb Crust - October 3, 2026
- Hamburgers in Sauce Recipe Crock Pot: Slow-Cooked Savory Delight - October 3, 2026