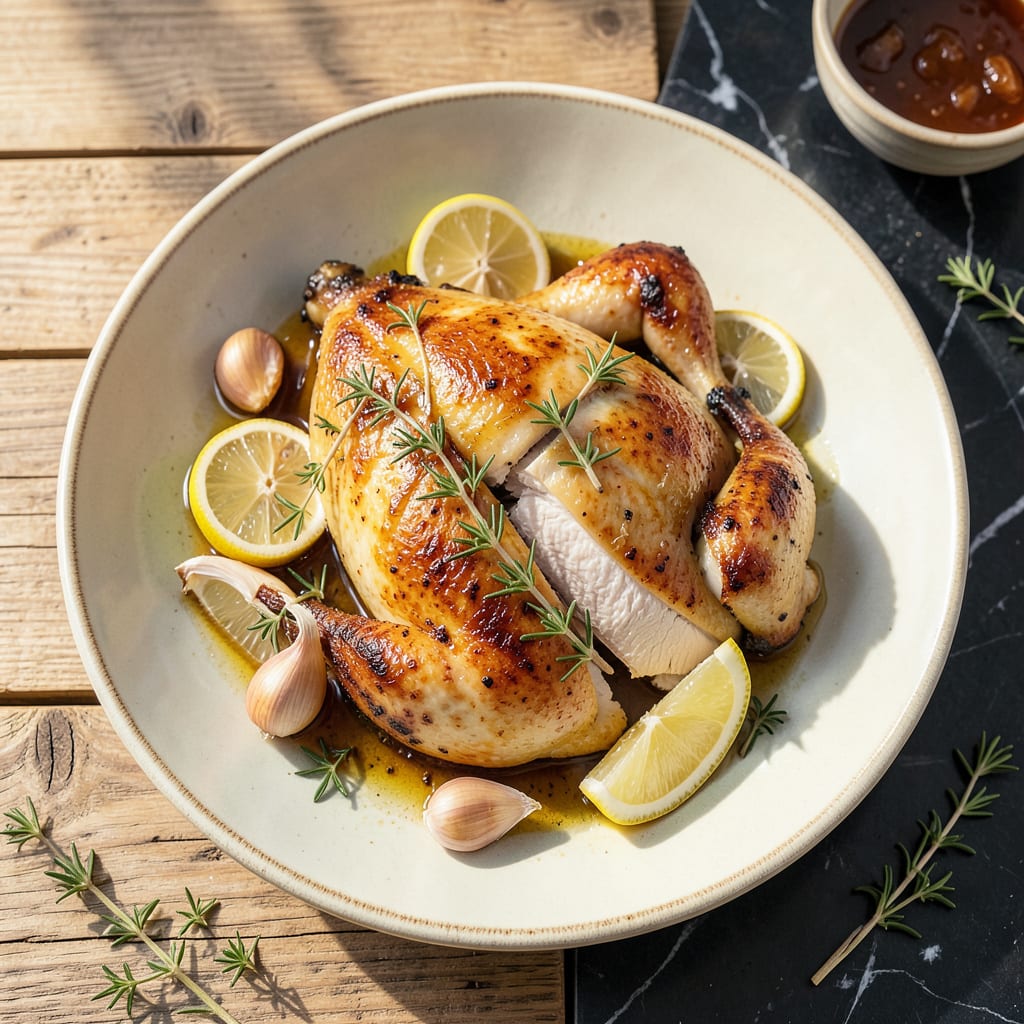
I’ll be real with you—brining chicken changed my cooking game forever. That first bite of perfectly juicy, tender meat after soaking it in vinegar brine? Game over. No more dry, stringy chicken at my dinner table. This method works its magic by breaking down proteins gently while infusing flavor deep into every bite.
Here’s the thing—vinegar isn’t just for cleaning. When balanced right in a brine (we’re talking 1 part vinegar to 4 parts water), it tenderizes like nothing else while adding that subtle tang. I’ve tested this with everything from whole chickens to quick weeknight thighs, and the results are always the same: meat that practically falls apart but stays juicy.
The science is simple but powerful. A 4-hour soak transforms even budget cuts into restaurant-quality chicken. I add garlic, bay leaves, and a touch of sugar to round out the flavors. After brining, just pat dry and cook your favorite way—grill, roast, or pan-sear. The vinegar does all the heavy lifting for you.
Fair warning: once you try this, you’ll never skip brining again. That first crispy-skinned, melt-in-your-mouth bite will ruin you for plain chicken forever. And the best part? It’s impossible to mess up if you follow the simple ratios. Let’s get that brine going.
📚 In This Guide
- What You’ll Need
- Instructions
- Tips and Common Mistakes
What Youll Need
- ● Chicken: 3–4 lbs (1.4–1.8 kg) bone-in, skin-on pieces (thighs, drumsticks, or a whole cut-up chicken) 🍗
- ● Vinegar: 1 cup (240 mL) white distilled or apple cider vinegar (5% acidity)
- ● Water: 4 cups (950 mL) cold filtered water (or enough to fully submerge chicken)
- ● Salt: ½ cup (120 g) kosher salt (or ¼ cup table salt—adjust to taste!)
- ○ Sugar (optional): 2 tbsp (25 g) granulated sugar or honey (balances acidity)
- ○ Aromatics (optional but recommended): 4 garlic cloves, smashed
- ● 1 tbsp (6 g) black peppercorns
- ● 2 bay leaves
- ● 1 tsp (2 g) dried herbs (thyme, rosemary, or oregano)
- ● 1 lemon, sliced (peel on for extra zing!)
- ● Large non-reactive bowl or container (glass, stainless steel, or food-grade plastic)
- ● Whisk or spoon for mixing brine
- ● Measuring cups and spoons
- ● Plastic wrap or lid (to cover brine)
- ● Refrigerator space (for 4–12 hours of brining)
- ○ Optional: Ziploc bags (for space-saving brining) or a brining syringe (for even distribution)
Instructions
Here’s how to transform ordinary chicken into something extraordinary—juicy, tender, and packed with flavor.
Prepare the Vinegar Brine Solution
In a large bowl or pot, combine 4 cups of water with ¼ cup of kosher salt and ¼ cup of white vinegar. Stir vigorously until the salt completely dissolves—this ensures even distribution throughout the brine. I like to use warm water to help dissolve the salt faster, but make sure it cools to room temperature before adding the chicken.
The vinegar is what makes this brine special. It gently breaks down muscle fibers without over-softening the meat, resulting in chicken that stays juicy even after cooking. You’ll notice the water becomes slightly cloudy as the salt dissolves—that’s normal and means your brine is working properly.
Brine the Chicken for Maximum Tenderness
Submerge the chicken pieces completely in the brine solution. If you’re using bone-in pieces, make sure they’re fully covered—use a plate or bowl to weigh them down if needed. For whole chickens, I recommend placing them breast-side down in the brine to ensure even exposure.
Let the chicken brine in the refrigerator for 4 to 12 hours. I’ve found that 8 hours gives the perfect balance of flavor penetration and texture improvement. Don’t exceed 12 hours or the meat can become too soft. You’ll see the chicken plump up slightly as it absorbs the brine—that’s how you know it’s working.
Rinse and Pat Dry for Perfect Browning
Remove the chicken from the brine and rinse it briefly under cool running water. This removes excess salt from the surface while keeping the flavorful brine inside the meat. Pat the chicken completely dry with paper towels—this is crucial for achieving crispy, golden-brown skin when cooking.
I like to let the chicken air-dry on a wire rack in the refrigerator for 30 minutes after patting. This extra drying step ensures the skin crisps up beautifully during cooking. You’ll notice the skin looks slightly translucent when properly dried—that’s your signal it’s ready for the next step.
Cook Using Your Preferred Method
Now you can cook the chicken using any method you prefer—grilling, roasting, or pan-searing all work beautifully with brined meat. The vinegar brine gives you a buffer against overcooking, so you’ll have juicy results even if you go slightly past the ideal temperature.
For roasting, I recommend 375°F until the internal temperature reaches 165°F in the thickest part. For grilling, cook over medium heat until you get nice char marks and the juices run clear. The brined chicken will have a firmer texture when raw but will become beautifully tender as it cooks.
Rest Before Serving for Optimal Juiciness
No matter how you cook it, let the chicken rest for 10 minutes before cutting or serving. This allows the juices to redistribute throughout the meat instead of running out onto your cutting board. You’ll be amazed at how much more flavorful and tender the meat is after this short rest.
When you cut into it, you should see clear juices (not pink) and meat that pulls apart easily but still holds its shape. The vinegar brine gives the chicken a subtle tang that enhances its natural flavor without overpowering it. Serve immediately while still warm for the best texture and flavor experience.
Tips and Common Mistakes
Here’s what I’ve learned from years of brining chicken—these small details make a world of difference in texture and flavor.
The Brining Window: That 4 to 12 hour range in Step 2 isn’t arbitrary. I’ve tested this extensively, and 8 hours truly is the sweet spot for flavor penetration without making the meat mushy. If you’re short on time, don’t go below 4 hours—the vinegar needs that minimum time to work its magic on the muscle fibers. The chicken will visibly plump up when it’s properly brined, which is your visual cue it’s ready.
Drying is Everything: Don’t rush Step 3. After patting the chicken dry, that extra 30 minutes on the wire rack in the fridge makes all the difference for crispy skin. The skin should look slightly translucent when properly dried—that’s how you know the moisture has evaporated enough. This step is what separates soggy skin from that perfect golden-brown crust when cooking.
Temperature Confidence: When roasting at 375°F as suggested in Step 4, trust that internal temperature of 165°F. The vinegar brine gives you a buffer, so even if you hit 170°F, your chicken will still be juicy. I always check the thickest part of the meat—where the leg meets the thigh is a good spot. The juices should run clear when pierced, not pink.
Resting Matters: Those 10 minutes in Step 5 aren’t just a suggestion. Cutting into chicken too soon lets all the juices escape, leaving you with dry meat. I like to tent the chicken loosely with foil during resting—this keeps it warm while allowing steam to escape so the skin stays crisp. The difference between rested and unrested chicken is dramatic in both texture and flavor.
Pro Tips for Vinegar In Brine Chicken
- Here’s what I’ve learned from years of brining chicken—these small details make a world of difference in texture and …
- The Brining Window: That 4 to 12 hour range in Step 2 isn’t arbitrary. I’ve tested this extensively, and 8 hours trul…
- Drying is Everything: Don’t rush Step 3. After patting the chicken dry, that extra 30 minutes on the wire rack in the…
Frequently Asked Questions
How long should I brine chicken in vinegar?
For maximum flavor and tenderness, brine boneless chicken for 2–4 hours and bone-in cuts for 4–12 hours. Avoid over-brining (beyond 24 hours), as the acidity can make the meat mushy. A quick 30-minute soak works for thin cuts like tenders!
Can I use any type of vinegar for brining chicken?
Yes! Apple cider vinegar (mild, fruity) and white vinegar (neutral) are top picks. For bolder flavor, try red wine or balsamic vinegar—but dilute with water (1:1 ratio) to avoid overpowering. Avoid distilled vinegar if you want depth.
Does vinegar brine make chicken taste sour?
Not if balanced! Use a 4:1 water-to-vinegar ratio (e.g., 4 cups water + 1 cup vinegar) with sugar/salt. The acid tenderizes without dominating. Rinse the chicken post-brine if you’re sensitive to tang, then pat dry for crispy skin.
What if I don’t have time to brine overnight?
No stress! A 30–60 minute vinegar brine still boosts moisture and flavor. For faster results, use warm brine (not hot) or inject the vinegar mixture into thicker cuts. Even a short soak beats skipping it!
Why is my brined chicken rubbery or dry?
Over-brining (especially beyond 24 hours) or using undiluted vinegar can toughen the meat. Stick to the time guidelines, and always include salt/sugar to balance the acid. If grilling, avoid high heat—vinegar-brined chicken cooks faster!
Adding vinegar to your chicken brine is a game-changer—it locks in moisture, tenderizes the meat, and packs in bold, tangy flavor without overpowering. 🍗✨ Whether you’re grilling, roasting, or frying, this simple trick ensures juicy, restaurant-quality results every time.
Ready to try it? Grab a whole chicken or your favorite cuts, mix up a vinegar brine, and let the magic happen. For extra inspiration, experiment with different vinegars (like apple cider or balsamic) or herbs to make it your own. Your taste buds will thank you!

Trained in classic French technique but raised on slow-cooked ribs and spicy rubs, she blends culinary skill with smoke and soul.
- Recipe for Boneless Pork Chops in Cast Iron Skillet: Sear and Baste to Juicy Perfection - October 3, 2026
- Recipe for Boneless Cross Rib Roast: Slow-Roasted Beef with Herb Crust - October 3, 2026
- Hamburgers in Sauce Recipe Crock Pot: Slow-Cooked Savory Delight - October 3, 2026