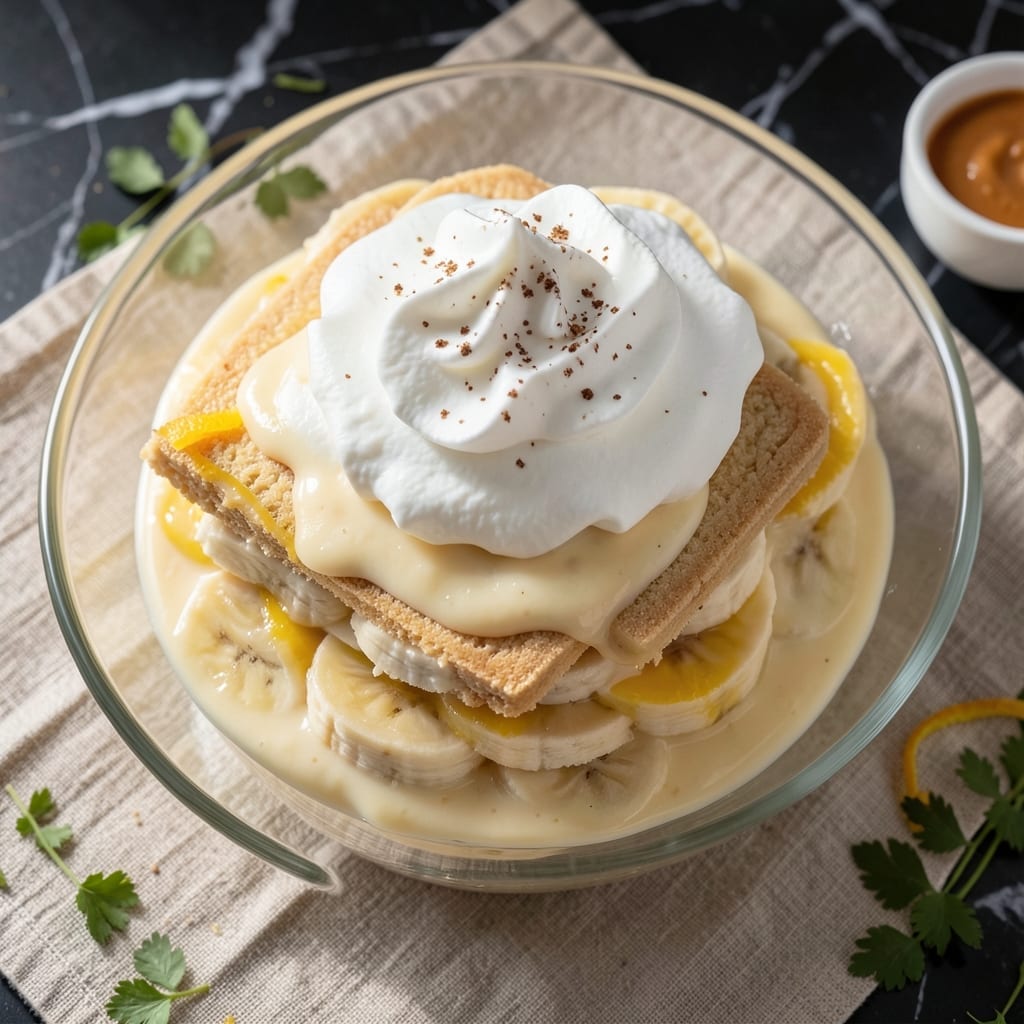
This layered dessert brings classic Southern charm to your table with minimal effort. The condensed milk creates a rich, creamy base that perfectly complements the fresh bananas and vanilla wafers.
I’ve refined this method to ensure every bite delivers that perfect balance of textures and flavors. It’s a timeless treat that’s as easy to make as it is to enjoy.
Ingredients for Banana Pudding Recipe with Condensed Milk
Classic Southern layers with vanilla wafers, bananas, and creamy condensed milk goodness.
| Ingredient | Amount | Notes |
|---|---|---|
| Vanilla Wafers 🍪 | 12 oz | About 48 wafers total |
| Sweetened Condensed Milk 🥛 | 14 oz | One standard can |
| Cold Water 💧 | 1 ½ cups | For pudding mixture |
| Instant Vanilla Pudding Mix 🍮 | 3.4 oz | One small box |
| Heavy Whipping Cream 🥛 | 2 cups | Whipped to stiff peaks |
| Ripe Bananas 🍌 | 4 whole | Sliced just before assembling |
| Vanilla Extract 🌿 | 1 tsp | Pure extract preferred |
| Granulated Sugar 🧂 | 2 tbsp | Optional for sweetening cream |
[recipe_ingredient_scaler]
The vanilla wafers are the foundation here. Nilla Wafers are the gold standard—any grocery store carries them, but Trader Joe’s has a great store brand too. For the condensed milk, Eagle Brand is what most folks reach for (and for good reason). Make sure your bananas are ripe but firm—too soft and they’ll turn to mush when sliced.
No instant pudding mix? Homemade vanilla pudding works but takes longer to set. Out of whipped cream? Cool Whip is a fine shortcut (just thaw it first). If you want to gild the lily, fold a little sour cream into the whipped cream for tang. The sugar is optional—taste the pudding mix first, as some brands are sweeter than others.
This keeps beautifully in the fridge for up to 3 days—if it lasts that long. Assemble it in a clear glass bowl so you can see those pretty layers. The wafers soften over time (which I love), so if you prefer crunch, add them right before serving.
Why You’ll Love This Recipe
- No-Bake Bliss: I just dump instant pudding mix, cold water, and condensed milk together—no oven, no fuss.
- Velvety Dream: The heavy cream and condensed milk create this rich, silky texture that clings perfectly to the vanilla wafers.
- Potluck Hero: I bring this to every picnic and it’s always the first dish gone—kids and grandparents alike.
- Make Ahead Magic: Honestly, it tastes even better the next day after the wafers soak up all that creamy goodness.
Step-by-Step Instructions for Banana Pudding With Condensed Milk
Here’s how I layer this classic dessert for perfect texture and flavor every time.
Step 1: Prepare the Vanilla Pudding Base
In a large bowl, whisk together the 3.4 oz Instant Vanilla Pudding Mix and 1.5 cups Cold Water for 2 minutes until smooth and slightly thickened. This is your foundation, so make sure it’s lump-free.
Immediately stir in the 14 oz Sweetened Condensed Milk and 1 tsp Vanilla Extract. The mixture will thicken further as it sits. Let it rest for 5 minutes to set slightly—this ensures it won’t turn runny when layered.
Step 2: Whip the Cream to Stiff Peaks
In a chilled bowl, beat the 2 cups Heavy Whipping Cream on high speed until soft peaks form. Gradually add the 2 tbsp Granulated Sugar (if using) and continue beating until stiff peaks form—this means the cream holds its shape when the beaters are lifted.
Gently fold the whipped cream into the pudding mixture with a spatula. Use a light hand to keep the texture airy. The goal is a smooth, fluffy base that’s rich but not overly dense.
Step 3: Slice the Bananas and Layer the Ingredients
Peel and slice the 4 whole Ripe Bananas into ¼-inch rounds just before assembling. This prevents browning and keeps the texture fresh. Arrange a layer of 12 oz Vanilla Wafers on the bottom of a 9×13-inch dish or individual serving glasses.
Follow with half the banana slices, then half the pudding mixture. Repeat the layers, ending with a final layer of vanilla wafers on top. The order matters: wafers, bananas, pudding, repeat.
Step 4: Chill and Let the Flavors Meld
Cover the dish with plastic wrap, pressing it directly onto the surface to prevent a skin from forming. Refrigerate for at least 4 hours (overnight is even better). This chilling time allows the vanilla wafers to soften slightly while keeping their structure.
When ready to serve, the pudding should be thick and creamy, with the bananas still fresh and the wafers tender but not soggy. Garnish with extra whipped cream or a sprinkle of crushed vanilla wafers if desired.
Pro Tips For Making Banana Pudding Recipe With Condensed Milk
- Chill the Mixture: After mixing the pudding, condensed milk, and water, refrigerate for at least 30 minutes before layering. I learned this the hard way—warm pudding turns the wafers soggy instantly.
- Use Very Cold Cream: Whip the heavy cream straight from the fridge, and chill your bowl too. Sounds fussy, but it whips faster and holds peaks better—no sad, deflated topping.
- Skip Overripe Bananas: Firm, just-ripe bananas hold their shape and texture in layers. Overripe ones turn mushy and bleed into the pudding after a few hours.
- Layer Wafers Last: Assemble everything else first, then add the vanilla wafers right before serving. This keeps them crisp and prevents that dreaded soggy-bottom layer.
Common Mistakes When Making banana pudding recipe with condensed milk
Overmixing the Pudding
Whisk the pudding mix just until smooth—2 minutes max. Overmixing introduces too much air, causing the layers to separate. I learned this the hard way during my first attempt at a local BBQ competition dessert round. 💡
Skipping the Rest Time
Let the pudding mixture rest for 5 minutes after adding condensed milk. This prevents a runny mess when layered. The mixture will thicken noticeably—trust the process.
Slicing Bananas Early
Slice bananas just before assembling to prevent browning. I keep a bowl of lemon water nearby if I need to hold them briefly. ¼-inch slices give the best texture distribution.
Using Underripe Bananas
Bananas should be ripe but firm. Overripe ones turn mushy, while green ones lack sweetness. Look for fruit with a few brown speckles—this is the sweet spot.
Improper Layering Order
Always start and end with vanilla wafers. The classic order is wafers, bananas, pudding, repeat. This ensures every bite has all three components.
Rushing the Chill
Refrigerate for at least 4 hours—overnight is ideal. This lets the wafers soften perfectly without becoming soggy. Patience rewards you with the best texture. ❄️
Nutrition Facts
Frequently Asked Questions
Can I use fresh cream instead of whipped?
Yes, but whip it to stiff peaks first. Unwhipped cream will make the layers runny. For best results, chill your bowl and beaters beforehand.
Why do my wafers get soggy too fast?
This usually means the pudding wasn’t thick enough before layering. Ensure you let it rest for 5 minutes after mixing, and chill for at least 4 hours.
Can I make this ahead of time?
It keeps well in the fridge for up to 3 days. The flavors actually meld better overnight. Just cover it tightly with plastic wrap.
What if I don’t have vanilla wafers?
Use shortbread cookies or graham crackers as substitutes. They’ll change the flavor slightly but still work well. For best texture, choose a buttery, crisp cookie.

Trained in classic French technique but raised on slow-cooked ribs and spicy rubs, she blends culinary skill with smoke and soul.
- Recipe for Boneless Pork Chops in Cast Iron Skillet: Sear and Baste to Juicy Perfection - October 3, 2026
- Recipe for Boneless Cross Rib Roast: Slow-Roasted Beef with Herb Crust - October 3, 2026
- Hamburgers in Sauce Recipe Crock Pot: Slow-Cooked Savory Delight - October 3, 2026