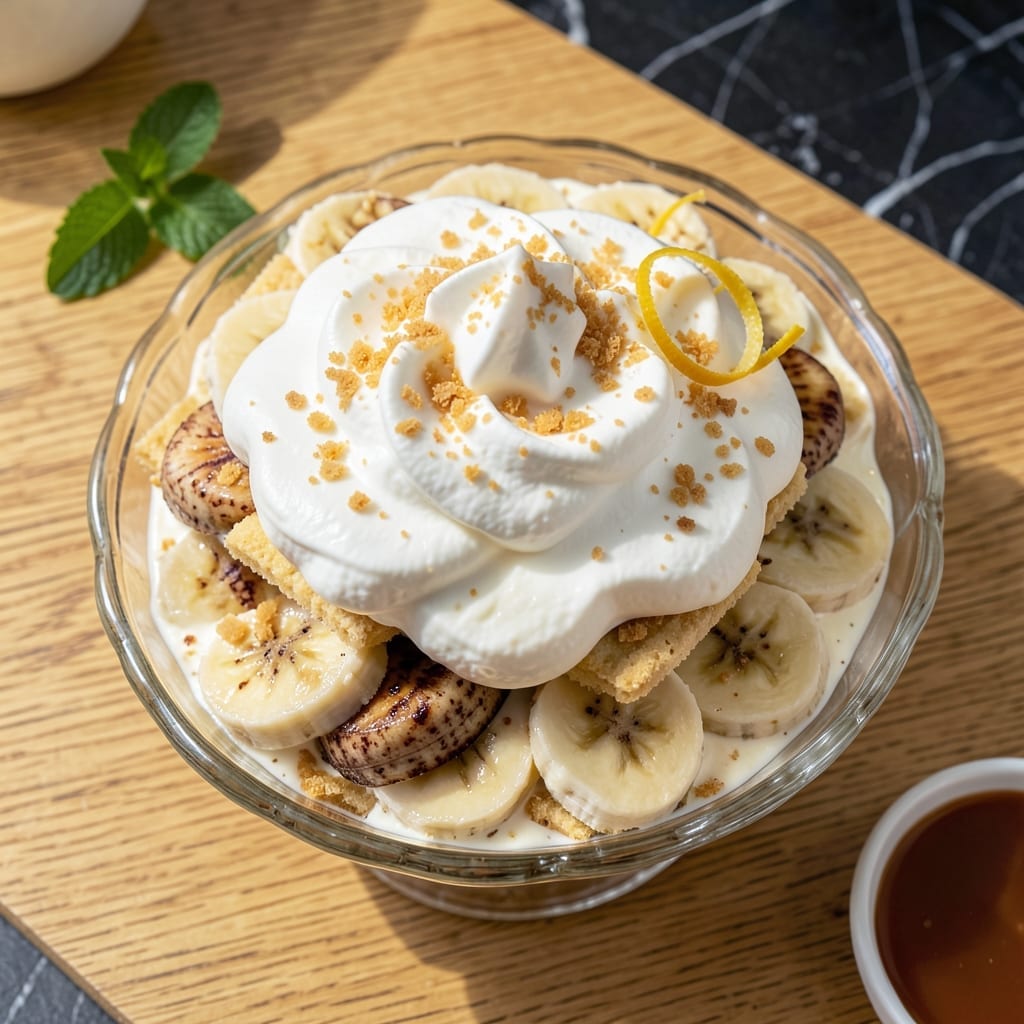
This layered dessert delivers ultra-creamy richness that sets it apart from traditional versions. The cream cheese adds depth while keeping the texture impossibly smooth.
Vanilla wafers provide the perfect crunch against soft banana slices and velvety pudding. Each spoonful offers a balance of textures that makes this dish unforgettable.
Ingredients for Banana Pudding Recipe with Cream Cheese
Creamy layers meet buttery crunch in this indulgent dessert everyone requests.
| Ingredient | Amount | Notes |
|---|---|---|
| Vanilla Wafers 🍪 | 12 oz | Whole, for layering |
| Ripe Bananas 🍌 | 4 whole | Sliced into coins |
| Cream Cheese 🧀 | 8 oz | Full-fat, softened to room temperature |
| Heavy Whipping Cream 🥛 | 2 cups | Cold, for whipping |
| Granulated Sugar 🍚 | ¾ cup | Fine grain preferred |
| Vanilla Extract 🌿 | 2 tsp | Pure vanilla, not imitation |
| Instant Vanilla Pudding Mix 🥄 | 1 package | 3.4 oz box size |
| Whole Milk 🥛 | 1 ½ cups | Cold, for pudding mix |
| Unsalted Butter 🧈 | 2 tbsp | Softened, for cream cheese mixture |
| Confectioners Sugar 🍚 | ¼ cup | For dusting layers |
| Lemon Juice 🍋 | 1 tbsp | Freshly squeezed to prevent browning |
| Salt 🧂 | ¼ tsp | Fine sea salt for balance |
[recipe_ingredient_scaler]
The cream cheese is non-negotiable for that ultra-creamy texture. Philadelphia brand delivers consistent results, but store brands work if that’s what you have. Use full-fat—reduced-fat versions can separate or curdle. For the vanilla wafers, Nilla Wafers are the classic choice, but any buttery vanilla cookie will do. Check the bakery section for fresh boxes—stale wafers lose their crunch.
No cream cheese? Mascarpone or full-fat Greek yogurt (strained through cheesecloth) can substitute, though the texture will differ slightly. Heavy cream can be replaced with coconut cream for a dairy-free alternative. For the pudding mix, Jell-O or Snack Pack brands are reliable. If using a cook-and-serve pudding, prepare it separately and chill thoroughly before layering.
Assemble in a glass dish to show off the layers—keeps in the fridge for 3 days. The banana slices will brown slightly, but the lemon juice helps. For make-ahead, prep components separately and assemble 2 hours before serving. Leftovers? Unlikely, but they freeze surprisingly well for 1 month.
Why You’ll Love This Recipe
- No-Bake Bliss: Honestly, I just layer the wafers, bananas, and cream cheese mixture—no oven, no stress.
- Creamy Dream: The whipped cream cheese and heavy cream make it luxuriously smooth, with just the right sweetness.
- Potluck Hero: I bring this to gatherings, and it’s always the first dish to disappear.
- Budget Friendly: Ripe bananas and simple ingredients mean I can make this without breaking the bank.
Step-by-Step Instructions for Banana Pudding With Cream Cheese
This professional method ensures ultra-creamy layers with perfect vanilla wafer texture every time.
Step 1: Prepare the Cream Cheese Layer
In a mixing bowl, beat the 8 oz cream cheese with the 2 tbsp unsalted butter until completely smooth. The butter should be softened but not melted—this ensures a silky texture without separation.
Gradually add the 0.75 cup granulated sugar, beating for 2-3 minutes until light and fluffy. Incorporate the 2 tsp vanilla extract and 0.25 tsp salt, then set aside. This base layer provides the rich, velvety foundation for the pudding.
Step 2: Whip the Heavy Cream
In a chilled bowl, whip the 2 cups heavy whipping cream to stiff peaks. Start on low speed to avoid splattering, then increase to medium-high once the cream begins to thicken. Watch for the moment the beaters leave distinct trails in the cream.
Gently fold the whipped cream into the cream cheese mixture using a spatula. Work in three additions to maintain volume, cutting through the center of the bowl and lifting from the bottom each time. The result should be billowy with no streaks of cream cheese visible.
Step 3: Prepare the Pudding Layer
In a separate bowl, whisk together the 1 package instant vanilla pudding mix with the 1.5 cups whole milk for 2 minutes. The mixture will thicken noticeably as you work—this is the pudding setting properly.
Let the pudding rest for 5 minutes to fully set. It should hold its shape when spooned but still be spreadable. This layer adds the classic vanilla pudding flavor that complements the cream cheese beautifully.
Step 4: Slice Bananas and Assemble Layers
Peel and slice the 4 whole ripe bananas into ¼-inch thick coins. Toss immediately with the 1 tbsp lemon juice to prevent browning. The lemon juice preserves the vibrant color without altering the flavor profile.
Begin assembly in a 9×13-inch dish with a layer of 12 oz vanilla wafers. Follow with half the banana slices, then spread half the cream cheese mixture. Dust lightly with 0.25 cup confectioners sugar. Repeat layers, finishing with vanilla wafers on top.
Step 5: Chill and Set
Cover the dish with plastic wrap, pressing it directly onto the surface to prevent a skin from forming. Refrigerate for at least 4 hours, or ideally overnight. This chilling time allows the wafers to soften slightly while maintaining their crunch.
The pudding reaches its peak texture after 6-8 hours of chilling. The layers will meld together while still maintaining distinct textures—the hallmark of a properly executed banana pudding. Serve chilled with any remaining confectioners sugar dusted on top.
Pro Tips For Making Banana Pudding Recipe With Cream Cheese
- Soften the Cream Cheese: Leave it on the counter for at least 30 minutes before mixing—I learned this the hard way after ending up with lumpy filling.
- Chill Between Layers: Pop the pudding in the fridge for 15 minutes between layers to keep the Vanilla Wafers from getting soggy too fast.
- Use Very Ripe Bananas: The ones with brown spots are sweeter and mash easier, which actually changes the outcome of your pudding’s flavor.
- Whip Cream Last: Fold in the whipped heavy cream right before assembling so it stays light and fluffy instead of deflating.
Pro Cooking Tips for Perfect Results
Room Temperature Matters
Always bring your 8 oz cream cheese and 2 tbsp unsalted butter to room temperature before mixing. Cold cream cheese creates lumps that are nearly impossible to smooth out. I leave mine on the counter for 1-2 hours before starting. 💡
Whipping Cream Perfection
Use a chilled bowl and beaters when whipping the 2 cups heavy whipping cream. The colder the cream, the faster it will reach stiff peaks. I prefer using a stand mixer for this step—it gives me more control over the texture.
Layering Technique
Press the 12 oz vanilla wafers lightly into the cream cheese mixture to help them adhere. This prevents shifting when you add subsequent layers. I also dust each layer with confectioners sugar to enhance the vanilla flavor.
Banana Prep Tip
Slice the 4 ripe bananas just before assembling to prevent browning. Toss them immediately with the 1 tbsp lemon juice. For extra freshness, I brush the banana slices with a bit of the lemon juice as I layer them.
Chilling Time
Don’t rush the chilling process—this dessert needs at least 4 hours in the fridge. Overnight is even better. The vanilla wafers will soften just enough to blend with the layers while keeping their signature crunch. 🍪
Pudding Mix Hack
Whisk the 1 package instant vanilla pudding mix with 1.5 cups whole milk for the full 2 minutes. This ensures it sets properly without any grainy texture. I’ve found that Jell-O brand gives the smoothest results.
Nutrition Facts
Frequently Asked Questions
Can I use reduced-fat cream cheese?
Full-fat is recommended for the creamiest texture. Reduced-fat may separate or create a grainy consistency. Stick with the full-fat version for best results.
How far in advance can I assemble this?
Assemble up to 1 day ahead for optimal texture. The wafers soften just enough while keeping their crunch. Cover tightly with plastic wrap pressed directly onto the surface.
What if my pudding layer is too thick?
If it sets too firmly, fold in 1-2 tbsp milk to loosen it before layering. Work quickly as the pudding will continue to thicken.
Can I substitute graham crackers for vanilla wafers?
Yes, but the flavor profile will differ. Graham crackers add a spiced note. For closest results, use shortbread cookies or sugar cookies instead.

Trained in classic French technique but raised on slow-cooked ribs and spicy rubs, she blends culinary skill with smoke and soul.
- Recipe for Boneless Pork Chops in Cast Iron Skillet: Sear and Baste to Juicy Perfection - October 3, 2026
- Recipe for Boneless Cross Rib Roast: Slow-Roasted Beef with Herb Crust - October 3, 2026
- Hamburgers in Sauce Recipe Crock Pot: Slow-Cooked Savory Delight - October 3, 2026