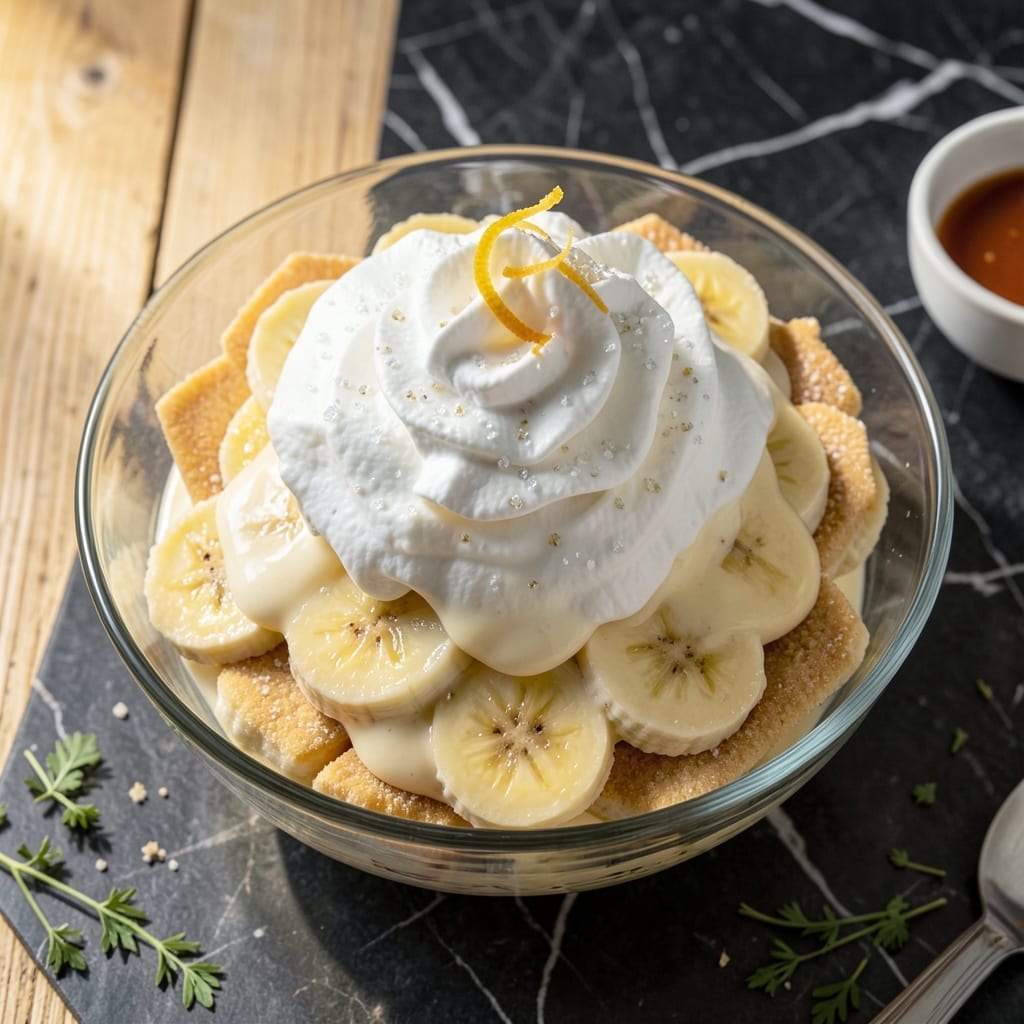
This layered dessert transforms simple ingredients into a showstopping treat that’s impossible to resist. The combination of vanilla wafers, fresh bananas, and creamy pudding creates a texture contrast that’s both comforting and indulgent.
With minimal effort and no baking required, this recipe delivers a restaurant-quality dessert in under 15 minutes. The key is layering everything while the pudding is still soft, allowing the flavors to meld perfectly as it chills.
Ingredients for Banana Pudding Recipe with Pudding
Simple, elegant ingredients create this no-bake layered dessert masterpiece with ease.
| Ingredient | Amount | Notes |
|---|---|---|
| Vanilla Wafers 🍪 | 12 oz | About 48 wafers, standard box |
| Fresh Bananas 🍌 | 4 whole | Ripe but firm, sliced |
| Instant Vanilla Pudding Mix 🥣 | 2 boxes | 3.4 oz each, Jell-O brand |
| Whole Milk 🥛 | 3 cups | Cold, for pudding preparation |
| Heavy Whipping Cream 🥣 | 1 cup | Whipped to stiff peaks |
| Granulated Sugar 🧂 | 2 tbsp | For sweetening whipped cream |
| Pure Vanilla Extract 🌿 | 1 tsp | For enhanced flavor depth |
| Unsalted Butter 🧈 | 2 tbsp | Melted, optional for topping |
| Ground Cinnamon 🌿 | ¼ tsp | Light dusting for garnish |
| Salt 🧂 | 0.125 tsp | Pinch for balance |
[recipe_ingredient_scaler]
The vanilla wafers are non-negotiable—Nilla Wafers are the gold standard here, found in any grocery store baking aisle. For the pudding, Jell-O brand instant vanilla has the right consistency and sets perfectly every time. Use whole milk for the creamiest texture; low-fat versions can make the pudding too thin. The bananas should be ripe enough to be sweet but still firm enough to slice cleanly (no mushy spots).
No instant pudding? Cooked vanilla pudding works but requires chilling first—add an extra hour. For a lighter version, swap heavy cream for coconut cream (chilled overnight). Vanilla wafers can be shortbread cookies in a pinch, though the texture changes slightly. If you’re out of vanilla extract, a vanilla bean scraped into the pudding adds luxury.
Assemble in a 9×13-inch dish for easy serving. Leftovers keep 2-3 days in the fridge (cover tightly with plastic wrap). The wafers will soften over time but the flavors deepen. For make-ahead, prep components separately and layer the morning of serving.
Why You’ll Love This Recipe
- No-Fuss Layers: I just dump the pudding mix with milk, fold in whipped cream, and stack it with wafers and bananas—no baking, no stress.
- Creamy Dreamy Bite: The vanilla wafers soften just enough to soak up that rich pudding-cream mix, with fresh banana slices adding the perfect sweet contrast.
- Potluck MVP: I’ve brought this to picnics, BBQs, and even a last-minute office lunch—always the first dish emptied.
- Budget-Friendly Batch: Five simple ingredients, most of which I already have, and it feeds a crowd without breaking the bank.
Step-by-Step Instructions for Banana Pudding With Pudding
This method ensures perfectly layered texture with creamy pudding and fresh bananas every time.
Step 1: Prepare the Vanilla Pudding Base
In a large mixing bowl, whisk together the 2 boxes Instant Vanilla Pudding Mix with the 3 cups Whole Milk for 2 minutes until completely smooth and slightly thickened. The pudding should hold a soft peak when you lift the whisk.
Let the mixture sit for 5 minutes to allow it to set fully. This resting period is crucial—it transforms the pudding from a thin liquid to a rich, creamy base that will hold its shape when layered. The texture should resemble soft custard, not runny liquid.
Step 2: Whip the Cream to Stiff Peaks
In a chilled metal bowl, combine the 1 cup Heavy Whipping Cream, 2 tbsp Granulated Sugar, and 1 tsp Pure Vanilla Extract. Using a hand mixer or whisk, beat on high speed until the cream forms stiff peaks.
Watch for the moment when the beaters leave distinct trails in the cream that hold their shape. This usually takes 2-3 minutes. Over-whipping will turn it to butter, so stop as soon as you see those firm, glossy peaks forming.
Step 3: Slice Bananas and Prepare Layers
Peel and slice the 4 whole Fresh Bananas into ¼-inch thick rounds. For best results, use bananas that are ripe but still firm—they should have just a few brown speckles. Toss the slices lightly in a pinch of the 0.125 tsp Salt to enhance their natural sweetness.
Arrange a single layer of 12 oz Vanilla Wafers in the bottom of your serving dish. I use a 9×13-inch glass dish for this recipe, but individual servings work just as well. The wafers should cover the bottom completely without overlapping.
Step 4: Assemble the Layered Pudding
Begin with a layer of ½ the pudding mixture, spreading it evenly over the vanilla wafers. Follow with a single layer of banana slices, arranging them to cover the pudding completely. Repeat with the remaining pudding, then add another layer of vanilla wafers.
Finally, spread the whipped cream evenly over the top layer. Use a spatula to create decorative swirls or peaks. The layers should be distinct but will meld together slightly as the dessert rests.
Step 5: Chill and Garnish for Serving
Cover the dish with plastic wrap and refrigerate for at least 4 hours, or preferably overnight. This chilling time allows the vanilla wafers to soften slightly while maintaining their structure, creating that signature pudding consistency.
Just before serving, melt the 2 tbsp Unsalted Butter and drizzle it lightly over the top. Finish with a dusting of 0.25 tsp Ground Cinnamon for a subtle warmth that complements the sweet layers beneath.
Pro Tips For Making Banana Pudding Recipe With Pudding
- Chill the Pudding: After mixing the pudding, refrigerate it for at least 20 minutes before layering—I learned this the hard way when my layers kept sliding apart.
- Slice Bananas Last: Cut the bananas right before assembling to prevent browning, especially if you’re not using lemon juice.
- Skip the Warm Milk: Use cold whole milk for the pudding mix to avoid a grainy texture; warm milk activates the thickeners too fast.
- Whip Cream First: Fold whipped heavy cream into the set pudding for a lighter texture instead of mixing it in from the start—it holds its shape better.
Wine and Beer Pairings for This banana pudding recipe with pudding
Dessert Wine Pairings
A chilled glass of Moscato d’Asti from Italy offers a perfect match with its light effervescence and notes of peach and apricot. The subtle sweetness enhances the vanilla and banana flavors without overpowering them. I love the Saracco Moscato d’Asti for its consistent quality. 🍷
Creamy Dessert Wines
For something richer, try a Late Harvest Riesling—its honeyed sweetness and bright acidity cut through the creaminess of the pudding. Look for bottles from Washington State or Germany. These wines have enough body to stand up to the layered textures.
Beer Pairings
Surprisingly, a Belgian Tripel like Westmalle Tripel works beautifully. The beer’s spicy yeast notes and light sweetness complement the dessert’s vanilla and banana. Serve it slightly chilled in a tulip glass to concentrate the aromas. 🍺
Non-Alcoholic Options
For a non-alcoholic pairing, try a sparkling apple cider like Martinelli’s Gold. The bubbles and crisp apple flavor refresh your palate between bites. Alternatively, a vanilla chai tea served over ice brings out the warm spices in the dessert.
Coffee Pairings
A light cold brew coffee with a splash of cream mirrors the dessert’s creamy texture. The bitterness balances the sweetness beautifully. I recommend Stumptown Coffee Roasters’ cold brew for its smooth, low-acid profile. ☕
Nutrition Facts
Frequently Asked Questions
Can I use cook-and-serve pudding instead of instant?
Yes, but you’ll need to prepare it first and let it cool completely. This adds about 1 hour to your prep time. The texture may be slightly different but still delicious.
How long will the layers stay crisp?
The wafers soften as they absorb moisture. For best texture, assemble 4-6 hours before serving. After 24 hours, they’ll be fully softened but still tasty.
Why did my pudding turn out runny?
This usually means the pudding didn’t set properly.
Can I make this with gluten-free cookies? Use your favorite gluten-free vanilla wafers. The flavor will be nearly identical, though the texture might be slightly different. Check that they’re sturdy enough for layering.

Trained in classic French technique but raised on slow-cooked ribs and spicy rubs, she blends culinary skill with smoke and soul.
- Recipe for Boneless Pork Chops in Cast Iron Skillet: Sear and Baste to Juicy Perfection - October 3, 2026
- Recipe for Boneless Cross Rib Roast: Slow-Roasted Beef with Herb Crust - October 3, 2026
- Hamburgers in Sauce Recipe Crock Pot: Slow-Cooked Savory Delight - October 3, 2026