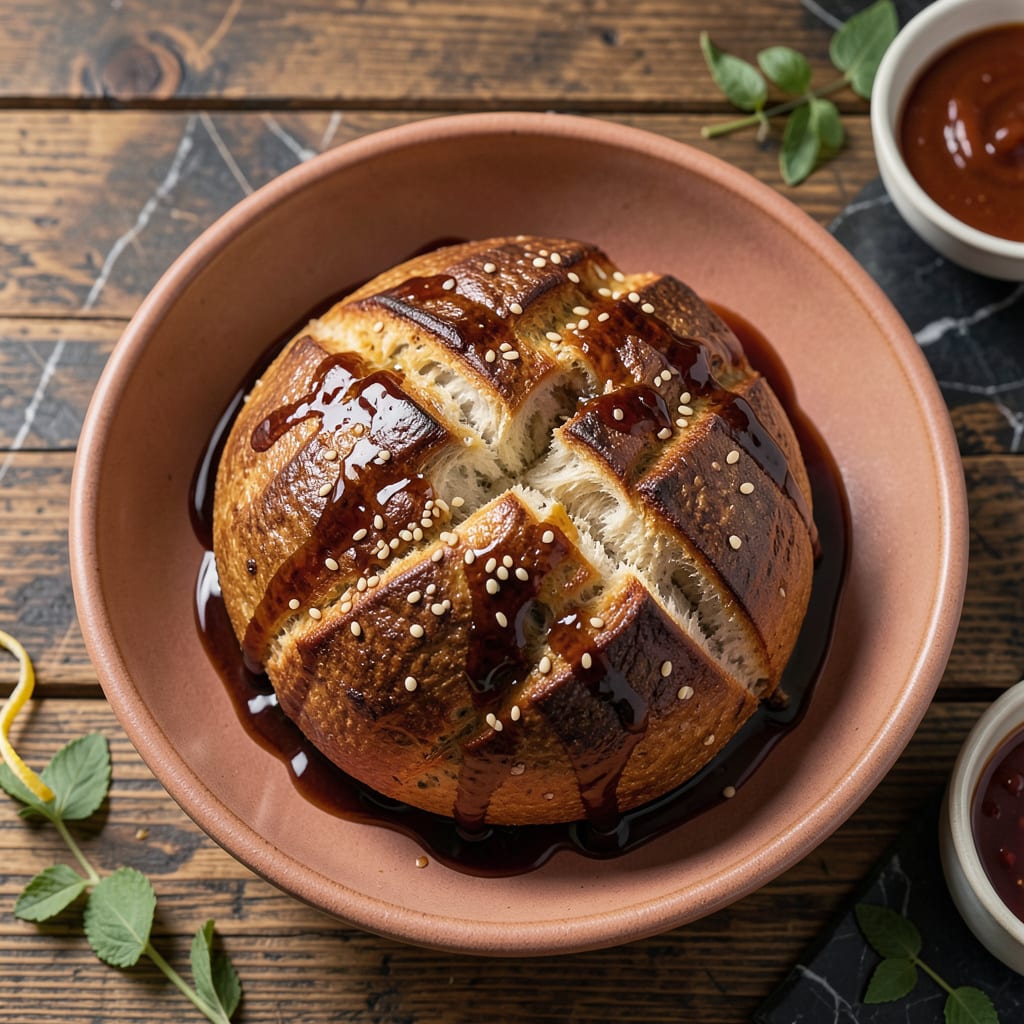
There’s nothing like the smell of bread kissed by open flames to bring a cookout to the next level. This recipe captures that perfect balance of soft interior and charred edges that only direct heat can create.
Using a simple dough enhanced with BBQ seasoning, you’ll achieve a bread that’s both tender and packed with smoky flavor. The grill transforms it into something truly special.
Ingredients for Bbq Bread
Simple dough with smoky BBQ seasoning delivers that perfect grill-kissed bread every time.
| Ingredient | Amount | Notes |
|---|---|---|
| All-Purpose Flour 🌾 | 4 cups | Plus extra for dusting |
| Active Dry Yeast 🍞 | 2 ¼ tsp | One packet, proofed in warm water |
| Granulated Sugar 🧈 | 1 tbsp | Feeds the yeast |
| Warm Water 💧 | 1 ¼ cups | 110°F, for yeast activation |
| Olive Oil 🫒 | 2 tbsp | Extra-virgin for richness |
| Salt 🧂 | 1 ½ tsp | Kosher or sea salt |
| BBQ Seasoning 🌶️ | 2 tbsp | Smoky blend preferred |
| Garlic Powder 🧄 | 1 tsp | Enhances savory depth |
| Onion Powder 🧅 | 1 tsp | Adds subtle sweetness |
| Cornmeal 🌽 | ½ cup | For dusting grill surface |
| Unsalted Butter 🧈 | 4 tbsp | Melted, for brushing |
| Fresh Cilantro 🌿 | ¼ cup | Chopped, for garnish |
[recipe_ingredient_scaler]
The BBQ seasoning is key here. Penzeys or Weber make excellent blends with balanced smoke and spice. For the flour, King Arthur all-purpose is my go-to—consistent results every time. Yeast freshness matters: check the expiration date, and if it’s been in your pantry for a while, test it in warm water with sugar first. The cornmeal prevents sticking and adds a nice crunch, so don’t skip it (worth the extra minute).
No BBQ seasoning? Mix smoked paprika, brown sugar, and a pinch of cayenne—gets you close. Out of fresh cilantro? Green onions or parsley work fine for garnish. If you’re avoiding dairy, swap the butter for olive oil—not quite the same richness but still delicious. The dough can be made a day ahead; just let it rise in the fridge overnight (slower fermentation = more flavor).
The dough keeps in the fridge for 2 days before shaping. Baked loaves are best fresh but will stay soft for 24 hours wrapped in foil. For longer storage, slice and freeze—reheat on the grill or in a toaster oven for that just-charred taste. Always bring butter to room temperature before brushing for even coverage.
Why You’ll Love This Recipe
- No-Fuss Dough: I mix flour, yeast, sugar, and warm water—no fancy steps, just let it rise while I prep the grill.
- Smoky Sweetness: The olive oil in the dough gives it a rich base that soaks up BBQ sauce like a dream.
- Crowd Pleaser: Honestly, it’s my go-to for potlucks—tear-and-share bread that disappears fast.
- Penny Wise: Five basic pantry staples, and it makes enough to stretch for days. Between us, it’s cheaper than takeout.
Step-by-Step Instructions for BBQ Bread
Here’s the method. Straightforward, tested, works every time.
Step 1: Activate the Yeast and Prepare the Dough
In a large bowl, whisk together the 1.25 cups warm water, 1 tbsp granulated sugar, and 2.25 tsp active dry yeast. Let it sit for 5-10 minutes until the mixture becomes frothy—this confirms the yeast is alive and active.
Add the 2 tbsp olive oil, 4 cups all-purpose flour, 1.5 tsp salt, 2 tbsp BBQ seasoning, 1 tsp garlic powder, and 1 tsp onion powder. Mix until a shaggy dough forms. The dough will be slightly sticky but should pull away from the sides of the bowl.
Step 2: Knead and Let the Dough Rise
Turn the dough out onto a lightly floured surface and knead for 8-10 minutes until smooth and elastic. I press the dough with the heel of my hand, fold it over, and repeat—this builds the gluten that gives the bread structure.
Place the dough in a greased bowl, cover with a damp towel, and let it rise in a warm place for 1-2 hours or until doubled in size. You’ll know it’s ready when it doesn’t spring back immediately when pressed gently with a finger.
Step 3: Shape and Prepare for Grilling
Punch down the risen dough to release the air and divide it into 4 equal portions. Roll each portion into a ½-inch thick round or oval shape. The thickness ensures even cooking on the grill without burning the outside before the inside is done.
Dust your work surface and the shaped dough lightly with 0.5 cup cornmeal to prevent sticking and add a subtle crunch to the crust. Let the dough rest for 15 minutes while you preheat your grill.
Step 4: Grill to Perfection
Preheat your grill to medium-high heat (about 400°F). Clean the grates thoroughly and oil them lightly to prevent sticking. Place the dough rounds directly on the grates and close the lid. Cook for 3-4 minutes per side until the bread has grill marks and sounds hollow when tapped.
Watch closely—if the grill runs hot, the bread can char quickly. You want a balance of soft, pillowy interiors with slightly charred edges for that signature smoky flavor.
Step 5: Finish and Serve
Remove the bread from the grill and immediately brush the tops with 4 tbsp melted unsalted butter. This adds richness and a glossy finish. Let the bread cool for 5 minutes before slicing.
Garnish with 0.25 cup chopped fresh cilantro for a pop of color and freshness. Serve warm, straight off the grill, for the best texture and flavor. Each piece should have a soft, slightly chewy interior with a crisp, charred exterior.
Pro Tips For Making Bbq Bread
- Test the Water: Use a thermometer to check your warm water is between 105-110°F—any hotter and you’ll kill the yeast, any colder and it won’t activate. I learned this the hard way after wasting a cup of flour on a dough that never rose.
- Activate the Yeast: Mix the yeast and sugar with the warm water first and let it sit for 5-10 minutes until foamy. If it doesn’t bubble, your yeast is dead—skip it and start over.
- Don’t Over-Flour: Resist the urge to dump extra flour on the counter when kneading. The dough should be slightly sticky—adding too much flour makes the bread dense and dry.
- Use Room-Temp Oil: Take the olive oil out of the pantry 10 minutes before mixing. Cold oil can shock the yeast and slow down the rising process, and room-temp oil blends into the dough more evenly.
Storing and Reheating bbq bread
Room Temperature Storage
For same-day serving, keep your bread wrapped in aluminum foil at room temperature. It stays soft for up to 24 hours this way. I learned this trick at local BBQ competitions—foil locks in moisture better than plastic. 💡
Refrigerator Storage
For longer freshness, transfer cooled bread to an airtight container or zip-top bag. It’ll keep in the fridge for 3-4 days. Reheat before serving to restore that just-grilled texture.
Freezing for Later
Slice the bread and wrap individual pieces in plastic wrap, then place in a freezer bag. It freezes well for up to 1 month. For best results, freeze the same day it’s made.
Reheating on Grill
Wrap bread in foil and warm on the grill over medium-low heat for 5-7 minutes. This method revives the smoky flavor beautifully. I brush with extra butter after reheating.
Oven Reheating
Preheat oven to 350°F, wrap bread in foil, and heat for 8-10 minutes. For crispier edges, unwrap and bake for 2 more minutes. Perfect for when the grill isn’t handy. 🔥
Toaster Oven Trick
For single servings, toast slices in a toaster oven at 375°F for 3-4 minutes. This gives you that charred edge without firing up the grill. Great for quick weeknight dinners.
Nutrition Facts

Trained in classic French technique but raised on slow-cooked ribs and spicy rubs, she blends culinary skill with smoke and soul.
- Recipe for Boneless Pork Chops in Cast Iron Skillet: Sear and Baste to Juicy Perfection - October 3, 2026
- Recipe for Boneless Cross Rib Roast: Slow-Roasted Beef with Herb Crust - October 3, 2026
- Hamburgers in Sauce Recipe Crock Pot: Slow-Cooked Savory Delight - October 3, 2026