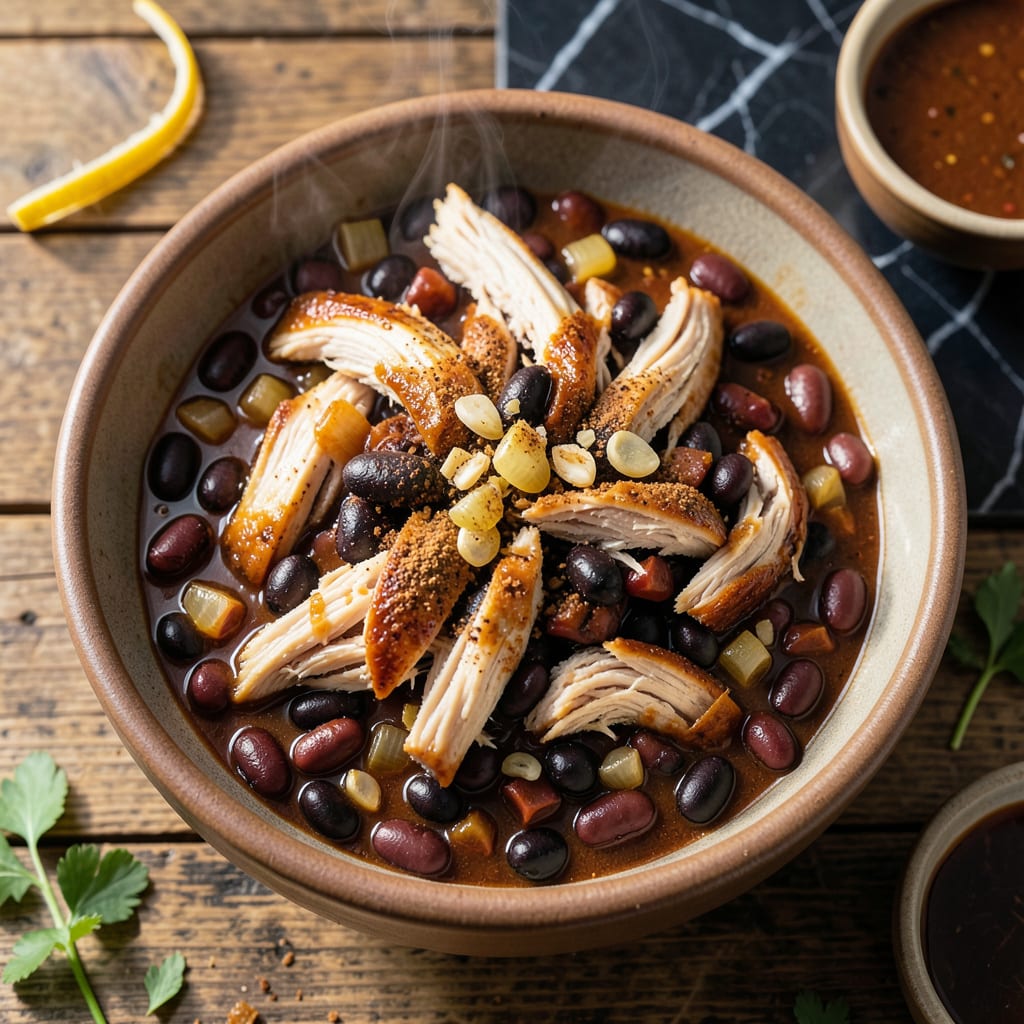
There’s nothing like the deep, smoky aroma of chili that’s been simmered low and slow. This version brings together tender chicken, bold BBQ flavors, and just the right amount of heat to create a bowl that’s rich and satisfying.
I developed this recipe to capture that classic backyard cookout taste in a hearty stew. The BBQ sauce adds sweetness and tang, while the spices build layers of warmth that make every spoonful unforgettable.
Ingredients for Bbq Chicken Chili
A handful of pantry staples plus fresh chicken deliver that smoky backyard cookout taste.
| Ingredient | Amount | Notes |
|---|---|---|
| Boneless Skinless Chicken Thighs 🍗 | 1 ½ lb | Trimmed of excess fat |
| BBQ Sauce 🍯 | 1 ½ cups | Thick, smoky variety preferred |
| Canned Black Beans 🫘 | 2 cans | Drained and rinsed |
| Canned Kidney Beans 🫘 | 1 can | Drained and rinsed |
| Yellow Onion 🧅 | 1 whole | Medium, finely diced |
| Garlic Cloves 🧄 | 3 cloves | Minced for depth |
| Bell Pepper 🌶️ | 1 whole | Red or green, diced |
| Chicken Broth 💧 | 2 cups | Low-sodium preferred |
| Diced Tomatoes 🍅 | 1 can | Fire-roasted for smokiness |
| Chili Powder 🌶️ | 2 tbsp | Adjust for heat preference |
| Ground Cumin 🌿 | 1 tbsp | Toasted for warmth |
| Smoked Paprika 🌶️ | 1 tsp | Key for smoky depth |
| Salt 🧂 | 1 tsp | Kosher or sea salt |
| Black Pepper 🌶️ | ½ tsp | Freshly ground preferred |
| Olive Oil 🫒 | 2 tbsp | For sautéing onions |
[recipe_ingredient_scaler]
The chicken thighs are non-negotiable here. Bone-in adds more flavor but boneless saves time—your call. I grab mine from Whole Foods for consistent quality, but any supermarket will do. Look for thighs with good marbling (the white fat streaks). The BBQ sauce makes or breaks this, so avoid the super cheap brands—Stubs or Sweet Baby Ray’s work well. Canned beans? Bush’s or Goya are reliable.
No boneless thighs? Chicken breasts work too but cook faster and can get dry. Swap kidney beans for pinto if that’s what’s in the pantry. Fresh out of BBQ sauce? Ketchup plus a dash of liquid smoke and brown sugar gets you close. The smoked paprika is key though—don’t skip it. Bell peppers can be any color, but red adds natural sweetness. Dried beans? Soak overnight, then use 3 cups cooked instead of canned.
This chili actually gets better overnight. Store in the fridge for up to 4 days or freeze for 3 months. Portion into containers for easy lunches. Reheat on the stove with a splash of broth if it thickens too much. Always taste before serving—the flavors deepen after sitting.
Why You’ll Love This Recipe
- One Pot Wonder: I love that I can dump the chicken thighs, BBQ sauce, and beans into a single pot and let it simmer—minimal cleanup, maximum flavor.
- Smoky Sweet Perfection: The BBQ sauce caramelizes into the chicken and beans, giving that sticky, smoky-sweet depth I crave in every bite.
- Meal Prep Hero: Between us, this tastes even better the next day, so I make a big batch for lunches all week.
- Budget Stretcher: Honestly, canned beans and chicken thighs keep this hearty and affordable without sacrificing an ounce of satisfaction.
Step-by-Step Instructions for BBQ Chicken Chili
This method delivers rich, smoky-sweet chili with tender chicken and perfect consistency.
Step 1: Sauté Aromatics and Brown Chicken
Heat the 2 tbsp olive oil in a large pot over medium-high heat. Add the finely diced yellow onion and cook for 3-4 minutes until translucent and soft. Stir in the minced garlic cloves and cook for 30 seconds until fragrant.
Add the 1.5 lb boneless skinless chicken thighs, breaking them up with a wooden spoon as they cook. Continue until the chicken is no longer pink, about 5-6 minutes. This builds a flavorful base and ensures the chicken absorbs the spices.
Step 2: Build Flavor with Spices and Vegetables
Stir in the 2 tbsp chili powder, 1 tbsp ground cumin, 1 tsp smoked paprika, 1 tsp salt, and 0.5 tsp black pepper. Cook for 1 minute to toast the spices, which deepens their flavor.
Add the diced bell pepper and cook for 3-4 minutes until it begins to soften. This step ensures all the aromatics meld together before adding the liquid ingredients.
Step 3: Simmer with Beans and Liquids
Pour in the 2 cups chicken broth, 1 can diced tomatoes, 2 cans canned black beans, and 1 can canned kidney beans. Stir well and bring to a gentle boil. Reduce heat to medium-low and let the chili simmer uncovered for 15 minutes.
This allows the flavors to meld and the chicken to become fully tender. Stir occasionally to prevent sticking and ensure even cooking.
Step 4: Finish with BBQ Sauce and Thicken
Stir in the 1.5 cups BBQ sauce and simmer for an additional 10-15 minutes. The sauce should thicken slightly, and the chili should reach a rich, deep color with a glossy finish.
Taste and adjust seasoning if needed, though the BBQ sauce adds its own saltiness and sweetness. The chili is ready when the chicken is fully cooked and the flavors are well-balanced.
Ladle into bowls and serve warm. The chili should have a hearty texture with a smoky, slightly sweet finish from the BBQ sauce.
Pro Tips For Making Bbq Chicken Chili
- Brown the Chicken: Sear the boneless skinless chicken thighs in batches over medium-high heat until deeply browned—about 4-5 minutes per side. I learned this the hard way: skipping this step leaves the chili tasting flat, no matter how good your BBQ sauce is.
- Drain and Rinse Beans: Always drain and rinse the canned black and kidney beans under cold water. It washes off the starchy canning liquid, which can make your chili taste metallic or overly thick.
- Skip the Raw Onions: Sauté the yellow onion until soft and just starting to caramelize before adding other ingredients. Sounds like a small thing, but raw onions stay harsh and crunchy in the finished dish.
- Simmer Low and Slow: Once everything’s in the pot, keep it at a gentle simmer—not a boil—for at least 30 minutes. After burning a batch early on, I now know high heat turns the BBQ sauce bitter and makes the chicken tough.
Storing and Reheating bbq chicken chili
Fridge Storage
Let the chili cool for no more than 2 hours before transferring to airtight containers. I use glass mason jars for easy portioning. It’ll keep in the fridge at 40°F or below for up to 4 days. The flavors actually deepen overnight, making leftovers taste even better. ❄️
Freezer Method
For longer storage, portion into freezer-safe bags or containers. Leave 1-inch headspace for expansion. I prefer flat freezer bags—they stack neatly and thaw faster. Your creation will stay fresh for up to 3 months without losing quality.
Stovetop Reheating
My go-to method: warm over medium-low heat in a heavy pot. Add ¼ cup chicken broth if it thickens too much. Stir occasionally to prevent sticking. It’ll be ready in 10-15 minutes when heated through to 165°F. 🔥
Microwave Option
For quick meals, transfer a single portion to a microwave-safe bowl. Cover with a damp paper towel and heat on 70% power for 2-3 minutes. Stir, then continue in 1-minute bursts until reaching 165°F.
Thawing First
If frozen, thaw overnight in the fridge or use the defrost setting on your microwave. Never reheat from frozen directly—this ensures even heating and prevents cold spots. I always give it a good stir halfway through thawing.
Nutrition Facts

Trained in classic French technique but raised on slow-cooked ribs and spicy rubs, she blends culinary skill with smoke and soul.
- Recipe for Boneless Pork Chops in Cast Iron Skillet: Sear and Baste to Juicy Perfection - October 3, 2026
- Recipe for Boneless Cross Rib Roast: Slow-Roasted Beef with Herb Crust - October 3, 2026
- Hamburgers in Sauce Recipe Crock Pot: Slow-Cooked Savory Delight - October 3, 2026