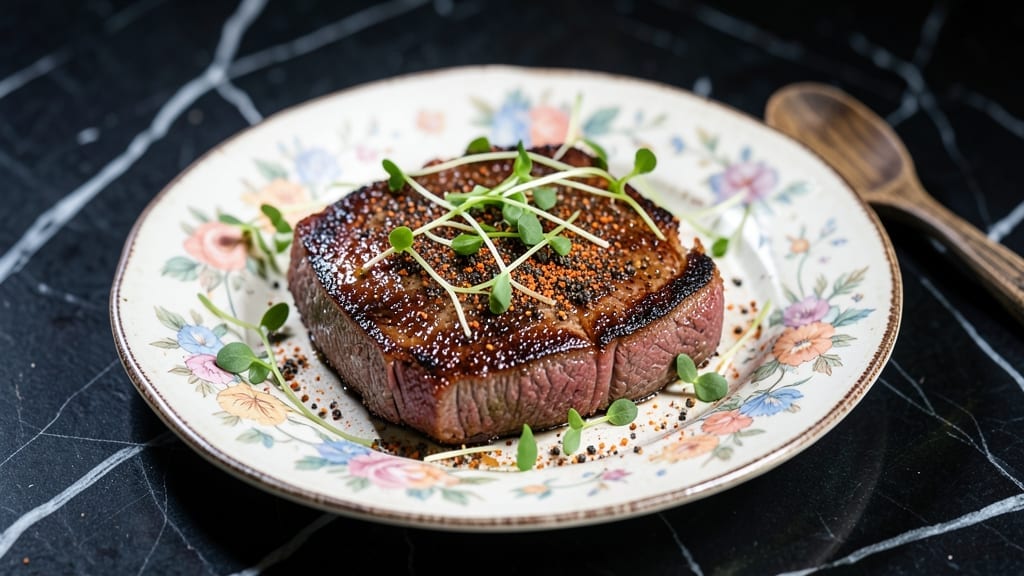
Mastering a beef brisket flat oven recipe transforms tough cuts into melt-in-your-mouth perfection with minimal effort. 💛 I developed this method after years of experimenting with slow-cooked brisket, and the results speak for themselves—tender, juicy meat that practically falls apart at the touch.
The secret lies in precise temperature control and a simple seasoning blend that enhances rather than overpowers the natural beef flavor.
This recipe delivers restaurant-quality results without requiring a smoker or hours of babysitting. You’ll start with a high-heat sear to lock in juices, then finish in a low oven where the meat cooks gently for hours, developing deep, rich flavors.
The beauty of this method is its simplicity—just a few pantry staples and one pan, yet the outcome is undeniably impressive. No special equipment or advanced techniques are needed, making it accessible for home cooks of all skill levels.
By the time you’re done, you’ll have a perfectly cooked brisket flat with a tender, almost buttery texture and a crust that’s just right—not too tough, not too soft. The aroma alone will have everyone gathering at the table, and each bite delivers that satisfying combination of juiciness and depth.
This is the kind of dish that makes weeknight dinners feel like a special occasion, without the fuss of traditional slow-cooking methods.
Serve it with classic sides like baked potatoes, coleslaw, or cornbread for a complete meal that’s sure to impress. The leftovers reheat beautifully too, making this recipe perfect for meal prep or feeding a crowd. Let’s get started on creating your juiciest brisket yet!
Ingredients for beef brisket flat oven
A few pantry staples and one pan create restaurant-quality brisket perfection.
| Ingredient | Amount | Notes |
|---|---|---|
| Beef Brisket Flat Cut 🥩 | 4 lb | Fat cap trimmed, 1-inch thick |
| Kosher Salt 🧂 | 2 tbsp | Diamond Crystal preferred |
| Black Pepper 🌶️ | 1 tbsp | Freshly ground, coarse |
| Garlic Powder 🧄 | 1 tsp | Not garlic salt |
| Onion Powder 🧅 | 1 tsp | Freshly ground preferred |
| Brown Sugar 🍚 | 1 tbsp | Light or dark variety |
| Smoked Paprika 🌶️ | 1 tbsp | For depth of flavor |
| Dried Thyme 🌿 | 1 tsp | Mexican oregano alternative |
| Olive Oil 🫒 | ½ cup | Extra-virgin, for searing |
| Beef Broth 💧 | 2 cups | Low-sodium preferred |
| Apple Cider Vinegar 🍎 | 2 tbsp | For tenderizing |
| Butter 🧈 | 4 tbsp | Full-fat, for basting |
| Fresh Rosemary 🌱 | 1 tbsp | Chopped, for garnish |
[recipe_ingredient_scaler]
The beef is everything here—look for a brisket flat cut with visible marbling from Costco or Whole Foods. 1-inch thickness cooks more evenly than thinner cuts. Trim the fat cap to 1/4 inch for a balance of flavor and tenderness. I always buy mine pre-trimmed from ButcherBox—saves time and ensures consistency. The cut should feel slightly springy when pressed, not mushy or overly firm.
No beef broth? Chicken broth with 1 tbsp Worcestershire sauce works in a pinch. Dried thyme at half the amount is fine, but fresh thyme adds a brighter note. Want to skip the vinegar? 1 tbsp lemon juice tenderizes just as well. The smoked paprika is non-negotiable for that classic brisket aroma—Penzeys or McCormick both have great options. For the olive oil, Califonia Olive Ranch is my go-to—it stands up to high heat without burning.
Sear the beef in batches to avoid crowding the pan. 400°F oven keeps the meat warm while you baste it every 30 minutes. The brisket reheats beautifully—just cover with foil and warm on low for 20-30 minutes. Store leftovers in the fridge for up to 5 days, or freeze portions for 3 months. I always double the recipe and freeze half—weeknight lunches sorted. The crust develops best when you let it rest 10 minutes before slicing, so don’t skip that step.
Why You’ll Love This Recipe
- Dutch Oven Done Right: That Dutch oven method? It’s my secret weapon for when I don’t want to babysit the stove. The high heat sears the brisket in just 16 minutes—no flipping every five seconds—and then the oven does all the heavy lifting while I grab a beer.
- Flavor Bomb: The smoked paprika and brown sugar caramelize into this sticky, savory crust while the apple cider vinegar tenderizes the meat from the inside out. That crispy edge with the creamy center? Chef’s kiss.
- Feed the Army: This 4-pound brisket makes enough for a family reunion or a cozy movie night with leftovers. I serve half on day one, reheat the rest in the oven at 400°F, and it still tastes like it came fresh from the pan.
- Budget Beef Win: Brisket’s cheaper than steak, and with these spices and broth, it feels like a fancy restaurant dish. The buttery rosemary finish makes it feel indulgent without breaking the bank—plus, it freezes beautifully for those “I don’t want to cook” Mondays.
Step-by-step instructions for perfect oven-braised beef brisket
Here’s the straightforward method for transforming your brisket into melt-in-your-mouth perfection.
🔥 Step 1: Sear the Brisket for Maximum Flavor
Preheat your oven to 450°F. Heat a Dutch oven over medium-high heat and add the ½ cup olive oil. Once shimmering, carefully place the 4 lb beef brisket flat cut fat-side down in the pan. Press down gently on the brisket during the first minute—this prevents it from curling and ensures even contact with the pan.
Sear for 8-10 minutes until the fat renders out and the brisket develops a deep golden-brown crust on the fat side. Flip the brisket and sear the other side for another 6-8 minutes until it reaches the same color. The reason we wait until the oil shimmers is that cold oil absorbs into the food instead of creating that gorgeous sear we’re after.
👨🍳 Step 2: Build the Flavor-Packed Rub
While the brisket sears, combine the 2 tbsp kosher salt, 1 tbsp black pepper, 1 tsp garlic powder, 1 tsp onion powder, 1 tbsp brown sugar, 1 tbsp smoked paprika, and 1 tsp dried thyme in a small bowl. Mix well until you have a fine, even blend—this is your flavor bomb.
Once the brisket is seared on both sides, remove it from the pan and place it on a cutting board. Generously coat both sides with the spice rub, pressing it into the meat so it adheres well. Let the brisket rest for 5 minutes while you prepare the braising liquid—this gives the rub time to penetrate the meat.
🥘 Step 3: Create the Braising Liquid
Return the Dutch oven to the stove over medium heat. Deglaze the pan with the 2 tbsp apple cider vinegar, scraping up all those delicious browned bits from the bottom—this is where all the flavor lives. Add the 2 cups beef broth and bring the liquid to a gentle simmer.
Here’s the thing—this liquid should be enough to come about halfway up the sides of the brisket when you place it back in the pan. If it’s too thin, reduce it slightly over medium-high heat until it thickens. The goal is a rich, flavorful liquid that will braise the brisket to perfection.
🔥 Step 4: Braise to Juicy Perfection
Place the seasoned brisket back into the Dutch oven, fat-side up, and pour the braising liquid over it. The liquid should cover about half of the brisket—this ensures it stays moist without turning to mush. Cover the Dutch oven tightly with a lid and transfer it to the preheated oven.
Braise for 2 hours at 450°F, then reduce the heat to 325°F and continue cooking for another 1.5 hours. You’ll know it’s ready when the brisket is fork-tender and the internal temperature reaches 200-205°F—this is the sweet spot for melt-in-your-mouth tenderness. Real talk: your oven might run hot, so start checking at the 20-minute mark.
🍳 Step 5: Finish with Butter and Rosemary
Remove the brisket from the oven and transfer it to a cutting board. Tent loosely with aluminum foil and let it rest for 15-20 minutes—this resting period allows the juices to redistribute throughout the meat, ensuring every slice is moist and flavorful.
While the brisket rests, skim any excess fat from the braising liquid in the Dutch oven. Return the pan to the stove over medium heat and add the 4 tbsp butter. Once the butter melts, stir in the 1 tbsp chopped fresh rosemary and let it infuse for 1 minute. Pour this fragrant butter mixture over the brisket before slicing. You’ve got this—now it’s time to serve up that juicy, flavor-packed perfection.
Pro Tips For Making Beef Brisket Flat Oven
- Press Hard While Searing: That first minute when you place the brisket in the pan is make-or-break—press firmly with a spatula or your hand to flatten it against the hot surface. I used to rush this, and the brisket would curl up like a shrimp, leaving half the meat undercooked. The goal is even contact so every bite gets that perfect crust.
- Salt Early, Salt Often: Diamond Crystal kosher salt is flaky, so don’t eyeball it—use the full 2 tablespoons before searing. After the rub, sprinkle another pinch of salt over the meat while it rests; the salt draws out moisture, which caramelizes into flavor during braising. (Yes, even if you’re impatient like me.)
- Don’t Skimp on Vinegar: The 2 tablespoons of apple cider vinegar in the braising liquid isn’t just for acidity—it tenderizes the meat while deglazing. If you’re using store-bought broth, add the vinegar last to the pan, let it bubble for 30 seconds, then pour in the broth. This ensures the vinegar works its magic instead of getting diluted.
- Check Internal Temp Early: Your oven’s hot spots will lie to you, so start checking the brisket’s internal temp with a meat thermometer 20 minutes before the 1.5-hour mark at 325°F. Aim for 200–205°F—any lower, and it’ll dry out; higher, and it risks falling apart. Pro move: Poke the thickest part, not the edge.
Serving suggestions for this dish
Classic Sides to Elevate
I always serve my brisket with garlic butter mashed potatoes—creamy, dreamy, and the perfect foil for the rich beef. Mash 2 lbs Yukon Gold potatoes with 4 tbsp melted butter, ½ cup warm milk, and 1 tsp garlic powder for that signature flavor.
A sprinkle of chives at the table adds freshness. 🥔
Southern-Inspired Must-Haves
For an authentic Southern touch, add creamy coleslaw with a tangy apple cider vinegar dressing. I use ½ cup mayonnaise, 2 tbsp vinegar, 1 tbsp honey, and ½ tsp celery seed for that perfect crunch. The cool, creamy texture balances the brisket’s richness beautifully.
Hearty Cornbread Companion
A warm slice of cornbread soaks up every last drop of that delicious braising liquid. My go-to recipe calls for 1 cup cornmeal, 1 cup buttermilk, and 1 egg, baked until golden. Serve it alongside the brisket for that ultimate comfort-food pairing. 🌽
Fresh Greens for Balance
Brighten up the plate with a simple kale and apple salad. Toss 4 cups chopped kale with 1 diced apple, ¼ cup walnuts, and a lemon vinaigrette made with 2 tbsp olive oil and 1 tbsp Dijon mustard.
The crispness cuts through the richness like a dream.
Garnish Like a Pro
Before serving, scatter fresh rosemary sprigs and thinly sliced scallions over the brisket for a pop of color and freshness. A drizzle of truffle oil (if you’re feeling fancy) adds an extra layer of sophistication. Trust me, presentation makes all the difference!
Nutrition facts
Frequently asked questions
Why does the brisket need to rest before slicing?
Resting for 15-20 minutes after cooking lets the juices redistribute evenly throughout the meat. This prevents them from spilling out when you slice, ensuring every bite is moist and flavorful. Skipping this step can leave you with dry, uneven slices—trust the process!
How do I know when the brisket reaches perfect tenderness?
Check for fork-tenderness at 200-205°F internal temperature. You should be able to pierce the thickest part with a fork with minimal resistance. If your oven runs hot, start checking around 20 minutes before the full cooking time. A meat thermometer is your best friend here!
What if I don’t have a Dutch oven?
A heavy pot with a tight-fitting lid works just as well. Just make sure it’s large enough to hold the brisket with space for the braising liquid. The key is heat retention—any thick-bottomed pot will do. For searing, use a separate skillet first, then transfer to your pot.
Can I make this recipe ahead of time?
Cook the brisket as directed, then refrigerate it in the braising liquid for up to 5 days. To reheat, cover with foil and warm in a 400°F oven for 20-30 minutes, basting occasionally. The flavors actually improve as it rests!
What’s the best way to slice brisket?
Slice against the grain in ¼-inch thick slices for maximum tenderness. This shortens the muscle fibers, making each bite easier to chew. Use a sharp knife and work carefully—patience here pays off!

Trained in classic French technique but raised on slow-cooked ribs and spicy rubs, she blends culinary skill with smoke and soul.
- Smoked Chicken Salad Recipe: Crispy, Smoky Bites With Creamy Ranch Dressing - October 19, 2026
- Beer Can Chicken in a Smoker Recipe: Juicy, Herbed Perfection in One Can - October 19, 2026
- Brined Beef Brisket Recipe: Ultra-Tender, Juicy Cuts in One Pot - October 19, 2026