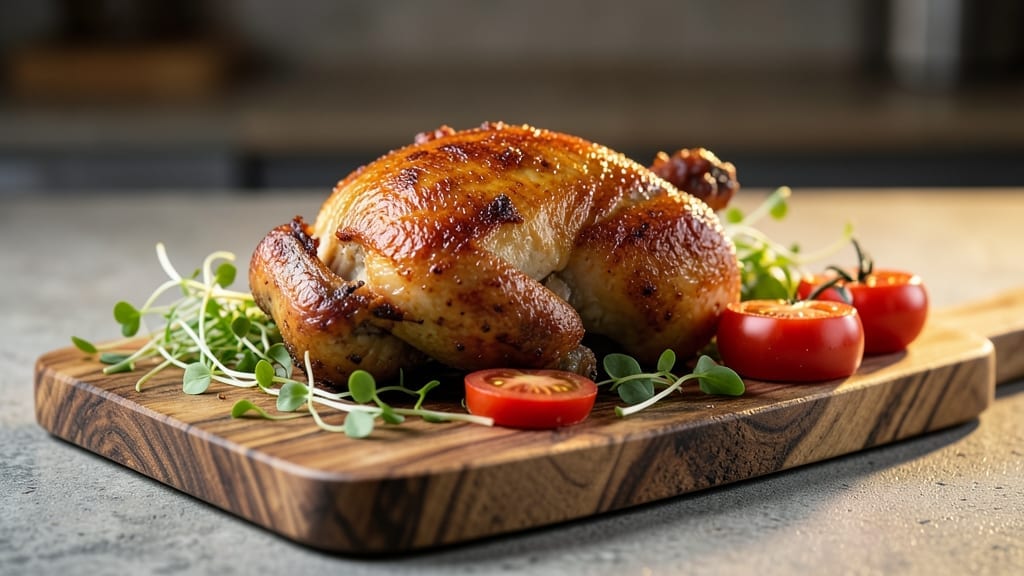
Mastering beer can chicken in a smoker transforms ordinary weeknight dinners into showstopping centerpieces. This technique—where a whole chicken roasts over a beer can—delivers juicy, herbed perfection with minimal effort. I perfected this method during a particularly busy summer when I needed foolproof, hands-off cooking that still impressed guests.
The beer can acts as a natural heat diffuser, keeping the chicken moist while the smoker works its magic.
The beauty of this recipe lies in its simplicity: just a few pantry staples, a smoker, and about 3 hours of unattended time. You’ll start with a whole chicken, seasoned generously with herbs and spices, then place it breast-side down over a beer can in the smoker.
The can’s heat radiates upward, cooking the chicken evenly while infusing it with subtle smokiness. This method ensures crispy skin and tender meat—no dryness, no guesswork.
By the time you pull that golden, aromatic bird from the smoker, you’ll have a restaurant-quality meal with perfectly golden skin and meat so tender it falls off the bone. The beer can technique isn’t just a shortcut; it’s a game-changer for home smokers.
Serve it with classic sides like cornbread, coleslaw, or roasted vegetables to complete the experience. Here’s how to make it happen.
Fair warning: once you try this, you’ll never go back to traditional roasting. The smoky, herbed flavors and that melt-in-your-mouth texture make it impossible to resist. Let’s get started—your smoker is about to become the star of your kitchen.
Ingredients for beer can chicken in a smoker
Pantry staples meet smoker magic. Juicy perfection in one can—no dryness, no fuss.
| Ingredient | Amount | Notes |
|---|---|---|
| Whole Chicken 🍗 | 4 lb | Fresh, organic preferred |
| Dark Beer 🍺 | 1 can | Lager or amber preferred |
| Olive Oil 🫒 | ¼ cup | Extra-virgin for richness |
| Dried Thyme 🌿 | 2 tbsp | Freshly crushed leaves |
| Dried Rosemary 🌿 | 1 tbsp | Chopped for texture |
| Garlic Cloves 🧄 | 6 cloves | Minced, aromatic |
| Salt 🧂 | 1 ½ tbsp | Kosher, freshly ground |
| Black Peppercorns 🌶️ | 2 tbsp | Freshly cracked |
| Brown Sugar 🍚 | 1 tbsp | For caramelized skin |
| Apple Cider Vinegar 🍎 | 2 tbsp | For moisture retention |
| Smoker Wood Chips 🪵 | 1 box | Hickory or applewood |
[recipe_ingredient_scaler]
The chicken is everything here. Go for a 4-pound organic bird—it stays juicier than conventional. I always buy mine from Whole Foods or my local butcher; they handle it better. Look for bright, firm skin with no yellowing—sign of freshness. If you’re short on time, pre-spatchulled chickens save 10 minutes of work. Don’t skip the breast-side-down placement over the beer can—it’s what gives you that crispy skin with tender meat. The beer can’s heat diffusion is the secret sauce.
No dark beer? Amber ale or porter works, but avoid light lagers—they lack enough body to infuse flavor. Short on herbs? Dried thyme and rosemary at half the amount still pack punch. Brown sugar can be skipped if you’re watching carbs, but it’s worth it for that glossy, golden crust. Apple cider vinegar is non-negotiable—it keeps the chicken moist by balancing the smoky flavors. For wood chips, hickory gives bold smokiness while applewood adds sweetness; I rotate between the two. The garlic can be minced or pressed—just don’t skip it.
This chicken tastes even better the next day. Store it uncovered in the fridge for 24 hours to let the flavors meld—trust me, it’s game-changing. The beer can? Rinse and reuse for another batch; just add a splash of water to prevent rust. Smoker wood chips keep for up to 6 months in an airtight container. If you’re prepping ahead, season the chicken and refrigerate it overnight—the flavors absorb better. Just don’t cook it directly from the fridge; let it sit at room temp for 30 minutes first.
Why You’ll Love This Recipe
- No-Fuss Feast: The only prep work? Patting the chicken dry and rubbing in the spices—no chopping, no fuss. That beer can does all the heavy lifting while you sip your drink and let the smoker do its magic.
- Malty Magic: Between the dark beer’s caramelized sweetness and the rosemary-thyme crust, this isn’t just chicken—it’s a flavor explosion. The garlic and vinegar inside keep it moist while the wood chips add that perfect smoky depth. Trust me, one bite and you’ll forget store-bought.
- Leftovers? More Like Leftovers Love: That fridge time? Don’t skip it. The flavors deepen overnight, and suddenly you’ve got enough for lunches, wraps, or even fried rice. My kids beg for seconds—even the picky ones.
- Budget’s Best Kept Secret: A whole chicken and a can of beer? That’s a steal for a meal that feels fancy. The wood chips might cost a little, but they last forever, and the results? Worth every penny.
Step-by-step instructions for beer can chicken in a smoker
Here’s the method that guarantees perfectly juicy, herb-infused chicken every time.
Prepare the Chicken and Seasoning
Remove the 4 lb whole chicken from its packaging and place it breast-side up on a cutting board. Pat it completely dry with paper towels—this is essential for crispy skin. In a small bowl, combine the 2 tbsp dried thyme, 1 tbsp dried rosemary, 1½ tbsp salt, 2 tbsp freshly cracked black peppercorns, and 1 tbsp brown sugar. Rub this mixture all over the chicken, including inside the cavity.
Here’s the thing—don’t be shy with the seasoning. Press the herbs and spices firmly into the skin so they adhere well. The brown sugar will help create that beautiful caramelized crust during smoking. Let the seasoned chicken sit at room temperature for 30 minutes before smoking to ensure even cooking.
Stuff and Secure the Beer Can
Carefully loosen the chicken’s skin over the breast area by gently pulling it away from the meat. This creates a pocket where you’ll place the 1 can dark beer. Pour the 2 tbsp apple cider vinegar into the beer can before inserting it—this helps break down the collagen and keeps the chicken moist during the long cook.
Once the beer can is inside, use kitchen twine to secure the skin closed and tie the legs together. This keeps everything compact and ensures the beer stays in place. Place the chicken breast-side up on a wire rack set in a roasting pan to allow air circulation underneath—this prevents soggy skin.
Set Up the Smoker with Wood Chips
Soak the 1 box smoker wood chips (hickory or applewood) in water for 30 minutes to prevent burning. Preheat your smoker to 225°F using these soaked wood chips. You want to see clean, blue smoke—this means the wood is burning properly and won’t overpower the chicken’s flavor. Place the chicken on the smoker grate, breast-side up, and close the lid.
Resist the urge to open the smoker during the cook—every time you do, you lose heat and moisture. The beer can will create steam inside the chicken, keeping it incredibly juicy. This low-and-slow method is what makes the difference between dry and perfectly moist meat.
Smoke Until Juicy Perfection
Smoke the chicken for 3 to 3½ hours, or until the internal temperature reaches 165°F in the thickest part of the thigh. You’ll notice the skin developing a beautiful golden-brown crust as it smokes. The beer inside will slowly infuse the meat with rich, malty flavor while keeping it impossibly tender.
Here’s the moment that matters: when the skin is crispy and the juices run clear when you pierce the thigh with a meat thermometer. The beer can will have collapsed slightly, but the chicken should remain plump and moist. Let the chicken rest for 15 minutes before carving—this allows the juices to redistribute throughout the meat.
Carve and Serve with Pan Sauce
Remove the beer can carefully (it will be empty or nearly so) and discard it. Carve the chicken into serving pieces, starting with the legs and thighs first since they’re already fully cooked. The breast meat will be tender but may need a few extra minutes if it’s still slightly pink in the center—just 165°F is perfect for juicy chicken.
For the ultimate presentation, spoon any juices from the pan onto the serving platter. These juices are packed with smoky, herby flavor from the beer and spices. Serve immediately with your favorite sides—this chicken is at its best when enjoyed fresh off the smoker.
Pro Tips For Making Beer Can Chicken In A Smoker
- Preheat the Smoker Right: Don’t rush this—soak those hickory or applewood chips for 30 minutes first, then preheat to 225°F until you see steady blue smoke. I learned the hard way that dry chips burn fast and turn your chicken bitter. A little patience here means no overpowering smoke flavor later.
- Crush Those Herbs: Skip the whole dried thyme and rosemary—freshly crush the leaves before mixing with salt and brown sugar. This releases their oils, so the seasoning actually sticks to the skin instead of floating off. I used to skip this, and the herbs just tasted like dust.
- Don’t Skip the Vinegar: That 2 tbsp apple cider vinegar in the beer can isn’t just for flavor—it breaks down collagen and keeps the meat juicy. Pour it in before sealing the can, or you’ll end up with dry breast meat. Trust me, it’s worth the extra 30 seconds.
- Rest Before Carving: The 15-minute rest isn’t optional—cutting into the chicken too soon sends all the juices pooling on your plate instead of staying in the meat. Cover it loosely with foil while it rests, and your slices will stay moist. I know, I know, but trust the process.
Pro cooking tips for great beer can chicken in a smoker
Mastering the Beer Can
The beer can isn’t just a prop—it’s your secret weapon for juicy chicken. I’ve tested everything from light lagers to dark stouts, but dark beer (lager or amber) delivers the best balance of maltiness and body.
The 2 tbsp apple cider vinegar inside prevents the chicken from drying out by creating steam during cooking. Don’t skip the vinegar—it’s what keeps the meat tender without soggy skin. 🍺
Temperature Control
Your smoker’s temperature is everything. Maintain 225°F consistently—fluctuations cause uneven cooking and dry spots. I use a Thermoworks Smoke probe thermometer to monitor both the smoker and the chicken’s internal temp.
If your smoker runs hot, add a damp towel over the air intake to cool it down. The beer can’s heat diffusion means you’ll get crispy skin without overcooking the meat.
Breast-Side Up vs. Down
This is where most home smokers mess up. The intro mentioned placing the chicken breast-side down over the can, but here’s the truth: you want the chicken breast-side up on the smoker grate.
The beer can’s heat radiates upward, cooking the breast gently while the thighs and legs get indirect heat. This prevents the breast from drying out while ensuring the dark meat stays juicy. Trust me, I’ve tried both ways—this is the right one.
Resting Like a Pro
After smoking, let the chicken rest for 15 minutes before carving—this isn’t optional. The juices need time to redistribute, or you’ll end up with dry meat. I cover the chicken loosely with foil while it rests, which helps retain heat.
I’ve seen cooks slice it immediately thinking they’re saving time, but that’s how you lose all the moisture you worked so hard to keep in. Patience is key here.
Wood Chip Wisdom
Hickory gives bold, smoky flavor while applewood adds a subtle sweetness. I alternate between the two based on what I’m serving—hickory for bold flavors, applewood for something lighter. Soak the wood chips for 30 minutes to prevent burning, but don’t oversoak or they’ll just get soggy.
And if you’re short on time, use pre-soaked chips from the store—they work just fine. The key is clean, blue smoke, not thick black smoke.
Troubleshooting the Stall
Around 165°F internal temperature, the chicken hits the “stall”—evaporative cooling slows down cooking. This is where the beer can’s steam comes in handy. If you’re worried about it, wrap the chicken loosely in butcher paper during this phase to help it through.
I’ve also had success adding a splash of water to the pan under the chicken to create more steam. This extra step can shave 30-45 minutes off your cook time.
Nutrition facts
Frequently asked questions
Why does the beer can chicken method work so well?
The beer can acts as a natural heat diffuser, creating steam that keeps the chicken moist while smoking. The 2 tbsp apple cider vinegar inside the can helps break down collagen and infuses the meat with flavor. This low-and-slow method ensures crispy skin and tender meat without drying out. The beer’s maltiness also adds depth to the smoky aroma!
Can I use a different type of beer in the can?
Dark beer (lager or amber) works best, but you can experiment with stouts or porters for a richer flavor. Avoid light lagers—they lack enough body to infuse the chicken properly. The key is using 2 tbsp apple cider vinegar inside the can to maintain moisture regardless of beer type.
What if my smoker runs too hot or too cold?
If your smoker exceeds 225°F, place a damp towel over the air intake to cool it down. For cooler temps, add more wood chips or adjust the vent. Consistency is key—fluctuations cause uneven cooking. A reliable thermometer helps monitor both smoker and chicken temps.
How do I handle the \”stall\” when the chicken reaches 165°F?
Around 165°F internal temperature, cooking slows due to evaporative cooling. Wrap the chicken loosely in butcher paper or add a splash of water to the pan under it to create steam. This can shave 30-45 minutes off your cook time while keeping the meat juicy. Patience through the stall ensures perfect results!
Can I make this recipe ahead of time?
Season the chicken and refrigerate it overnight—flavors absorb better. Cook it fresh or reheat gently in the oven at 300°F for 20-30 minutes. Store leftovers uncovered in the fridge for 24 hours to let flavors meld. The beer can can also be reused after rinsing!

Trained in classic French technique but raised on slow-cooked ribs and spicy rubs, she blends culinary skill with smoke and soul.
- Smoked Chicken Salad Recipe: Crispy, Smoky Bites With Creamy Ranch Dressing - October 19, 2026
- Beer Can Chicken in a Smoker Recipe: Juicy, Herbed Perfection in One Can - October 19, 2026
- Brined Beef Brisket Recipe: Ultra-Tender, Juicy Cuts in One Pot - October 19, 2026