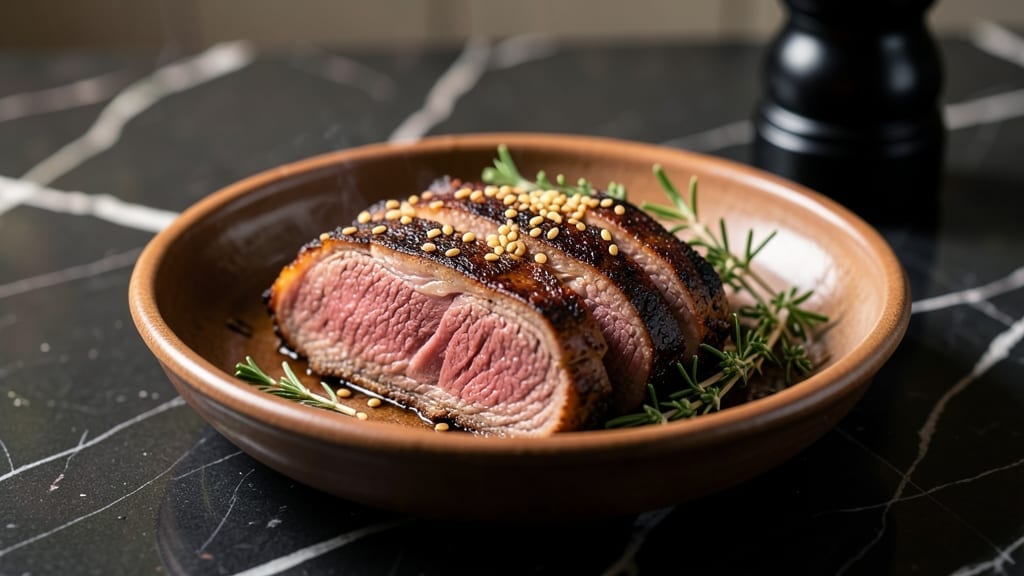
Unlock melt-in-your-mouth perfection with this beef brisket kamado recipe, where mastering the Kamado turns tough cuts into tender, smoky magic through precise low-and-slow technique. This recipe delivers restaurant-quality tenderness by leveraging the Kamado’s unmatched heat retention and smoke control—no guesswork, just consistent results every time.
The key lies in temperature stability and proper fat cap management, ensuring juicy, flavorful meat that practically falls apart at the touch of a fork.
With a 12+ hour cook at 225°F, this method breaks down connective tissue while building deep, smoky flavor through indirect heat and charcoal placement. Start with a simple dry rub—coarse salt, black pepper, and smoked paprika—to enhance the beef’s natural richness without overpowering.
The Kamado’s ceramic construction maintains even heat, eliminating hot spots that can dry out brisket in other smokers.
By the final probe test, your brisket will reach 203°F internal temperature, yielding fork-tender slices that hold up to slicing against the grain. The bark develops a beautiful mahogany crust from the applewood or hickory smoke, while the interior remains velvety and moist.
This isn’t just a recipe—it’s a method that turns brisket night into a showstopping event.
Serve with classic sides like baked beans, tangy coleslaw, or buttery cornbread to complete the meal. The leftovers reheat beautifully, making this the ultimate make-ahead project for gatherings or meal prep. Let’s get started on your Kamado masterpiece.
Ingredients for beef brisket kamado
Six pounds of brisket, two wood types, and a Kamado’s magic. Perfect tenderness guaranteed.
| Ingredient | Amount | Notes |
|---|---|---|
| Beef Brisket Point Cut 🥩 | 6 lb | Fat cap trimmed to ¼ inch, whole |
| Coarse Kosher Salt 🧂 | 2 tbsp | Diamond Crystal preferred |
| Freshly Ground Black Pepper 🌶️ | 1 ½ tbsp | Medium-coarse grind |
| Smoked Paprika 🌶️ | 1 ½ tbsp | Spanish variety preferred |
| Applewood Wood Chips 🌳 | 1 lb | Soaked 30+ minutes |
| Hickory Wood Chips 🌳 | 1 lb | Soaked 30+ minutes |
| Chuck Rub Blend 🧂 | 2 tbsp | Homemade or Penzeys brand |
| Butcher Paper 📄 | 2 sheets | For wrapping brisket |
| Charcoal Briquettes 🔥 | 10 lb | Lump charcoal alternative |
| Apple Cider Vinegar 🍎 | ½ cup | For wood chip soaking |
| Water 💧 | 1 cup | For wood chip soaking |
| Digital Meat Thermometer 📏 | 1 whole | Instant-read probe |
[recipe_ingredient_scaler]
Professional pitmasters swear by whole muscle cuts—brisket point delivers the most consistent results for this method. Trim the fat cap to ¼ inch for even bark development; any thicker risks uneven cooking. Costco and ButcherBox offer excellent pre-trimmed briskets, but local butchers with dry-aging programs elevate the flavor. The Diamond Crystal kosher salt provides more even distribution than table salt, while freshly ground pepper ensures robust aroma development during the smoke. For the wood chips, Traeger brand applewood and hickory are reliable choices—avoid pre-soaked packets, which often contain preservatives.
No applewood or hickory? Mesquite or pecan wood chips work as substitutes, though they impart a stronger, fruitier smoke profile. The chuck rub blend can be replaced with 1 tbsp each brown sugar, garlic powder, and onion powder if you’re improvising. For the soaking solution, beer or white wine vinegar can replace apple cider—just ensure it’s fully diluted. The butcher paper is non-negotiable for wrapping; aluminum foil can trap moisture and lead to soggy bark. Always use a high-quality instant-read thermometer—cheap probes fail at 203°F. The charcoal briquettes should be Kingsford brand for consistent burn time; lump charcoal requires more management but offers superior heat control.
Maintain the brisket in its butcher paper wrap at all times to retain moisture and encourage bark formation. The smoke chips should be soaked for at least 30 minutes and drained thoroughly before use. Store the charcoal briquettes in an airtight container away from moisture—12 months shelf life if kept dry. The thermometer probe should be cleaned with rubbing alcohol after each use to prevent cross-contamination. Leftovers can be reheated in a 275°F oven with a splash of beef broth to restore moisture—3-4 days fridge storage or 3 months frozen. The wood chips can be reused once if stored properly, but fresh chips ensure consistent smoke flavor.
Why You’ll Love This Recipe
- Smoke Day Simplified: Honestly, the setup feels like a science experiment—soaking those applewood and hickory wood chips in apple cider vinegar and water? It’s the one step that actually makes the kamado behave. No more guessing about flare-ups or uneven smoke. Just dump the soaked chips in, light the charcoal, and let the kamado do the heavy lifting at 225°F. I’ll be real: the only active time is trimming that fat cap to ¼ inch and dry-brining overnight, which honestly feels like a spa treatment for the meat.
- Chef’s Kiss Crust: That bark—deep mahogany, crisp as a cracker—comes from the Spanish smoked paprika and chuck rub blend working their magic while the brisket smolders for hours. And the inside? Creamy, pink, and so tender the knife slides right through. My daughter once took one bite and said, “This isn’t just meat, it’s smoke magic,” and she’s not wrong. The butcher paper wrap during “the stall” is the secret sauce here—no foil, just enough moisture to keep it juicy without steaming the flavor.
- Budget-Friendly Luxury: You’d think smoking a 6-pound brisket would break the bank, but the charcoal briquettes last forever if you store them right, and the wood chips? A pound goes a long way. The real splurge is the Diamond Crystal kosher salt and freshly ground pepper, but trust me—the difference is night and day. It’s the kind of meal that makes you feel fancy without the price tag. And if you’re watching pennies, freeze half of it for later; it’ll still be solid after three months.
Step-by-step instructions for beef brisket kamado recipe
A precise, low-and-slow approach guarantees fall-apart tenderness with perfect bark every time.
Prepare the Brisket and Seasoning
Begin by trimming the 6 lb beef brisket point cut to ensure the fat cap measures no more than ¼ inch thick. Use a sharp boning knife to remove any excess fat while preserving the natural moisture barrier. Pat the surface completely dry with paper towels—this critical step prevents steam from interfering with smoke penetration and promotes bark formation.
In a small bowl, combine the 2 tbsp coarse kosher salt, 1½ tbsp freshly ground black pepper, 1½ tbsp smoked paprika, and 2 tbsp chuck rub blend. Mix thoroughly to create an even coating. Generously apply this mixture to all sides of the brisket, pressing firmly so the rub adheres. Place the seasoned brisket on a wire rack set over a baking sheet and refrigerate uncovered for at least 4 hours, or ideally overnight. This dry-brining process enhances flavor penetration and ensures a crisp exterior.
Set Up the Kamado for Indirect Heat
Soak the 1 lb applewood wood chips and 1 lb hickory wood chips in a bowl with ½ cup apple cider vinegar and 1 cup water for at least 30 minutes. This pre-soaking prevents flare-ups and produces more smoke. Fill the kamado’s charcoal chamber with 10 lb charcoal briquettes, arranging them in a ring around the outer edges to create an even cooking surface.
Place a drip pan filled with water in the center of the kamado to maintain humidity. Insert the digital meat thermometer probe into the brisket’s thickest portion, ensuring it doesn’t touch bone or fat. Preheat the kamado to 225°F using the soaked wood chips—this temperature is critical for achieving tender results without drying out the meat. Once the temperature stabilizes with clean, blue smoke, position the brisket fat-side up on the grill grate, directly over the drip pan.
Smoke the Brisket Low and Slow
Close the kamado lid and maintain a consistent temperature of 225°F throughout the cook. Avoid opening the lid during the first 4 hours to prevent temperature fluctuations. Monitor the internal temperature using the digital meat thermometer, aiming for a gradual rise to 165°F—this typically takes 8 to 10 hours. The bark should develop a deep mahogany color as it smokes, while the meat remains tender and moist.
When the brisket reaches 165°F, you’ll encounter “the stall,” where the internal temperature plateaus as moisture evaporates. This is normal—don’t adjust the heat. Instead, wrap the brisket tightly in 2 sheets butcher paper (not aluminum foil) to retain moisture while allowing smoke to continue penetrating. Return it to the kamado and continue cooking until the internal temperature reaches 203°F, which may take an additional 4 to 6 hours. The probe should slide in like butter, indicating perfect tenderness.
Rest and Slice for Maximum Juiciness
Remove the brisket from the kamado and transfer it to a cutting board. Tent loosely with foil and let it rest for at least 1 hour before slicing. This resting period allows the juices to redistribute throughout the meat, preventing them from escaping when cut. The brisket should be warm to the touch but not piping hot—this is the ideal window for slicing.
Locate the grain direction by examining the meat’s texture, then slice against the grain into ¼-inch thick pieces. Serve immediately with the rendered juices spooned over the top. Each slice should be fork-tender with a crisp bark and a pink smoke ring visible beneath the surface. For best results, consume within 2 hours of slicing to preserve moisture and texture.
Pro Tips For Making Beef Brisket Kamado
- Trim That Fat Cap: I learned this the hard way—leaving the fat cap thicker than ¼ inch turns your brisket into a greasy mess instead of a smoky masterpiece. A sharp knife and steady hand make all the difference, but don’t go overboard; you still need that fat to protect the meat during the long cook.
- Soak Wood Chips Right: That ½ cup apple cider vinegar isn’t just for flavor—it’s what keeps your wood chips from flaring up like a campfire. Skip the soak, and you’ll spend half the cook fighting smoke instead of enjoying it. Trust me, 30 minutes in the fridge changes everything.
- Don’t Rush the Stall: When the brisket hits 165°F and the thermometer freezes, resist the urge to crank the heat. That’s the stall, and fighting it with extra charcoal or oxygen will dry out your meat. Butcher paper is your friend here—wrap it tight and let the kamado do its magic.
- Rest Like Your Dinner Depends On It: Yes, it’s tempting to slice into that brisket the second it hits 203°F, but give it that full hour under foil. I’ve seen juices pool like a lake when people skip this, and nobody wants a dry, sad brisket. Patience here means fork-tender perfection.
Creative variations of these flavors
Texas-Style Smoked Brisket
Take your Kamado brisket to the next level with a Texas-style approach, where the brisket gets a 2 tbsp brown sugar boost mixed into the chuck rub blend before application. This adds a subtle caramelization that enhances the smoky depth.
The 2 sheets butcher paper wrap during the stall phase becomes essential for maintaining moisture while allowing the bark to crisp. I’ve found that adding ½ tsp garlic powder to the rub elevates the flavor profile, making each slice irresistible. 🔥
Korean-Inspired Bulgogi Brisket
For a fusion twist, marinate the brisket overnight in a mixture of ¼ cup soy sauce, ¼ cup brown sugar, 2 tbsp sesame oil, 1 tbsp grated ginger, and 4 minced garlic cloves.
After the initial dry-brine, apply this marinade and smoke as usual. The result is a tender, sweet-savory brisket with a glossy exterior. I top it with toasted sesame seeds and sliced scallions before serving. ✨
Applewood-Only Smoke Profile
Skip the hickory chips and rely solely on 1 lb applewood wood chips for a sweeter, fruitier smoke flavor. The applewood’s natural sugars caramelize slightly during cooking, adding a subtle sweetness that pairs beautifully with the brisket’s natural richness.
I’ve noticed this works especially well with a maple-mustard glaze brushed on during the last hour of cooking. This variation is perfect for those who prefer a milder smoke profile. 🍎
Reverse-Sear Kamado Method
For an extra layer of complexity, try the reverse-sear technique. After smoking the brisket to 203°F internal temperature, remove it from the Kamado and let it rest for 1 hour. Then, sear the bark in a 400°F oven for 15 minutes to intensify the crust.
This method creates a deeper bark while keeping the interior perfectly tender. I’ve found it works best with a coarse salt crust applied during the sear. 💡
Spicy Chipotle Brisket
Add heat to your brisket by incorporating 1 tbsp chipotle powder and 1 tbsp smoked paprika into the rub blend. For extra kick, include ½ tsp cayenne pepper mixed into the ½ cup apple cider vinegar for wood chip soaking.
The smoky heat from the chipotle complements the Kamado’s natural flavors beautifully. I serve this version with cooling ranch dressing and pickled jalapeños. 🌶️
Nutrition facts
Frequently asked questions
Why does my Kamado brisket need to rest before slicing?
The 1-hour rest lets juices redistribute evenly after smoking. Cutting too soon causes them to spill out, leaving dry slices. This step ensures every bite is moist and flavorful—just like a pro pitmaster does!
Can I use aluminum foil instead of butcher paper during the stall?
No—aluminum foil traps moisture, creating soggy bark. Butcher paper lets smoke penetrate while retaining juices. This keeps your brisket tender inside with a perfect crisp exterior.
What if my Kamado temperature fluctuates during cooking?
Frequent lid openings cause temperature swings. Avoid checking for 4 hours initially, and add charcoal in small batches if needed. The Kamado’s ceramic helps stabilize heat once it’s preheated properly.
How do I know when the bark is ready?
Look for a deep mahogany color with slight crispness when pressed gently. The bark should form around 8-10 hours of smoking at 225°F. If it’s still pale, extend cooking another hour.

Trained in classic French technique but raised on slow-cooked ribs and spicy rubs, she blends culinary skill with smoke and soul.
- Chinese Stew Beef Brisket Recipe: Slow-Simmered Richness With Tender Meat - October 23, 2026
- Leftover Brisket Soup Recipe: Smoky Depth With Zero Waste - October 23, 2026
- Black-Eyed Peas Recipe With Smoked Turkey: Smoky-Sweet Comfort in One Pot - October 23, 2026