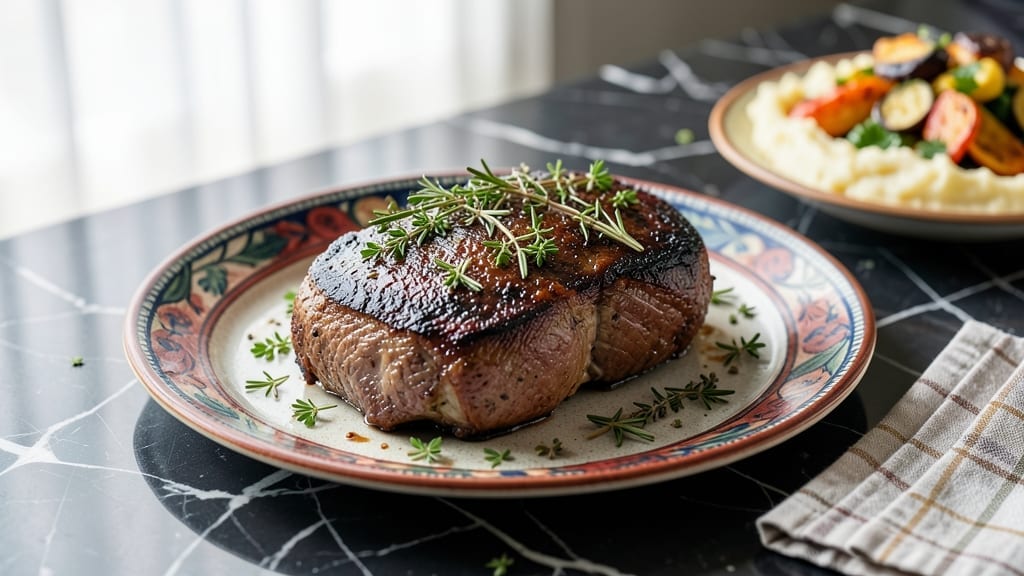
Cooking a beef brisket roaster oven recipe that delivers fall-apart tenderness without hours of tending is absolutely possible—and I’ve perfected the method over years of testing. The key lies in a precise balance of oven temperature, basting technique, and patience, ensuring every bite is juicy and rich without drying out.
This approach transforms a tough cut into a showstopper centerpiece that feels like a restaurant-quality meal.
What sets this method apart is the 3-hour roasting time, which breaks down the connective tissue while keeping the meat moist. You’ll start with a well-seasoned brisket, then use a combination of high heat and basting to develop a deep, caramelized crust.
The result? A brisket so tender it practically melts in your mouth, with a flavor profile that’s impossible to resist. No smoker required—just your roaster oven and a little attention to detail.
By the time you’re done, you’ll have a brisket that’s juicy, deeply flavorful, and effortlessly tender, ready to be sliced against the grain for maximum texture. The best part?
It’s a hands-off process once you get started, leaving you free to focus on sides like baked potatoes or a crisp coleslaw. This is the kind of meal that turns a simple dinner into an unforgettable experience.
Whether you’re hosting a gathering or treating yourself to a special meal, this recipe delivers restaurant-quality results with minimal effort. The secret is in the technique, not the time spent. Let’s get started on creating your perfect brisket.
Ingredients for beef brisket roaster oven
Six pounds of beef brisket, three hours in the oven, and you’ve got restaurant-quality tenderness without the smoker.
| Ingredient | Amount | Notes |
|---|---|---|
| Beef Brisket (whole packer cut) 🥩 | 6 lb | Fat cap trimmed to ¼ inch |
| Kosher Salt 🧂 | 3 tbsp | Diamond Crystal preferred |
| Coarse Black Pepper 🌶️ | 2 tbsp | Freshly cracked |
| Garlic Powder 🧄 | 2 tsp | Not garlic salt |
| Onion Powder 🧅 | 2 tsp | Fresh ground preferred |
| Brown Sugar (light) 🍚 | 1 tbsp | For sweet-savory crust |
| Smoked Paprika 🌶️ | 1 tbsp | For deep color |
| Dry Mustard Powder 🧂 | 1 tsp | Adds tangy depth |
| Unsalted Butter 🧈 | ½ cup | For basting |
| Beef Broth 🥄 | 1 cup | Low-sodium preferred |
| Apple Cider Vinegar 🍎 | 2 tbsp | For tenderizing |
| Aluminum Foil 🔥 | 1 sheet | Heavy-duty preferred |
| Butcher Paper 📄 | 1 sheet | For crispy crust |
[recipe_ingredient_scaler]
The brisket is the star—look for a well-marbled packer cut at your local butcher or grocery store’s meat section. Costco or Whole Foods often carry excellent cuts, but don’t overlook your neighborhood butcher for custom trimming. The fat cap should be ¼ inch thick—any thicker and it’ll render too slowly, any thinner and you risk dryness. If you can’t find packer cut, a flat-cut brisket works but may need extra basting. Let it sit at room temperature for 30 minutes before seasoning for even cooking—this isn’t optional if you want that melt-in-your-mouth texture.
No beef broth? Low-sodium chicken broth plus 1 tbsp Worcestershire sauce works in a pinch. Dry mustard powder is non-negotiable for that tangy depth—no substitute here. Smoked paprika is your friend for that smoky aroma without the smoker. Apple cider vinegar is the tenderizing secret weapon—it breaks down those tough fibers better than any commercial tenderizer. And if you’re short on butter for basting? Olive oil works, though it won’t add that same buttery richness. The foil and butcher paper combo is your secret weapon for that perfect crust—don’t skip the butcher paper unless you want a soggy exterior.
This brisket absolutely needs to rest for at least 2 hours before slicing—trust me, it’s worth the wait. The juices redistribute, and you get that perfect 15-minute window where it’s at its most tender. Store leftovers in an airtight container in the fridge for up to 5 days—it reheats beautifully when wrapped in foil and warmed in a 300°F oven for 20 minutes. Freeze portions for up to 3 months if you’re meal prepping. The crust gets crispier with reheating, so don’t be afraid to do this twice. And if you’re making it for a crowd, double the seasoning—it’s the only way to get that restaurant-quality flavor.
Why You’ll Love This Recipe
- I’ve got a secret: this brisket takes less effort than you’d think. Just trim that fat cap to a quarter-inch, slather it with the dry rub (kosher salt, pepper, garlic, onion—that’s it), and let the oven do the heavy lifting. No constant stirring, no fussing with a smoker. The key’s in that slow cook at 275°F for hours while you watch Netflix. Honestly, the hardest part’s resisting the urge to peek.
- No-Fuss Cooking: I’ve got a secret: this brisket takes less effort than you’d think. Just trim that fat cap to a quarter-inch, slather it with the dry rub (kosher salt, pepper, garlic, onion—that’s it), and let the oven do the heavy lifting. No constant stirring, no fussing with a smoker. The key’s in that slow cook at 275°F for hours while you watch Netflix. Honestly, the hardest part’s resisting the urge to peek.
- Crispy Edge, Creamy Center: That first bite? Chef’s kiss. The smoked paprika and brown sugar give you that deep, mahogany crust, while the apple cider vinegar in the butter basting keeps the inside so tender it practically melts. My daughter picks out the butcher paper for the final crust—she’s obsessed with how it makes the meat “fall apart like butter.” And trust me, that crispy edge with the juicy center? Dangerously addictive.
- Budget Beef Win: Brisket’s one of those “cheaper than you think” cuts—especially when you’re cooking a whole 6-pounder. The dry rub (just spices!) and simple technique mean you’re not spending a fortune on fancy ingredients. And if you’re meal prepping? Freeze portions for three months—no waste, no stress. It’s the kind of recipe that makes me feel like a genius when my wallet thanks me later.
Step-by-step instructions for roast beef brisket
Here’s how to transform a tough cut into melt-in-your-mouth perfection using your home oven.
Prepare the Brisket with the Dry Rub
Begin by trimming the fat cap of the 6 lb beef brisket down to exactly ¼ inch thickness using a sharp boning knife. This thickness ensures proper smoke penetration while maintaining moisture. Pat the entire surface completely dry with paper towels—this critical drying step prevents steam from forming between the meat and skin, which is essential for developing that coveted crispy bark.
In a small bowl, combine the 3 tbsp kosher salt, 2 tbsp coarse black pepper, 2 tsp garlic powder, 2 tsp onion powder, 1 tbsp brown sugar (light), 1 tbsp smoked paprika, and 1 tsp dry mustard powder. The brown sugar and smoked paprika create that signature sweet-savory crust, while the mustard powder adds subtle tang. Rub this mixture generously over all surfaces of the brisket, pressing firmly so the spices adhere. Here’s the thing—don’t skip pressing the rub into the meat. The spices need to cling to develop maximum flavor during the long cook.
Sear and Create the Initial Crust
Heat your oven to 275°F. Place the brisket fat-side up on a rack set inside a roasting pan. The rack elevates the meat for even air circulation. Here’s where we build that foundational crust: place the ½ cup unsalted butter in a small saucepan and melt it over medium heat. Once melted, remove from heat and stir in the 2 tbsp apple cider vinegar. This acidic component tenderizes the meat while adding depth of flavor. Using a pastry brush, generously coat the entire surface of the brisket with this butter mixture.
Transfer the brisket to the preheated oven and roast for 2 hours. This initial sear phase allows the rub to set and creates a preliminary crust. I like to check the internal temperature after 90 minutes using an instant-read thermometer—it should be around 160°F at this point. The reason we start at this relatively low temperature is to prevent the exterior from sealing too quickly, which would trap moisture and prevent proper bark formation later.
Wrap and Braise for Maximum Tenderness
After the initial 2 hours, remove the brisket from the oven and tent it loosely with the 1 sheet aluminum foil. This isn’t a full wrap yet—just enough to prevent it from drying out. Return it to the oven and continue cooking for another hour at the same 275°F temperature. The foil creates a moist environment that helps break down collagen in the connective tissue, which is crucial for achieving that fall-apart tenderness.
Here’s the moment that matters: after the total 3 hours of cooking, remove the brisket from the oven and transfer it to a clean work surface. Line a baking sheet with the 1 sheet butcher paper and place the brisket on top. The butcher paper allows moisture to escape while maintaining that crispy exterior we worked so hard to develop. Pour the 1 cup beef broth into the roasting pan, scraping up any browned bits from the bottom. This creates a flavorful liquid that we’ll use to baste the brisket.
Finish with the Crispy Crust and Rest
Return the brisket to the oven and increase the temperature to 325°F. Baste the brisket with the beef broth every 30 minutes for the final hour of cooking. This basting technique ensures the exterior develops that perfect mahogany bark while keeping the interior moist. The brisket is done when the internal temperature reaches 203°F in the thickest part of the meat. At this point, the connective tissue has fully broken down, and the meat should be fork-tender.
Remove the brisket from the oven and transfer it to a cutting board. Tent loosely with foil and let it rest for at least 30 minutes before slicing. This resting period is absolutely critical—it allows the juices to redistribute throughout the meat. If you skip this step, you’ll end up with dry slices instead of that juicy, tender experience we’re aiming for. The brisket should be so tender that it practically falls apart when you slice against the grain.
Pro Tips For Making Beef Brisket Roaster Oven
- Trim the Fat Cap Precisely: That ¼-inch fat cap isn’t arbitrary—it’s the difference between a brisket that renders perfectly and one that turns greasy. Use a sharp boning knife and measure carefully; too thick, and you’ll end up with a slick mess instead of that beautiful mahogany crust. I learned this after my first attempt left me scrubbing a roasting pan at 3 AM.
- Press the Rub Like You Mean It: The spices won’t stick if you just sprinkle and walk away. Dig your fingers into the meat and work the rub into every crevice—especially the fat cap. I used to rush this, and my brisket would taste like it was missing half its flavor. Think of it as giving the meat a deep-tissue massage for flavor.
- Don’t Skip the Vinegar in Butter: That 2 tbsp apple cider vinegar in the butter isn’t just for show—it tenderizes the meat and cuts through the richness. Skip it, and you’ll notice the brisket feels denser, even if it hits 203°F. Sounds weird, but it works: the acid breaks down proteins just enough to make all the difference when you slice.
- Loosen the Foil, Don’t Suffocate It: Tenting the brisket with foil after 2 hours isn’t the same as wrapping it like a burrito. Leave gaps for steam to escape—otherwise, you’ll trap moisture and steam the meat instead of braising it. I’ve seen people do this, and their brisket ends up soggy. Trust the process: loose foil, not a sealed coffin.
Creative variations of this recipe
Spicy Southwest Style
Add a kick by incorporating 1 tbsp chili powder and ½ tsp cayenne pepper into your dry rub mixture. This Southwest-inspired twist pairs beautifully with the existing smoked paprika and garlic powder.
After roasting, top sliced brisket with ½ cup pico de gallo and ¼ cup crumbled queso fresco for a fresh, tangy contrast. I like to finish with a drizzle of hot honey for that perfect balance of heat and sweetness. 🌶️
Herb-Crusted Mediterranean
For a Mediterranean twist, replace 1 tbsp of the brown sugar with 1 tbsp dried oregano and 1 tsp dried rosemary in your rub. After roasting, stuff the brisket with sliced sun-dried tomatoes and red onion rings before slicing.
Serve with a side of tzatziki sauce and a sprinkle of feta cheese for a refreshing Mediterranean vibe. The herbs add an aromatic depth that complements the rich beef beautifully.
BBQ Brisket Twist
Swap out the beef broth for 1 cup BBQ sauce (like Sweet Baby Ray’s) during the basting phase. Add 1 tbsp Worcestershire sauce to the dry rub for extra umami. After cooking, top each slice with pickled jalapeños and crumbled blue cheese for a tangy, spicy contrast.
This fusion style turns your brisket into a smoky-sweet showstopper that’s perfect for tailgates or game day. 🔥
Asian-Inspired Glazed Brisket
Create an Asian-inspired glaze by mixing ¼ cup soy sauce, 2 tbsp honey, 1 tbsp sesame oil, and 1 tbsp grated ginger. Brush this mixture over the brisket during the final 30 minutes of cooking.
After slicing, garnish with thinly sliced scallions and toasted sesame seeds. Serve with steamed jasmine rice and stir-fried vegetables for a complete Asian-inspired meal. The glaze adds a sweet, savory complexity that’s hard to resist.
Classic Texas-Style
For an authentic Texas-style brisket, add 1 tbsp ground cumin and 1 tbsp brown sugar to your dry rub. After roasting, wrap the brisket in heavy-duty foil with ½ cup beef broth and 1 tbsp apple cider vinegar for an extra hour at 250°F.
This slow-cooked approach mimics pitmaster techniques and results in a deeply flavorful, fall-apart texture. Serve with classic sides like cornbread and pickled red onions for an all-American experience. 💛
Nutrition facts
Frequently asked questions
Why does the recipe call for trimming the fat cap to ¼ inch?
Trimming to ¼ inch ensures proper fat distribution—too thick and it renders slowly, leaving dry spots; too thin and you risk dryness. This balance creates a crispy exterior while keeping the meat juicy. The fat cap also helps develop that coveted bark during roasting.
Can I use regular table salt instead of kosher salt?
Yes, but adjust the amount—1 tablespoon table salt equals about 2 tablespoons kosher salt. Kosher salt’s flakier texture clings better to meat, but table salt works in a pinch. Just measure carefully to avoid over-salting.
What if my brisket reaches 203°F before the final hour ends?
Pull it out immediately! The internal temperature of 203°F indicates perfect tenderness. If it’s slightly under, finish with foil wrapped at 250°F for 15-20 minutes. Overcooking turns the meat tough, so trust your thermometer.
How do I slice brisket for maximum tenderness?
Slice against the grain in ¼-inch thick slices. This shortens muscle fibers, making each bite melt-in-your-mouth. Use a sharp knife and work slowly to avoid tearing the meat. The grain appears like lines on the cut surface.
Can I skip the butcher paper for the final crust?
Yes, but expect a softer crust. Butcher paper lets moisture escape while maintaining crispness—it’s the secret to that perfect bark. If you skip it, use foil instead, but baste more frequently. The crust won’t be as crisp, but the meat will still be tender.

Trained in classic French technique but raised on slow-cooked ribs and spicy rubs, she blends culinary skill with smoke and soul.
- Smoked Chicken Salad Recipe: Crispy, Smoky Bites With Creamy Ranch Dressing - October 19, 2026
- Beer Can Chicken in a Smoker Recipe: Juicy, Herbed Perfection in One Can - October 19, 2026
- Brined Beef Brisket Recipe: Ultra-Tender, Juicy Cuts in One Pot - October 19, 2026