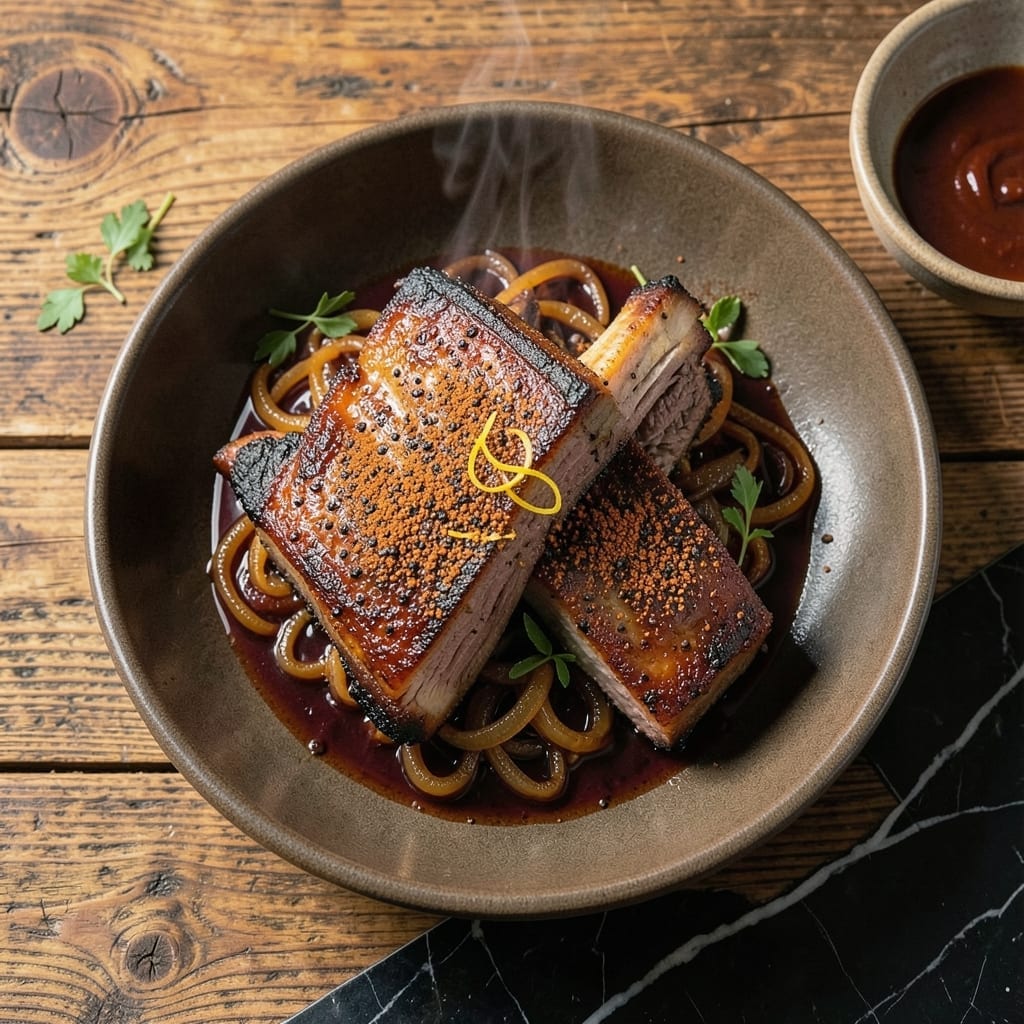
Forget the smoker—this oven-braised method delivers tender beef ribs with minimal effort. I developed this technique for those who crave fall-off-the-bone results without outdoor equipment.
Low heat and a flavorful braising liquid transform tough cuts into succulent, richly seasoned meat. The result is restaurant-quality ribs that practically melt at the touch of a fork.
Ingredients for Beef Ribs Recipe Not Bbq
These quality ingredients transform tough beef ribs into tender, oven-braised perfection without a smoker.
| Ingredient | Amount | Notes |
|---|---|---|
| Beef Back Ribs 🥩 | 4 lb | Full rack, membrane removed |
| Kosher Salt 🧂 | 2 tbsp | Diamond Crystal preferred for even seasoning |
| Black Pepper 🌶️ | 2 tsp | Freshly cracked for bold flavor |
| Smoked Paprika 🌶️ | 1 tbsp | Adds depth without actual smoking |
| Garlic Powder 🧄 | 1 tbsp | Uniform flavor distribution in dry rub |
| Onion Powder 🧅 | 1 tbsp | Complements beef’s natural sweetness |
| Brown Sugar 🍚 | 2 tbsp | Balances savory with subtle caramelization |
| Beef Stock 🥩 | 3 cups | Low-sodium preferred for controlled seasoning |
| Red Wine Vinegar 🍷 | ½ cup | Brightens rich braising liquid |
| Tomato Paste 🍅 | 3 tbsp | Concentrated umami base for sauce |
| Dried Thyme 🌿 | 1 tbsp | Earthy backbone in braise |
| Bay Leaves 🍃 | 2 pieces | Infuses aroma during long cook |
| Olive Oil 🫒 | 2 tbsp | For searing ribs before braising |
| Yellow Onion 🧅 | 1 whole | Diced, foundational flavor layer |
| Carrots 🥕 | 3 whole | Peeled and cut into chunks for braise |
[recipe_ingredient_scaler]
The beef ribs are non-negotiable—back ribs offer the ideal meat-to-bone ratio for oven braising. Seek out well-marbled cuts at a reputable butcher or Whole Foods for consistent quality. Avoid pre-trimmed racks; the fat cap renders down beautifully during the long cook, basting the meat in its own juices. Diamon Crystal kosher salt is my go-to for the dry rub due to its clean flavor and even distribution.
No red wine vinegar? Apple cider vinegar works in a pinch, though it’s slightly fruitier. Fresh garlic can replace garlic powder at a 3:1 ratio (3 fresh cloves per teaspoon powder). For the beef stock, Better Than Bouillon paste dissolved in water yields excellent depth. If tomato paste is unavailable, 1 cup crushed tomatoes cooked down to 3 tablespoons will suffice.
The dry rub can be mixed 24 hours ahead and stored in an airtight container. Braised ribs taste even better the next day—refrigerate in their liquid for up to 4 days. The braising liquid also freezes beautifully for 3 months, perfect for future sauces or soups.
Why You’ll Love This Recipe
- Minimal Effort: I just rub the ribs with salt, pepper, smoked paprika, and garlic powder—no marinade, no fuss.
- Deep Smoky Flavor: The smoked paprika and garlic powder give these ribs a rich, savory depth that’s anything but bland.
- Feeds a Crowd: Between us, these ribs disappear fast at gatherings, and no one misses the BBQ sauce.
- Budget Friendly: Beef back ribs are often cheaper than other cuts, and a little spice goes a long way.
Step-by-Step Instructions for Oven-Braised Beef Ribs
This method transforms tough ribs into melt-in-your-mouth perfection through careful braising.
Step 1: Season the Ribs with a Flavorful Dry Rub
Pat the 4 lb Beef Back Ribs completely dry with paper towels to ensure the rub adheres properly. In a small bowl, combine the 2 tbsp Kosher Salt, 2 tsp Black Pepper, 1 tbsp Smoked Paprika, 1 tbsp Garlic Powder, 1 tbsp Onion Powder, and 2 tbsp Brown Sugar.
Rub this mixture evenly over all surfaces of the ribs, pressing gently to help it stick. This creates a flavorful crust that will deepen as the ribs braise. Let the seasoned ribs sit at room temperature for 30 minutes while you prepare the remaining ingredients.
Step 2: Sear the Ribs for Depth of Flavor
Preheat your oven to 325°F. Heat the 2 tbsp Olive Oil in a large Dutch oven over medium-high heat. Once the oil shimmers, add the ribs and sear for 4-5 minutes per side until deeply browned. This step builds a rich fond that will flavor the braising liquid.
Remove the ribs and set them aside on a plate. The ribs should release easily from the pot when properly seared. Don’t rush this step—browning creates the complex flavors that define this dish.
Step 3: Build the Braising Liquid
In the same Dutch oven, add the diced 1 whole Yellow Onion and the 3 whole Carrots (peeled and cut into chunks). Cook for 5 minutes until the vegetables begin to soften. Stir in the 3 tbsp Tomato Paste and cook for 1 minute to deepen its flavor.
Pour in the 0.5 cup Red Wine Vinegar and scrape up any browned bits from the bottom of the pot. Add the 3 cups Beef Stock, 1 tbsp Dried Thyme, and 2 pieces Bay Leaves. Bring to a gentle simmer.
Step 4: Braise Until Fall-Off-The-Bone Tender
Return the ribs to the Dutch oven, meat-side down. The liquid should come about halfway up the ribs—add a bit more Beef Stock if needed. Cover tightly with a lid and transfer to the preheated oven.
Braise for 2.5 to 3 hours, turning the ribs halfway through, until the meat pulls away from the bone with minimal resistance. The ribs are done when a knife slides in effortlessly and the meat is fork-tender.
Remove the ribs carefully and skim excess fat from the braising liquid if desired. Serve the ribs with the reduced braising liquid spooned over the top for maximum flavor.
Pro Tips For Making Beef Ribs Recipe Not Bbq
- Dry the Ribs: Pat them completely dry with paper towels before seasoning—I learned this the hard way after my first batch steamed instead of browned.
- Season Generously: Use more Kosher salt than you think, especially on the meaty side, because beef back ribs can handle it and it actually changes the outcome.
- Skip the Rush: After seasoning, let them sit uncovered in the fridge for at least an hour, or overnight if you can—this isn’t the prettiest step, but it’s the tastiest.
- Low and Slow: Cook them at 275°F until the meat pulls back from the bone, about 3-4 hours—sounds long, but it works every single time.
Pro Cooking Tips for Perfect Results
Dutch Oven Selection
Invest in a heavy enamel-coated cast iron Dutch oven—I swear by my Le Creuset. The even heat distribution is crucial for consistent braising. A 5-7 quart size perfectly fits a full rack of ribs with room for braising liquid. 🔥
Searing Technique
Don’t overcrowd the pot when searing. I sear 2-3 ribs at a time to avoid steaming. Use tongs to flip—never pierce the meat with a fork. The Maillard reaction during searing creates complex flavors that define this dish.
Liquid Level Check
The braising liquid should come halfway up the ribs. If it’s too low, add more Beef Stock. Too high? Remove some with a ladle. Check at the 1-hour mark and adjust as needed.
Temperature Control
Maintain a steady 325°F oven temperature. I place my Dutch oven on the middle rack for even heat. If your oven runs hot, reduce to 300°F—low and slow wins the race.
Doneness Test
Ribs are done when they reach 195-203°F internal temperature. I test with a ThermoWorks instant-read thermometer. Alternatively, the meat should pull away from the bone with minimal resistance when probed with a fork.
Resting Period
Let ribs rest 15-20 minutes in their braising liquid before serving. This allows the juices to redistribute. I often make the braising liquid ahead—it reheats beautifully with the ribs. ✨
Nutrition Facts

Trained in classic French technique but raised on slow-cooked ribs and spicy rubs, she blends culinary skill with smoke and soul.
- Recipe for Boneless Pork Chops in Cast Iron Skillet: Sear and Baste to Juicy Perfection - October 3, 2026
- Recipe for Boneless Cross Rib Roast: Slow-Roasted Beef with Herb Crust - October 3, 2026
- Hamburgers in Sauce Recipe Crock Pot: Slow-Cooked Savory Delight - October 3, 2026