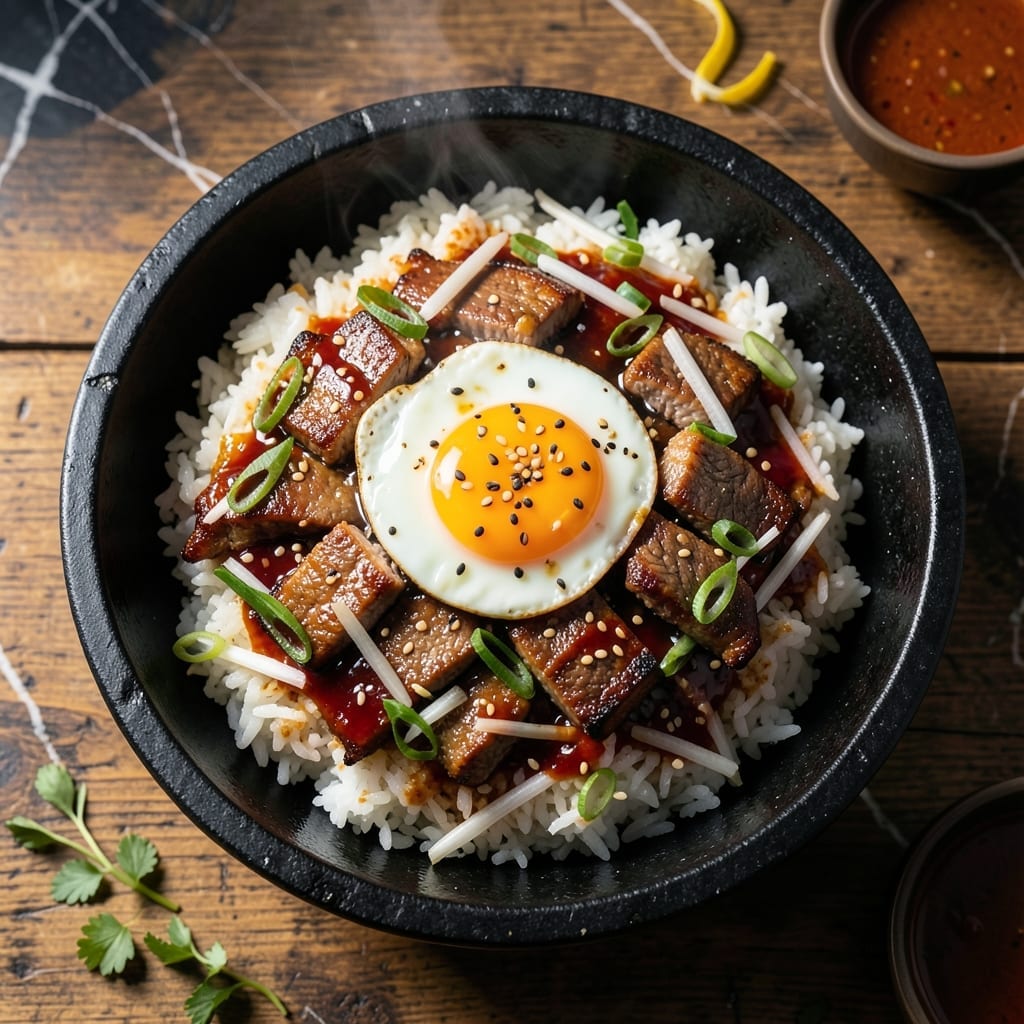
This fried rice brings bold Korean BBQ flavors to your wok with a gochujang kick that transforms leftovers into a meal worth celebrating.
I’ve perfected the balance of smoky, sweet, and spicy notes using traditional techniques, ensuring each bite delivers restaurant-quality depth and texture.
Ingredients for Korean Bbq Fried Rice
Bold Korean flavors start with gochujang and bulgogi beef for restaurant-quality fried rice.
| Ingredient | Amount | Notes |
|---|---|---|
| Cooked White Rice 🍚 | 4 cups | Day-old, chilled preferred |
| Gochujang 🌶️ | 3 tbsp | Korean red chili paste |
| Soy Sauce 🫙 | 3 tbsp | Low-sodium preferred |
| Sesame Oil 🫒 | 1 tbsp | Toasted for depth |
| Bulgogi Beef 🥩 | ¾ lb | Thinly sliced, pre-cooked |
| Large Eggs 🥚 | 2 whole | Beaten for scrambling |
| Green Onions 🧅 | ½ cup | Thinly sliced, white and green parts |
| Carrots 🥕 | ½ cup | Julienned or finely diced |
| Garlic Cloves 🧄 | 4 cloves | Minced for maximum flavor |
| Fresh Ginger 🌿 | 1 tbsp | Grated or minced |
| Sesame Seeds 🌰 | 1 tbsp | Toasted for garnish |
| Vegetable Oil 🫒 | 2 tbsp | Neutral flavor for frying |
| Brown Sugar 🍚 | 1 tbsp | Packed for sweetness |
| Rice Vinegar 🍯 | 1 tbsp | For acidity balance |
[recipe_ingredient_scaler]
The gochujang is non-negotiable here—look for it in the Asian aisle at any major supermarket or pick up a tub at H Mart. It keeps forever in the fridge. For the beef, pre-cooked bulgogi saves time, but any leftover grilled meat works (the smokier, the better). If you’re starting from scratch, thin-slice ribeye and marinate in soy, sugar, and garlic before cooking.
No gochujang? Sriracha plus a touch of miso paste gets you in the ballpark. Out of bulgogi beef? Chicken or shrimp work great—just keep the pieces small. The rice needs to be cold and dry (freshly cooked turns mushy). Day-old takeout rice is actually perfect for this. For extra veg, toss in bell peppers or frozen peas (no thawing needed).
This keeps 3-4 days in the fridge—reheat in a skillet with a splash of oil. Freezes for 1 month (thaw overnight before reheating). The flavors deepen after sitting, so leftovers taste even better.
Why You’ll Love This Recipe
- One Pan Meal: I just toss the cooked rice with bulgogi beef, gochujang, and soy sauce—no extra bowls, no fuss.
- Umami Bomb: The sesame oil and gochujang create this deep, savory-sweet flavor that hits every time.
- Lunchbox Hero: Honestly, it reheats like a dream, so I pack leftovers for work with zero complaints.
- Stretch a Pound: A little bulgogi beef goes a long way, making this dish surprisingly budget-friendly.
Step-by-Step Instructions for Korean BBQ Fried Rice
This is my foolproof method for achieving that perfect wok-hei flavor at home.
Step 1: Prep the Aromatics and Protein
Mince the 4 cloves garlic cloves and grate the 1 tbsp fresh ginger together—this creates a flavor base that will perfume your entire dish. Thinly slice the 0.5 cup green onions, keeping white and green parts separate for layered texture.
Julienne or finely dice the 0.5 cup carrots so they cook quickly and evenly. Have the pre-cooked 0.75 lb bulgogi beef ready to go; its caramelized edges will add depth to every bite.
Step 2: Create the Sauce Base
In a small bowl, whisk together the 3 tbsp gochujang, 3 tbsp soy sauce, 1 tbsp brown sugar, and 1 tbsp rice vinegar until smooth. This balance of sweet, spicy, salty, and tangy is what makes this dish sing.
The sauce should be thick but pourable. I always taste it at this stage—if it needs more heat, a pinch of extra gochujang does the trick, but remember the bulgogi beef already carries its own seasoning.
Step 3: Stir-Fry in Batches for Maximum Flavor
Heat 1 tbsp vegetable oil in a wok or large skillet over high heat until shimmering. Add the carrots and stir-fry for 2-3 minutes until slightly softened but still crisp. Push them to one side and add the remaining 1 tbsp vegetable oil, then the garlic and ginger.
Cook for 30 seconds until fragrant—this is when you’ll smell the magic happening. Immediately add the bulgogi beef and stir-fry for 1-2 minutes until heated through and starting to caramelize at the edges.
Step 4: Combine Rice and Sauce
Break up any clumps in the 4 cups cooked white rice with your hands—day-old, chilled rice works best as it fries up fluffy rather than mushy. Add it to the wok along with the sauce mixture. Stir-fry for 3-4 minutes until the rice is evenly coated and starting to crisp slightly.
This is where the wok-hei (breath of the wok) develops. Keep the heat high and the ingredients moving constantly. You’ll notice the rice grains becoming distinct and slightly toasted—that’s your cue it’s working.
Step 5: Finish with Eggs and Garnishes
Push the rice mixture to one side of the wok. Pour the 2 whole large eggs into the empty space and scramble until just set, then fold into the rice. Drizzle with 1 tbsp sesame oil and toss everything together for 1 final minute.
Remove from heat and stir in the green onion greens and 1 tbsp sesame seeds. The residual heat will soften the onions slightly while keeping them bright and fresh. Serve immediately while hot, with extra sesame seeds on top if desired.
Pro Tips For Making Korean Bbq Fried Rice
- Use Day-Old Rice: Fresh rice turns mushy under high heat—I learned this the hard way after several sad, gummy batches. Day-old, cold rice from the fridge fries up with that perfect chewy texture.
- Sear Bulgogi First: Crowding the pan with beef and rice at once steams everything. Sear the bulgogi beef alone first for 2-3 minutes until caramelized, then set aside before adding rice.
- Bloom the Gochujang: Cook the gochujang in sesame oil for 30 seconds before adding anything else—this deepens the flavor and removes the raw paste taste.
- Finish with Sesame Oil: Drizzle the sesame oil at the very end, not during cooking. High heat can make it bitter, but a final toss with 1 teaspoon gives that nutty aroma without the bitterness.
Pro Cooking Tips for Perfect Results
High Heat Essentials
This dish demands high heat to achieve authentic wok-hei. I use a carbon steel wok on my gas range maxed out at 450°F. If your stove can’t reach that, a cast iron skillet works too—just preheat it for 5 minutes first. 🔥
Rice Prep Trick
Day-old, chilled rice is non-negotiable here. Spread freshly cooked rice on a tray and refrigerate uncovered for 2 hours to dry it out. I’ve found this prevents the mushy texture that ruins so many fried rice attempts.
Sauce Timing
Mix your gochujang sauce before cooking starts. This ensures you can add it immediately when the rice hits the wok, preventing overcooking. I keep mine in a small bowl right next to the stove for quick access.
Egg Technique
Push the rice to one side and scramble the eggs in the empty space. Use a spatula to create soft, fluffy curds in 30 seconds, then fold them in. This method gives you perfect egg texture without overmixing.
Sesame Oil Finish
Always add the 1 tbsp sesame oil at the very end. Its delicate flavor degrades with high heat, so drizzle it in during the final toss. This preserves its aromatic punch. ✨
Garnish Strategy
Remove from heat before adding green onions and sesame seeds. The residual heat will soften the onions just enough while keeping their bright color and crisp texture. I always save extra seeds for table-side sprinkling.
Nutrition Facts

Trained in classic French technique but raised on slow-cooked ribs and spicy rubs, she blends culinary skill with smoke and soul.
- Recipe for Boneless Pork Chops in Cast Iron Skillet: Sear and Baste to Juicy Perfection - October 3, 2026
- Recipe for Boneless Cross Rib Roast: Slow-Roasted Beef with Herb Crust - October 3, 2026
- Hamburgers in Sauce Recipe Crock Pot: Slow-Cooked Savory Delight - October 3, 2026