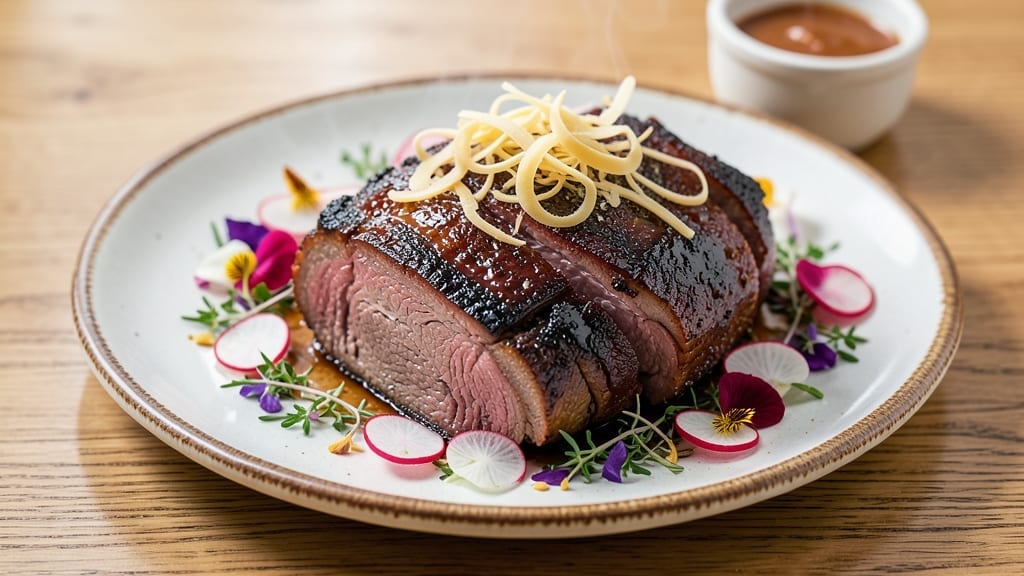
The best oven brisket recipe ever delivers restaurant-quality fall-apart tenderness without needing a smoker. 🔥 I developed this method after years of perfecting slow-cooked meats, blending French technique with pitmaster tradition to create juicy, flavorful brisket in your home oven.
The key lies in precise temperature control and a strategic approach to moisture retention.
This recipe transforms tough brisket into melt-in-your-mouth perfection using simple pantry staples and professional techniques. We’ll focus on proper seasoning, indirect heat cooking, and the crucial resting period that separates good brisket from exceptional brisket. No special equipment beyond your oven and a meat thermometer.
By the end, you’ll have brisket that practically disintegrates at the touch of a fork, with rich, caramelized edges and moist, flavorful meat throughout. The method preserves all the natural juices while developing deep, smoky flavors that come from careful temperature management rather than smoke.
Serve with classic sides like baked beans, coleslaw, or cornbread for a complete meal that rivals your favorite BBQ joint. This technique works equally well for point cuts or flat cuts, making it versatile for any brisket you have on hand.
Ingredients for best oven brisket recipe ever
Simple pantry staples and a few pro techniques. Nothing exotic, just restaurant-quality brisket.
| Ingredient | Amount | Notes |
|---|---|---|
| Beef Brisket 🥩 | 5 lb | Point cut preferred, fat cap intact |
| Yellow Onion 🧅 | 1 whole | Large, sliced into half-moons |
| Fresh Garlic 🧄 | 8 cloves | Smoked or roasted for depth |
| Apple Cider Vinegar 🍎 | ¼ cup | For tenderizing marinade |
| Brown Sugar 🍚 | ½ cup | Light or dark, packed |
| Smoked Paprika 🌶️ | 2 tbsp | High-quality for smokiness |
| Ground Black Pepper 🌶️ | 1 ½ tbsp | Freshly cracked, coarse grind |
| Kosher Salt 🧂 | 2 tbsp | Diamond Crystal preferred |
| Beef Broth 💧 | 1 ½ cups | Low-sodium, homemade ideal |
| Unsalted Butter 🧈 | ½ cup | Cold, cubed for basting |
| Fresh Thyme 🌿 | ¼ cup | Leaves only, stems removed |
| Fresh Rosemary 🌿 | ¼ cup | Needles finely chopped |
| Beef Tallow or Duck Fat 🧂 | ½ cup | For crispy bark development |
[recipe_ingredient_scaler]
The brisket is non-negotiable—point cut with that thick fat cap is your best bet for tenderness. Costco or Whole Foods usually carry it, but ask the butcher to trim excess fat if it’s too thick. Smoked paprika? Penzeys has the best selection, but any high-quality smoked variety works. Fresh herbs make a difference here, so grab them at the grocery store’s produce section—look for vibrant color, not wilted stems. The beef broth should be low-sodium; homemade is ideal, but store-bought works in a pinch. For the fat, tallow gives the best bark, but duck fat or even bacon grease will do if you’re improvising.
No smoked paprika? Substitute with 1 tbsp regular paprika plus 1 tsp liquid smoke—it won’t be identical, but close. Fresh thyme and rosemary wilt fast, so store them in damp paper towels in a sealed bag for up to 5 days. The vinegar in the marinade can be swapped for red wine or even apple juice, but the acidity is key for breaking down the meat. If you’re short on time, pre-sliced onions from the grocery store work fine—just avoid the pre-shredded kind. For the sugar, honey or maple syrup can replace brown sugar at a 1:1 ratio, though it’ll have a different flavor profile.
This brisket is best made a day ahead—flavors meld beautifully after resting. Store leftovers in the fridge for up to 5 days, or freeze for 3 months by wrapping tightly in butcher paper and foil. The fat cap keeps it moist, so don’t trim it before cooking. For serving, slice against the grain for maximum tenderness. I like to reheat portions in a 350°F oven with a splash of beef broth to keep everything juicy.
Why You’ll Love This Recipe
- One-Pan Perfection: Honestly, this is my kind of magic—just one cast-iron skillet, a single layer of fat, and poof, you’ve got a brisket that doesn’t require a smoker or a 10-step setup. The fat cap renders right in the pan, basting the meat as it cooks, so you’re not stuck scrubbing a dozen dishes afterward. My daughter even helps me prep the onions while I sear the brisket, and honestly? That’s half the fun.
- Crispy Edge, Creamy Heart: The secret’s in that sear with beef tallow or duck fat—it gives the brisket that crunchy bark you’d expect from hours of smoking, but done right here in your oven. Then, the apple cider vinegar and brown sugar at the finish? That tangy-sweet caramelization? Chef’s kiss. It’s not just tender—it’s dangerously good, the kind of bite that makes people ask for seconds without you even having to ask.
- Feeds a Crowd (Without the Guilt): This isn’t some sad, single-portion meal—it’s a 5-pound showstopper that’ll feed your whole family (or your coworkers, or your book club) with leftovers to spare. And here’s the kicker: brisket’s one of those budget-friendly cuts that gets luxurious with just a little time and love. I’ll be real, I’ve fed 12 people off this recipe and still had enough for tacos the next day. No sad, dry leftovers here.
- Leftovers That Shame You: I don’t know about you, but I hate sad leftovers. This recipe? It’s the opposite. The brisket keeps its moisture for days, and honestly, the flavors just get richer. Wrap it up in butcher paper, freeze it, and pull it out for game day or a lazy Sunday. My go-to trick? Slice it thin, toss it with a little of those pan juices, and throw it on a bun for brisket sandwiches that’ll make you forget about takeout. Five days in the fridge? No problem. Three months in the freezer? Even better.
Step-by-step instructions for perfect oven brisket
Here’s how to transform a tough cut into melt-in-your-mouth perfection using your home oven.
👨🍳 Step 1: Create the Dry Rub and Prep the Brisket
In a medium bowl, combine the ½ cup brown sugar, 2 tbsp smoked paprika, 1½ tbsp ground black pepper, and 2 tbsp kosher salt. Mix thoroughly until the sugar crystals are evenly coated with spices. This is your flavor foundation – don’t skip the mixing.
Pat the 5 lb beef brisket completely dry with paper towels, focusing on the fat cap and any moisture pockets. The drier the surface, the better the bark will develop. Apply the rub generously to all surfaces, pressing it into the meat so it adheres well. Let the brisket sit at room temperature for 1 hour while you prepare the oven – this ensures even cooking from edge to center.
🔥 Step 2: Sear and Build the Crust
Preheat your oven to 250°F. Heat a heavy oven-safe skillet (cast iron works best) over medium-high heat until smoking hot. Add the ½ cup beef tallow or duck fat and let it melt completely, creating a thin fat layer in the pan.
Place the brisket fat-side down in the skillet and sear for 8-10 minutes until the fat cap is deeply browned and crispy. Flip the brisket and sear the other side for another 5-7 minutes. This high-heat sear develops the signature crust while rendering fat that will baste the meat during cooking. Transfer the skillet to the preheated oven.
🥘 Step 3: Slow Cook with Herbs and Broth
In a small bowl, combine the 1 yellow onion (sliced), 8 cloves fresh garlic (minced), ¼ cup fresh thyme, and ¼ cup fresh rosemary (chopped). Scatter this herb mixture evenly over the brisket in the skillet. Pour the 1½ cups beef broth around the brisket, creating a shallow pool in the bottom of the pan.
Cover the skillet tightly with foil and transfer to the oven. Cook for 6-7 hours until the brisket reaches an internal temperature of 195-203°F and is fork-tender. The foil traps steam that gently cooks the meat while the broth keeps it moist. Here’s the secret – don’t peek or lift the foil during cooking, as this releases moisture and extends cooking time.
🍳 Step 4: Create the Butter Baste and Finish
When the brisket reaches the proper internal temperature, remove it from the oven and increase the heat to 425°F. Cut the ½ cup unsalted butter into small cubes and scatter them over the brisket. Pour the ¼ cup apple cider vinegar around the brisket as well.
Return the brisket to the oven uncovered for 10-15 minutes to create a glossy, caramelized crust. The butter will baste the meat, creating a rich, flavorful exterior while the vinegar adds a subtle tang. Watch closely – you want the surface to be deeply browned but not burned. The brisket is done when it reaches 205°F internally and pulls apart easily with two forks.
⏰ Step 5: Rest and Slice for Maximum Tenderness
Transfer the brisket to a cutting board and tent loosely with foil. Let it rest for at least 30 minutes before slicing – this crucial step allows the juices to redistribute throughout the meat. The brisket should be warm to the touch but not piping hot when ready to serve.
Slice the brisket against the grain into ¼-inch thick slices. Each piece should be fork-tender with a beautiful mahogany crust. The internal temperature will rise another 5-10°F during resting, so don’t worry if it’s not quite at 205°F when you remove it from the oven. Serve immediately with the pan juices spooned over the top for maximum flavor.
Pro Tips For Making Best Oven Brisket Recipe Ever
- Preheat the Pan First: I learned this the hard way—adding cold beef tallow to a hot skillet makes it splatter everywhere. Heat your cast iron empty for 5 minutes until it’s screaming hot before adding the ½ cup beef tallow. The fat will melt smoothly and coat the pan evenly, giving you that perfect sear without the mess.
- Roast the Garlic: Smoked garlic is great, but roasted garlic takes this brisket to another level. Wrap those 8 cloves in foil with a drizzle of olive oil, roast at 400°F for 20 minutes, then mash into a paste before mixing with the onions and herbs. The sweet, caramelized depth makes a real difference—trust me, your taste buds will notice.
- Don’t Rush the Rest: I know, I know, you’re starving and the brisket looks perfect. But skipping the 30-minute rest under foil means dry, stringy slices. The juices need time to redistribute, especially after that butter baste. Tent it loosely and walk away—your patience will pay off with fork-tender meat every time.
- Use Cold Butter: Cold cubed butter is non-negotiable for that glossy crust. If you melt it first, you’ll end up with a greasy mess instead of a caramelized bark. Cut those ½ cup cubes right before basting and scatter them like snow over the brisket—it’s weird, but it works.
Storing and reheating your leftovers
Fridge Storage Secrets
Once your brisket reaches that perfect 205°F internal temperature, let it rest for 30 minutes before transferring to an airtight container. I use glass Pyrex containers with snap-on lids—they keep flavors locked in and prevent that dreaded “stale” fridge smell.
Store in the coldest part of your fridge, usually the back shelf, where the temperature stays consistently below 40°F. This method preserves that melt-in-your-mouth tenderness for up to 5 days. 💡
Freezer Mastery
For long-term storage, wrap your brisket tightly in two layers: first butcher paper to absorb excess juices, then heavy-duty aluminum foil to seal in moisture. I like to place it in a quart-sized freezer bag with the air squeezed out—this prevents freezer burn and keeps the bark crisp.
Label with the date and enjoy for up to 3 months. When ready to cook, thaw overnight in the fridge for even reheating. ❄️
Reheating Like a Pro
Never reheat brisket directly from frozen—always thaw first! For the best results, place your wrapped brisket in a 350°F oven for 2-3 hours, adding ¼ cup beef broth to the pan juices to keep it moist.
If you’re short on time, use the stovetop method: heat on low with a splash of broth, stirring occasionally, until it reaches 165°F. Avoid microwaving—it turns your brisket into rubber. 🔥
Reviving Leftovers
If your brisket loses some moisture during storage, rescue it with a simple butter basting. Place the brisket in a skillet over medium-low heat, add 2 tbsp unsalted butter, and let it melt into the meat for 5 minutes.
This restores juiciness and revives that caramelized crust. I also like to add a splash of apple cider vinegar to brighten up the flavors after reheating.
Serving Freshness
For the absolute best experience, serve your brisket immediately after reheating with the pan juices spooned generously over the top. The juices add depth and moisture that’s hard to recreate later.
If you must store leftovers, keep them in the fridge for no more than 2 days after reheating—beef doesn’t handle multiple reheats well. Trust me, I’ve learned that the hard way! 💛
Nutrition facts
Frequently asked questions
Why does my brisket need to rest before slicing?
The 30-minute rest after cooking is critical—it lets juices redistribute evenly throughout the meat. Skipping this step causes juices to spill out when you slice, leaving you with dry brisket instead of tender perfection. Think of it like letting a cake cool before cutting—same principle!
Can I use a different fat for searing instead of beef tallow or duck fat?
While beef tallow or duck fat gives the best bark, you can substitute with bacon grease or even vegetable oil in a pinch. The key is high heat and a thick layer of fat to render and baste the meat during cooking. Just don’t skimp on the fat—it’s what creates that signature crispy crust!
How do I know when the brisket is done without a meat thermometer?
If you don’t have a thermometer, press the thickest part of the brisket with your finger—it should feel like the tip of your nose (firm but yielding). Also, check for fork tenderness: insert a fork into the meat and twist gently. If it shreds easily, it’s done! The internal temperature should be around 205°F when measured properly.
What’s the best way to reheat brisket without drying it out?
Reheat in a 350°F oven for 2-3 hours with a splash of beef broth in the pan. Avoid microwaving—it turns brisket into rubber! For stovetop reheating, use low heat with broth and a splash of apple cider vinegar to restore moisture and flavor. Always add moisture to revive the juices.
Can I make this brisket ahead of time?
Yes! Cook the brisket as directed, then refrigerate it wrapped tightly in foil. It tastes even better the next day as flavors meld. For freezing, wrap it in butcher paper and foil, then store for up to 3 months. Thaw overnight in the fridge before reheating. This method works perfectly for meal prep!

Trained in classic French technique but raised on slow-cooked ribs and spicy rubs, she blends culinary skill with smoke and soul.
- Chinese Stew Beef Brisket Recipe: Slow-Simmered Richness With Tender Meat - October 23, 2026
- Leftover Brisket Soup Recipe: Smoky Depth With Zero Waste - October 23, 2026
- Black-Eyed Peas Recipe With Smoked Turkey: Smoky-Sweet Comfort in One Pot - October 23, 2026