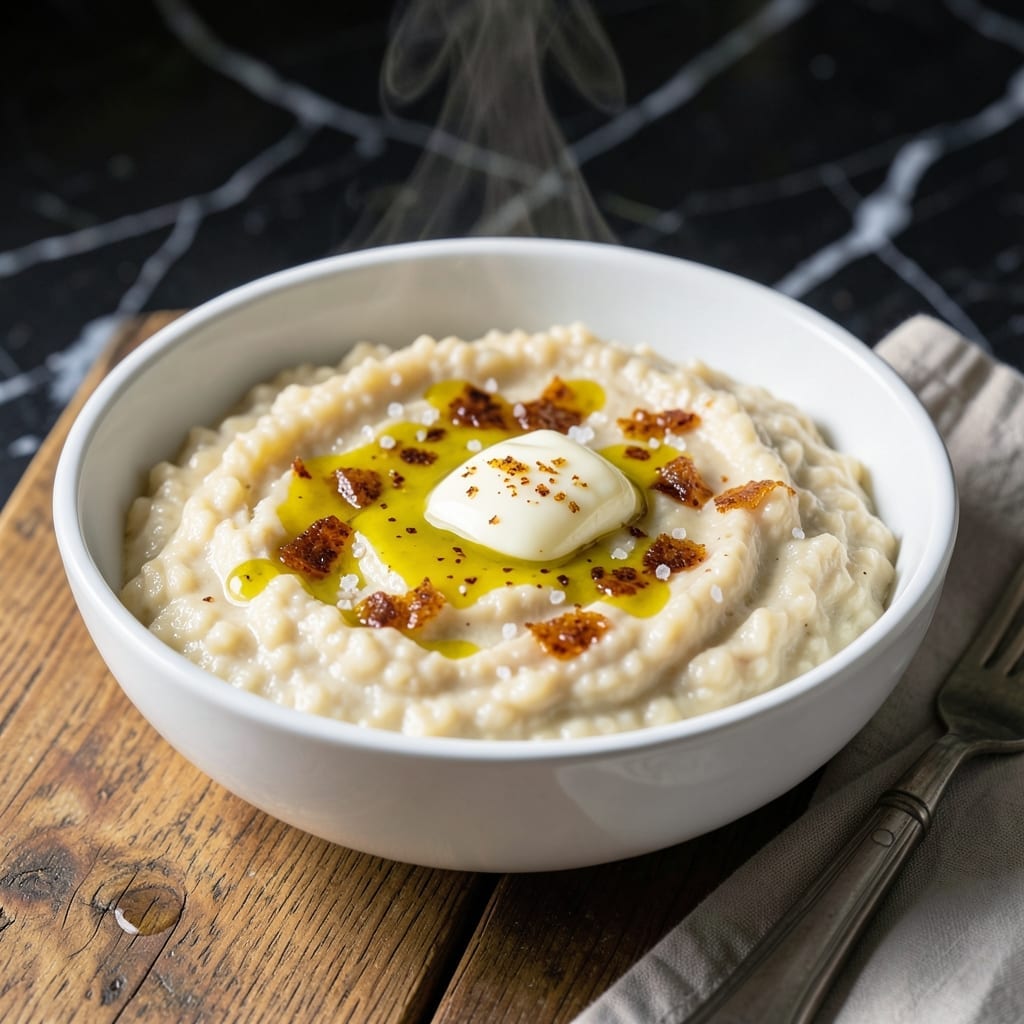
Stone-ground grits deserve a place at your breakfast table, and this method delivers creamy, buttery perfection in minutes.
With just a few ingredients and 5 minutes of active prep, you’ll have a dish that rivals any Southern diner’s best.
Ingredients for Best Quick Grits
Stone-ground grits and a handful of staples create this creamy Southern classic in minutes.
| Ingredient | Amount | Notes |
|---|---|---|
| Stone-Ground Grits 🌾 | 1 cup | Not instant or quick grits |
| Water 💧 | 4 cups | Or substitute milk for creamier texture |
| Unsalted Butter 🧈 | 4 tbsp | Divided for cooking and finishing |
| Kosher Salt 🧂 | 1 tsp | Diamond Crystal preferred |
| Whole Milk 🥛 | ½ cup | Optional for extra creaminess |
| Sharp Cheddar Cheese 🧀 | 1 cup | Freshly shredded for best melt |
| Garlic Powder 🧄 | ½ tsp | Adds subtle depth |
| Black Pepper 🌶️ | ½ tsp | Freshly ground preferred |
| Hot Sauce 🔥 | 1 tsp | Such as Crystal or Tabasco |
| Green Onions 🧅 | 2 whole | Thinly sliced for garnish |
[recipe_ingredient_scaler]
The grits are non-negotiable here. Stone-ground from a Southern mill like Anson Mills or Bob’s Red Mill delivers that authentic texture—instant grits won’t cut it. Look for coarse ground in the grain aisle or order online. The butter matters too; Plugrá or Kerrygold add that rich, rounded flavor that defines the dish. Avoid salted butter so you can control the seasoning precisely.
No whole milk? Half-and-half or heavy cream makes it downright decadent. Skip the cheddar if you prefer a simpler profile, or swap in Pepper Jack for a kick. The hot sauce can be adjusted to taste—add it to the pot or drizzle it on after. Garlic powder is subtle but essential; fresh garlic can be overpowering here. Need to stretch it? Add an extra cup of water and a little more butter.
Leftover grits thicken as they cool—stir in a splash of hot water or milk to revive. Keeps 3-4 days in the fridge, reheats beautifully on the stove or microwave. Freezes well too, though the texture softens slightly. Garnish with green onions just before serving for a fresh finish.
Why You’ll Love This Recipe
- Ready in 15: I can have creamy grits on the table faster than it takes to brew a pot of coffee.
- Buttery Richness: The whole milk and butter make these grits so velvety, I could eat them plain.
- Breakfast or Dinner: Honestly, I serve these with eggs for breakfast or shrimp for dinner—same pot, different meals.
Step-by-Step Instructions for Buttery Stone-Ground Grits
This method ensures creamy, flavorful grits with minimal effort and maximum result.
Step 1: Boil Water and Toast the Grits
Bring the 4 cups Water to a rolling boil in a heavy-bottomed saucepan over high heat. As the water heats, I stir in the 1 cup Stone-Ground Grits gradually, whisking constantly to prevent clumping. This initial vigilance is crucial for achieving a smooth texture.
The mixture will thicken almost immediately. Reduce the heat to medium-low and continue stirring for 1-2 minutes to toast the grits slightly, which enhances their nutty flavor. You’ll notice the raw corn aroma giving way to a deeper, more complex scent.
Step 2: Simmer Until Creamy
Once the grits are incorporated, add the 1 tsp Kosher Salt and 0.5 tsp Garlic Powder, stirring to dissolve. Cover the saucepan and let the grits simmer for 18-20 minutes, stirring every 5 minutes to prevent sticking. Stone-ground grits take longer to cook than instant varieties, but the result is infinitely superior.
After 15 minutes, check the texture. The grits should be creamy but still have a slight bite. If they’re too thick, add a splash of hot water. If they’re too thin, let them cook uncovered for a few more minutes to evaporate excess liquid.
Step 3: Finish with Dairy and Seasonings
Once the grits are tender, stir in the 4 tbsp Unsalted Butter and 0.5 cup Whole Milk. I add the butter one tablespoon at a time, allowing each addition to melt completely before adding the next. This emulsifies the mixture, giving it a silky, luxurious mouthfeel.
Next, incorporate the 1 cup Sharp Cheddar Cheese in small handfuls, stirring until fully melted and smooth. Then add the 0.5 tsp Black Pepper and 1 tsp Hot Sauce, stirring to combine. The cheese should be freshly shredded to avoid clumping, and the hot sauce adds a subtle kick without overpowering the dish.
Step 4: Rest and Garnish
Remove the saucepan from the heat and let the grits rest for 2-3 minutes. This brief pause allows the flavors to meld and the texture to set slightly. The grits should be thick enough to hold their shape when spooned but still fluid enough to pour.
Ladle the grits into serving bowls and garnish with the 2 whole Green Onions, thinly sliced. The green onions add a fresh, oniony brightness that cuts through the richness of the cheese and butter. Serve immediately while hot, as grits thicken considerably as they cool.
Pro Tips For Making Best Quick Grits
- Boil Water First: Start with rolling boiling water before adding grits—I learned this the hard way after too many lumpy batches from lukewarm starts.
- Whisk Constantly: Stir grits vigorously for the first 2-3 minutes to prevent clumping, then ease up but keep a spoon nearby.
- Use Whole Milk: Skip the water-only version; whole milk adds richness that low-fat just can’t match (yes, even if you’re tempted to “healthify” it).
- Salt at the End: Add kosher salt after cooking—early salt can make grits tough, and you’ll taste the difference in the final creamy texture.
Pro Cooking Tips for This Dish
Prevent Lumps Early
Whisk the 1 cup Stone-Ground Grits into boiling 4 cups Water in a slow, steady stream. I use a heavy-bottomed saucepan and keep the whisk moving constantly for the first 2 minutes. This prevents the dreaded clumping that ruins texture. 💡
Stirring Strategy
After toasting the grits, reduce to medium-low heat and stir every 5 minutes during the 18-20 minute simmer. I set a timer because it’s easy to get distracted. Stone-ground grits need this attention to cook evenly without scorching.
Cheese Melting Tip
Always use freshly shredded Sharp Cheddar Cheese—pre-shredded has anti-caking agents that create a grainy texture. Add it in small handfuls off the heat, stirring until smooth between each addition. This prevents the cheese from seizing up and keeps your grits velvety.
Butter Emulsification
Add the 4 tbsp Unsalted Butter one tablespoon at a time, letting each melt completely before adding more. This creates a stable emulsion that makes the grits luxuriously creamy. I prefer Plugrá for its rich, clean flavor. 🧈
Rest Before Serving
Let your grits rest for 2-3 minutes off the heat before serving. This allows the starches to settle and the flavors to meld. The texture will be just right—not too runny, not too thick. Trust me, this small step makes a big difference.
Reviving Leftovers
Grits thicken as they cool. To revive, stir in ¼ cup hot water or milk per cup of leftover grits over low heat until creamy. Avoid microwaving, as it can make them unevenly hot and lose that silky consistency.
Nutrition Facts
Frequently Asked Questions
Can I use instant grits instead?
Instant grits cook faster but lack the creamy texture of stone-ground. For best results, stick with stone-ground grits and allow 18-20 minutes to simmer.
How do I make them creamier?
Replace half the water with whole milk or stir in ½ cup heavy cream at the end. Adding butter one tablespoon at a time also helps.
Why are my grits lumpy?
Lumps form when grits aren’t whisked constantly into boiling water. Pour them in slowly while stirring for the first 2 minutes.
Can I make this vegan?
Yes! Use vegetable broth and swap dairy for olive oil and vegan cheese. The texture will be slightly different but still delicious.

Trained in classic French technique but raised on slow-cooked ribs and spicy rubs, she blends culinary skill with smoke and soul.
- Recipe for Boneless Pork Chops in Cast Iron Skillet: Sear and Baste to Juicy Perfection - October 3, 2026
- Recipe for Boneless Cross Rib Roast: Slow-Roasted Beef with Herb Crust - October 3, 2026
- Hamburgers in Sauce Recipe Crock Pot: Slow-Cooked Savory Delight - October 3, 2026