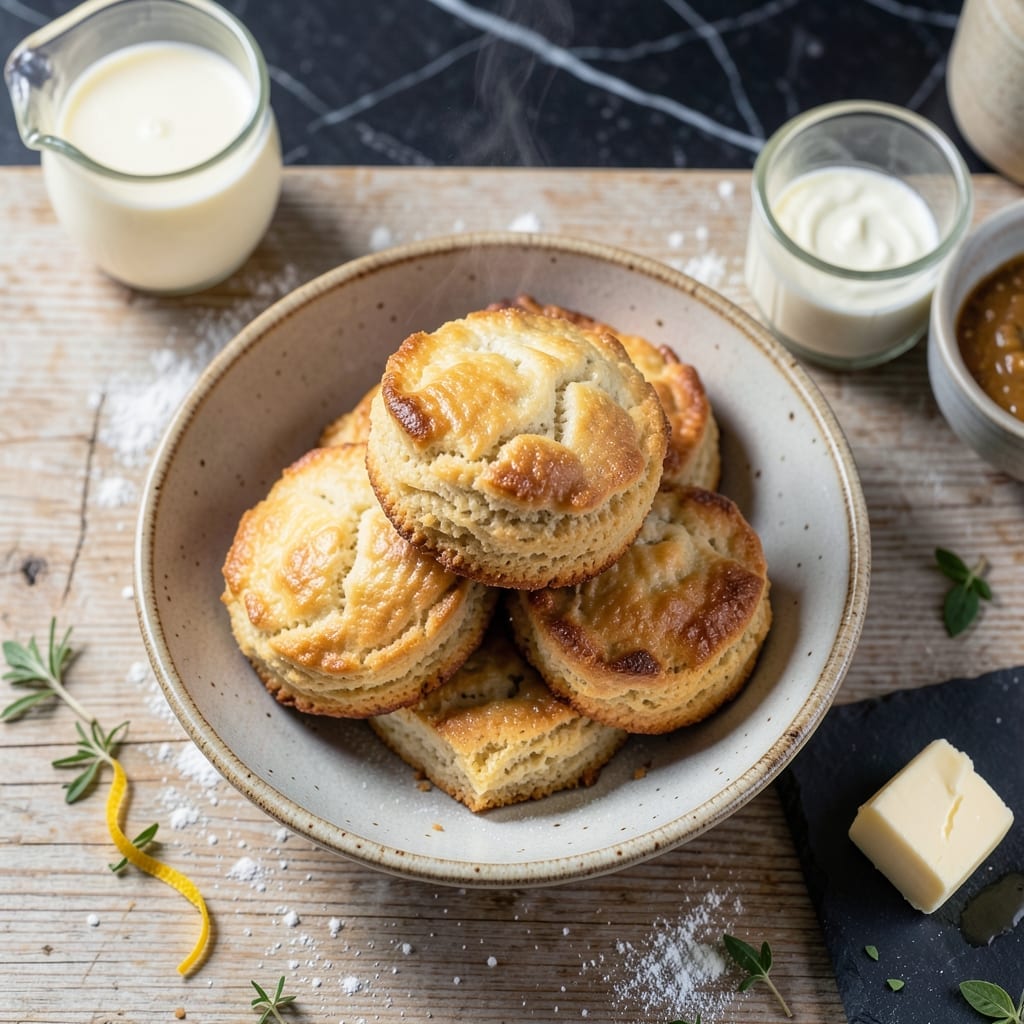
Achieving flaky biscuits without buttermilk is absolutely possible with the right technique. This method uses simple pantry staples to create layers that rival traditional recipes.
Cold butter and a gentle touch are key to building those perfect flaky layers. The result is tender, golden biscuits that rise beautifully every time.
Ingredients for Biscuit Recipe No Buttermilk
Simple pantry staples create those coveted flaky layers in this dairy-free biscuit method.
| Ingredient | Amount | Notes |
|---|---|---|
| All-Purpose Flour 🌾 | 2 cups | Sifted for lighter texture |
| Baking Powder 🧂 | 1 tbsp | Aluminum-free preferred |
| Salt 🧂 | ½ tsp | Fine grain for even distribution |
| Cold Unsalted Butter 🧈 | ½ cup | Cubed, keep chilled until use |
| Whole Milk 🥛 | ¾ cup | Cold, plus extra for brushing |
| White Vinegar 💧 | 1 tbsp | Or lemon juice for acidity |
| Granulated Sugar 🍚 | 1 tsp | Optional, for slight sweetness |
| Baking Soda 🧂 | ¼ tsp | Balances acidity from vinegar |
[recipe_ingredient_scaler]
The butter must stay cold—cut it into small cubes and return to the fridge while prepping other ingredients. Use high-quality unsalted for control over salt content. For the flour, White Lily or King Arthur produce excellent results. The milk needs to be cold too; this prevents the butter from melting prematurely, which is critical for achieving those distinct layers.
No buttermilk? Whole milk plus vinegar mimics the acidity perfectly. For a richer option, substitute plain yogurt thinned with water. Swap the vinegar for lemon juice if preferred. The baking powder should be fresh—test by dropping a spoonful in hot water; it should bubble vigorously. If your biscuits spread, your butter was likely too warm.
Store biscuits in an airtight container at room temperature for up to 2 days. For longer storage, freeze unbaked dough on a tray, then transfer to a bag for up to 3 months. Reheat frozen biscuits in a 350°F oven for 10-12 minutes to restore flakiness.
Why You’ll Love This Recipe
- 5-Minute Mix: I don’t even need to pull out the mixer—just cut cold butter into flour, add milk, and fold. Honestly, it’s faster than waiting for the oven to preheat.
- Buttery Layers: The cold butter creates those flaky, golden layers that melt in your mouth. That first bite with warm honey? Pure satisfaction.
- Breakfast to Dinner: I’ve served these with jam at dawn and alongside stew at dusk. Between us, they’re just as good as a sandwich split open with deli turkey.
- Pantry Staples: No special trips, no buttermilk to buy. All-purpose flour, milk, and butter—things I always have—turn into something crave-worthy every time.
Step-by-Step Instructions for Biscuits Without Buttermilk
This method creates tall, flaky layers using a simple milk and vinegar substitution.
Step 1: Create the Buttermilk Substitute
In a measuring cup, combine the 0.75 cup Whole Milk with the 1 tbsp White Vinegar. Stir gently and let the mixture sit for 5 minutes until it thickens slightly and forms small curdles.
This acidified milk mimics buttermilk’s tang and reacts with the 0.25 tsp Baking Soda to create lift. The mixture should look slightly separated when ready. This step is crucial for achieving the proper chemical reaction that makes these biscuits rise beautifully.
Step 2: Combine Dry Ingredients
In a large bowl, whisk together the 2 cups All-Purpose Flour, 1 tbsp Baking Powder, 0.5 tsp Salt, 1 tsp Granulated Sugar, and 0.25 tsp Baking Soda. Make sure all ingredients are evenly distributed throughout the flour mixture.
The combination of baking powder and baking soda provides double-acting leavening power, while the salt enhances flavor. The sugar adds a subtle sweetness that balances the tang from our milk mixture. Sifting the flour first, as noted in the ingredients, helps create a lighter texture in the final biscuit.
Step 3: Cut in the Cold Butter
Add the 0.5 cup Cold Unsalted Butter (cubed) to the dry ingredients. Using a pastry cutter or your fingers, work the butter into the flour until the mixture resembles coarse crumbs with some pea-sized butter pieces remaining visible.
This is the secret to flaky layers—visible butter pieces create steam pockets during baking that separate the dough into distinct layers. Keep the butter as cold as possible throughout this process to prevent it from melting into the flour. I recommend working quickly and using chilled utensils.
Step 4: Form and Cut the Dough
Make a well in the center of the flour mixture and pour in the thickened milk. Using a wooden spoon or silicone spatula, gently stir until the dough just comes together. It will be slightly sticky but should hold its shape.
Turn the dough onto a lightly floured surface and fold it over itself 2-3 times to create layers. Pat the dough into a 1-inch thick rectangle. Use a 2.5-inch biscuit cutter to cut out biscuits, pressing straight down without twisting to ensure even rising.
Step 5: Bake to Golden Perfection
Preheat your oven to 425°F. Place the biscuits on a baking sheet lined with parchment paper, leaving about 1 inch between each one. Brush the tops with a little extra Whole Milk for browning.
Bake for 12-15 minutes until the biscuits are golden brown on top and the layers are visible from the side. The internal temperature should reach at least 200°F. Serve warm, as the layers are most distinct when fresh from the oven.
Pro Tips For Making Biscuit Recipe No Buttermilk
- Chill the Butter: Cut your cold unsalted butter into small cubes and freeze for 10-15 minutes before mixing—I learned this the hard way after my first few batches turned out flat and dense.
- Use Ice-Cold Milk: Pop your whole milk in the freezer for 15 minutes before using; the colder the liquid, the flakier your biscuits will be.
- Don’t Overwork Dough: Mix just until the dough comes together, even if it looks shaggy—overmixing develops gluten and turns biscuits tough.
- Bake Immediately: Get biscuits in the oven as soon as they’re shaped; letting them sit too long warms the butter and ruins the layers.
Make-Ahead Tips for This Dish
Prep the Dough
You can make the dough up to 2 days ahead and refrigerate. After mixing, wrap tightly in plastic wrap and chill. The cold actually helps the butter stay firm, improving layering.
Freeze for Later
Shape and cut biscuits, then freeze on a parchment-lined tray for 1 hour. Transfer to a freezer bag and store for up to 3 months. This method prevents them from sticking together.
Bake from Frozen
No need to thaw! Bake frozen biscuits directly at 425°F for 18-20 minutes. Add 2-3 minutes if they’re still pale. I love this for surprise weekend brunches. 💡
Room Temperature Rise
If refrigerating dough, let it sit at room temperature for 15-20 minutes before baking. This helps activate the leavening agents for maximum rise.
Reheating Tips
Warm leftover biscuits in a 350°F oven for 5-8 minutes. Wrap in foil to retain moisture. Avoid the microwave—it makes them rubbery.
Morning Freshness
For breakfast, reheat and split open, then drizzle with honey or serve with jam. The layers will still be flaky and delicious. 💛
Nutrition Facts
Frequently Asked Questions
What can I use instead of buttermilk?
Mix 0.75 cup milk with 1 tbsp vinegar or lemon juice. Let it sit for 5 minutes to thicken. Plain yogurt thinned with water works too.
Why does the butter need to stay cold?
Cold butter creates steam pockets during baking, which makes the layers flaky. If it melts prematurely, your biscuits will be dense instead of light and airy.
Can I make these biscuits ahead?
Yes! Shape and freeze unbaked biscuits for up to 3 months. Bake directly from frozen, adding 2-3 minutes to the bake time.
How do I prevent flat biscuits?
Avoid overmixing the dough and press the cutter straight down without twisting. Also, ensure your baking powder is fresh for proper rise.

Trained in classic French technique but raised on slow-cooked ribs and spicy rubs, she blends culinary skill with smoke and soul.
- Recipe for Boneless Pork Chops in Cast Iron Skillet: Sear and Baste to Juicy Perfection - October 3, 2026
- Recipe for Boneless Cross Rib Roast: Slow-Roasted Beef with Herb Crust - October 3, 2026
- Hamburgers in Sauce Recipe Crock Pot: Slow-Cooked Savory Delight - October 3, 2026