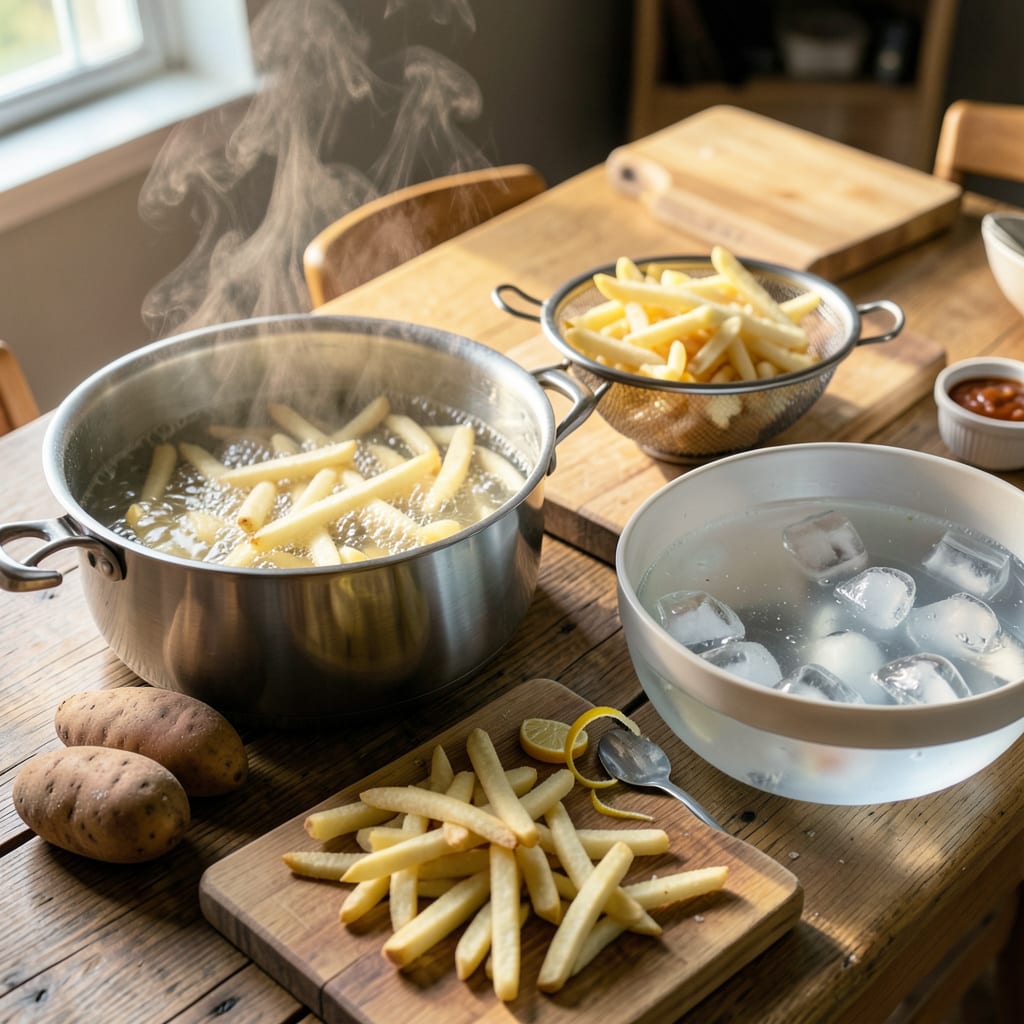
Here’s the thing—freezing french fries the right way means you can have crispy, golden fries anytime without starting from scratch. I’ve burned through more batches than I’d like to admit, but nailing the blanching process changed everything. This isn’t just tossing raw potatoes in the freezer and hoping for the best.
The secret is a quick blanch in hot water (exactly 300°F for 4 minutes—no longer!) followed by an ice bath to stop the cooking. This removes excess starch while keeping the interior fluffy. I learned this trick from my pitmaster days—same principle as par-cooking ribs before smoking, just with potatoes instead of pork.
What you end up with are fries that freeze perfectly and crisp up beautifully when cooked later. No soggy centers, no weird textures—just restaurant-quality fries that taste fresh-made. The best part? They’ll keep for up to 3 months, so you can always have that crispy, salty fix ready to go.
Fair warning: don’t skip the single-layer freezing step before bagging. That’s what prevents those annoying ice crystals and keeps your fries separate. Once you try this method, you’ll never go back to store-bought frozen fries again.
📚 In This Guide
- What You’ll Need
- Instructions
- Tips and Common Mistakes
What Youll Need
- ● Potatoes: 5 lbs (2.3 kg) of russet or Idaho potatoes (high starch for crispiness! 🥔)
- ● Water: 1 gallon (3.8 L) for blanching + extra for rinsing
- ● Ice: 2 lbs (0.9 kg) for an ice bath (keeps fries crisp! ❄️)
- ○ Salt: 2 tbsp (optional, for flavor enhancement)
- ○ White vinegar: ¼ cup (optional, prevents browning)
- ● Large pot: 6-8 quart capacity (with lid)
- ● Slotted spoon or spider strainer: For easy fry removal
- ● Large bowl: For ice bath (must fit all fries)
- ● Sharp chef’s knife or mandoline slicer: For uniform ¼–½” sticks
- ● Cutting board: Non-slip preferred
- ● Paper towels or clean kitchen towel: For drying
- ● Baking sheets: For freezing (lined with parchment paper)
- ● Freezer-safe bags or airtight containers: For storage
- ● Kitchen timer: For precise blanching (⏰ critical!)
- ○ Food thermometer (optional): To check water temp (160–180°F ideal)
Instructions
Here’s the simple process I use to lock in flavor and texture before freezing.
Select and Cut Your Potatoes
Start with russet potatoes—they’re the gold standard for fries because of their high starch content. Scrub them thoroughly under cold water to remove any dirt, then peel if you prefer (I like leaving the skin on for extra texture). Cut them into even 1/3-inch sticks for consistent cooking.
As you cut, place the fries in a bowl of cold water to prevent browning. This soaking step also removes excess starch, which helps prevent the fries from sticking together during freezing. Let them soak for 30 minutes while you prepare your workstation.
Blanch the Fries in Boiling Water
Bring a large pot of water to a rolling boil—you’ll need enough to fully submerge the fries. Add 1 tablespoon of salt per gallon of water for seasoning. Working in batches to avoid overcrowding, drain the soaked fries and carefully add them to the boiling water.
Blanch for exactly 4-5 minutes—you’re looking for the fries to become slightly translucent around the edges but still firm in the center. They shouldn’t be fully cooked through. Immediately drain them in a colander and rinse with cold water to stop the cooking process.
Dry Thoroughly Before Freezing
Spread the blanched fries in a single layer on clean kitchen towels or paper towels. Pat them completely dry—this is crucial for preventing ice crystals from forming. I like to let them air-dry for 10-15 minutes after patting to ensure they’re bone-dry.
For extra crispiness, you can arrange them on a baking sheet and place them in the freezer for 1 hour before bagging. This quick-freeze method keeps them from clumping together. Once frozen solid, transfer them to airtight freezer bags, removing as much air as possible before sealing.
Store for Future Crispy Results
Label your freezer bags with the date—they’ll keep for up to 3 months at peak quality. When you’re ready to cook, don’t thaw them first. Spread the frozen fries in a single layer on a baking sheet and bake at 425°F for 20-25 minutes, flipping halfway through.
The blanching process creates a protective barrier that locks in moisture while allowing the exterior to get perfectly crispy. You’ll know they’re done when they’re golden brown and sizzling. Serve immediately while hot and crispy—just like fresh-made fries from your favorite restaurant!
Tips and Common Mistakes
Here’s what I’ve learned from years of perfecting frozen fries—small details that make a huge difference in texture and flavor.
Potato Selection: Russet potatoes are non-negotiable for this method. Their high starch content creates that perfect crispy exterior when baked. I’ve tried other varieties, but they either turn mushy or don’t brown properly. The 1/3-inch stick size in Step 1 is also crucial—thinner fries will overcook during blanching, while thicker ones won’t crisp up evenly when baked.
Blanching Technique: During Step 2, don’t skip the salt in the boiling water—it seasons the fries from within. The 4-5 minute blanch is just enough to start cooking the starches without making them mealy. Watch for that slight translucency at the edges; if they’re still completely opaque, they need another 30 seconds. Immediately shocking them with cold water stops the cooking and preserves that perfect al dente texture.
Drying Process: The 10-15 minute air-drying in Step 3 isn’t optional—it’s what prevents ice crystals from forming. I use a clean kitchen towel and actually press down gently to absorb maximum moisture. For extra insurance, I sometimes run a fan over them for the last 5 minutes. This step determines whether your fries will be crispy or soggy after freezing.
Freezing Strategy: That 1-hour quick-freeze on the baking sheet in Step 3 creates individual frozen fries that won’t stick together. Skip this, and you’ll end up with a solid block of fries in your bag. When baking from frozen at 425°F, don’t crowd the pan—give each fry space to crisp up properly during those 20-25 minutes.
Pro Tips for Blanching French Fries For Freezing
- Here’s what I’ve learned from years of perfecting frozen fries—small details that make a huge difference in texture a…
- Potato Selection: Russet potatoes are non-negotiable for this method. Their high starch content creates that perfect …
- Blanching Technique: During Step 2, don’t skip the salt in the boiling water—it seasons the fries from within. The 4-…
Frequently Asked Questions
Do I need to blanch french fries before freezing?
Yes! Blanch them to lock in flavor, texture, and color. Skipping this step can lead to soggy, discolored fries when cooked later. The quick boil stops enzyme activity, keeping your fries fresh for up to 6 months in the freezer.
How long should I blanch french fries before freezing?
Blanch cut potatoes in boiling water for 3-5 minutes (depending on thickness). Drain and immediately plunge into ice water for 3-5 minutes to halt cooking. Pat dry before freezing to prevent ice crystals.
Can I freeze french fries without blanching?
You can, but they’ll turn brown and mushy when cooked. For best results, blanch first—it’s worth the extra 10 minutes! If short on time, try a vinegar soak (1 tbsp vinegar + 4 cups water) for 30 minutes before freezing to slow discoloration.
Why did my frozen french fries turn out soggy after frying?
Sogginess usually means excess moisture. After blanching, dry thoroughly with a towel or air-dry for 10 minutes before freezing. Also, avoid thawing before cooking—fry directly from frozen for crispiness!
What’s the best way to reheat frozen blanched french fries?
For crispy results, deep-fry at 375°F (190°C) for 3-5 minutes or air-fry at 400°F (200°C) for 10-12 minutes, shaking halfway. Oven-baking works too (425°F/220°C for 15-20 mins), but flip them for even browning!
Blanching your french fries before freezing is the secret to crispy, restaurant-quality results every time! 🍟 By following these simple steps—prepping, blanching, and freezing properly—you’ll lock in texture and flavor for months. No more soggy disappointments!
Ready to put your new skills to the test? Grab those potatoes and start blanching—your future self (and taste buds) will thank you! For extra crispiness, try double-frying after thawing. Happy cooking! 😊

Trained in classic French technique but raised on slow-cooked ribs and spicy rubs, she blends culinary skill with smoke and soul.
- Recipe for Boneless Pork Chops in Cast Iron Skillet: Sear and Baste to Juicy Perfection - October 3, 2026
- Recipe for Boneless Cross Rib Roast: Slow-Roasted Beef with Herb Crust - October 3, 2026
- Hamburgers in Sauce Recipe Crock Pot: Slow-Cooked Savory Delight - October 3, 2026