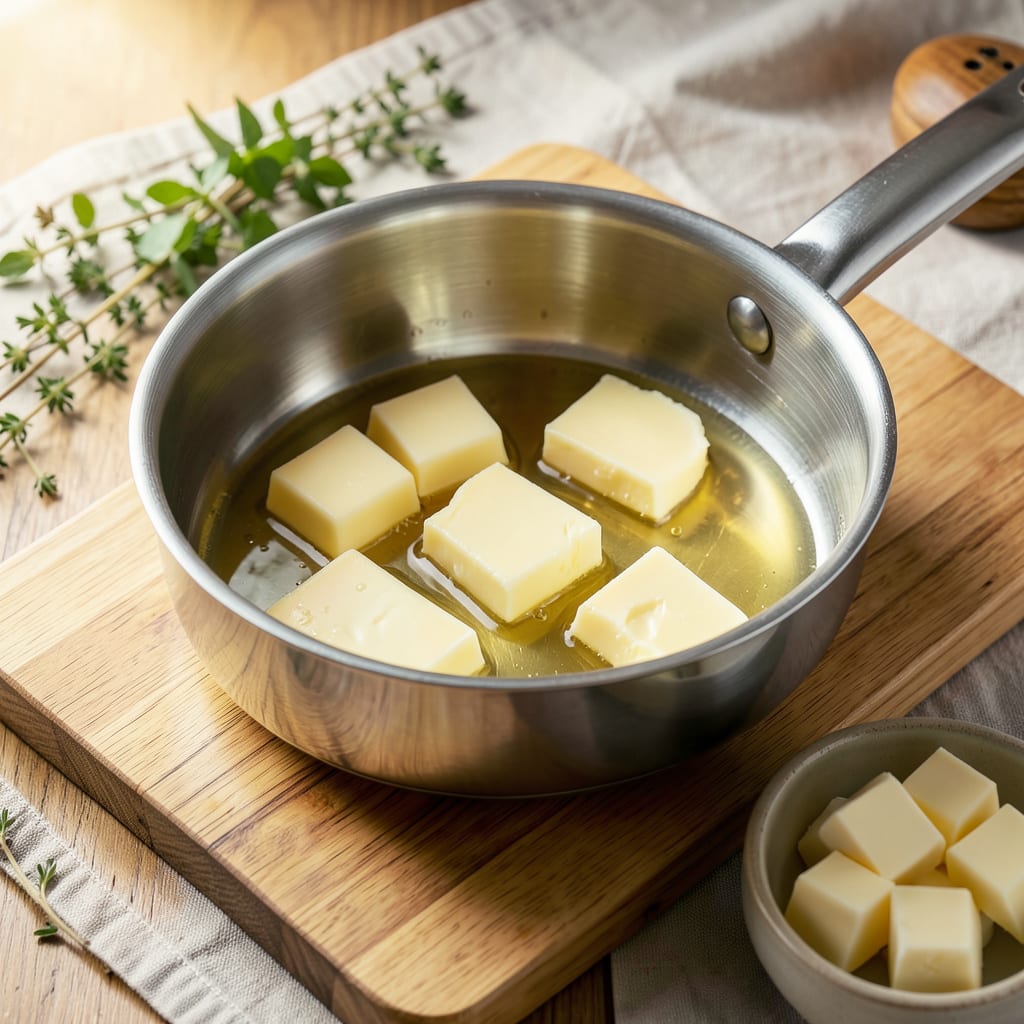
I’ve burned more butter in my early cooking days than I’d care to admit—until I finally cracked the code for melting it perfectly every time. There’s a science to transforming that solid stick into liquid gold without a single scorched speck, and it’s simpler than you think. Whether you’re making hollandaise, baking cookies, or just need it for sautéing, the method matters more than most home cooks realize.
The stovetop might seem straightforward, but here’s where most people go wrong: too much heat, too fast. Low and slow is the golden rule—I learned this the hard way after ruining three batches of beurre blanc in one afternoon. The microwave can work too, but only if you use short bursts and stir between each. Both methods have their place, depending on what you’re making and how much control you need.
What you’re aiming for is that moment when the butter goes from foamy to clear—that’s your sweet spot. Push it past that, and you’re flirting with burned milk solids that’ll ruin your dish. I’ve found that understanding these visual cues makes all the difference between silky smooth results and a pan of bitter disappointment.
This isn’t just about preventing burns—it’s about unlocking butter’s full potential. Melted properly, it becomes the secret weapon in your cooking arsenal, elevating everything from simple scrambled eggs to fancy French sauces. Once you master this, you’ll wonder how you ever cooked without knowing these tricks.
📚 In This Guide
- What You’ll Need
- Instructions
- Tips and Common Mistakes
What Youll Need
- ● Butter: ½ cup to 1 cup (1 stick = ½ cup) of unsalted or salted butter, depending on your recipe. 🧈
- ● Heat-safe bowl or measuring cup: Microwave-safe (glass or ceramic) or a small saucepan for stovetop melting.
- ○ Microwave (optional): For quick melting—use a microwave-safe container with a lid or cover.
- ○ Stovetop (optional): A small saucepan or double boiler for gentle, controlled melting.
- ● Spatula or spoon: To stir and check consistency (silicone or wooden works best).
- ● Timer: To avoid overheating (especially for microwave method). ⏰
- ○ Knife (optional): For cutting butter into smaller pieces for faster melting.
- ○ Thermometer (optional): For precision—ideal temp is 160–170°F (71–77°C) for fully melted butter.
- ● Paper towels or cloth: To wipe up spills or dry the bowl for better control.
Step-by-Step Instructions for Melting Butter Perfectly
Here’s the foolproof method I use every time—simple, reliable, and guaranteed to work.
Choose the Right Butter and Prep
Start with high-quality unsalted butter for the cleanest flavor. I always cut the butter into small, uniform pieces (about 1-tablespoon size) before melting. This creates more surface area, so it melts faster and more evenly without overheating.
If your butter is straight from the fridge, let it sit at room temperature for 5-10 minutes first. You don’t want it soft, just slightly less cold—this prevents the outside from melting while the inside stays solid. Cold butter can also cause splattering when it hits heat.
Use Gentle, Indirect Heat
Place the butter pieces in a heavy-bottomed saucepan or light-colored skillet. I prefer stainless steel or enameled cast iron because they distribute heat evenly. Set the pan over low heat—this is crucial. You should barely see any movement in the butter at first.
As it begins to melt, you’ll notice the butter goes through stages: first it softens, then pools into liquid, and finally the milk solids separate. Stir occasionally with a silicone spatula, scraping the bottom to prevent any hot spots from forming. This should take 5-7 minutes for a standard stick of butter.
Watch for Visual Cues and Remove Immediately
Pay close attention as the butter fully liquefies. You’ll see foam rise to the top—that’s the water content evaporating. The butter is ready when it’s completely liquid with just a few tiny bubbles, but before any browning occurs. The color should remain pale yellow, not golden.
Here’s the critical moment: as soon as you see the foam subside and hear just a gentle sizzle (not a crackle), remove the pan from heat. The residual heat will finish the melting process without risking overheating. I always transfer the melted butter to a heatproof bowl immediately to stop the cooking process.
Cool Slightly Before Using
Let the melted butter cool for 2-3 minutes before using in recipes. You’ll notice it becomes slightly more viscous as it cools—this is ideal for most baking applications. If you’re using it for sautéing, you can proceed immediately, but be cautious as it will be very hot.
For baking recipes that call for “cooled melted butter,” let it sit until it’s warm to the touch but not hot—about 10 minutes. You can test this by dipping your finger in (carefully!). It should feel like warm bath water. This temperature ensures it won’t cook eggs or melt chocolate prematurely when combined with other ingredients.
Tips and Common Mistakes
Perfectly melted butter makes all the difference in your cooking—here’s how to get it right every time.
Heat Control: The low heat mentioned in Step 2 isn’t just a suggestion—it’s the key to preventing separation or burning. I’ve found that stainless steel pans work best because they respond quickly when you adjust the heat. If you notice the butter starting to bubble aggressively before the 5-7 minute mark, reduce the heat slightly or remove the pan from the burner for 30 seconds to let it calm down.
Preparation Matters: Don’t skip the 5-10 minute resting time for cold butter in Step 1. I learned this the hard way when I tried melting straight-from-fridge butter—it created uneven pockets of liquid and solid fat. Cutting into uniform 1-tablespoon pieces isn’t just for speed; it ensures even melting so you don’t end up with some pieces fully liquid while others are still solid.
Visual Cues: In Step 3, watch for the foam to turn from white to slightly translucent—that’s your signal the water is evaporating. The pale yellow color is crucial; if it starts turning golden, you’ve gone too far. I always keep a heatproof bowl ready so I can transfer the butter immediately when it reaches that perfect liquid state. The residual heat will continue working for about 30 seconds after you remove it from the stove.
Cooling Strategy: The 2-3 minute cooling time in Step 4 isn’t arbitrary. This brief rest lets the butter reach the ideal consistency for most recipes. For baking, that 10-minute cooling period is non-negotiable—hot butter can melt chocolate or cook eggs in your batter. I test it by touching the side of the bowl; if it feels warm but not hot to the touch, it’s ready.
Pro Tips for Best Way To Melt Butter
- Perfectly melted butter makes all the difference in your cooking—here’s how to get it right every time.
- Heat Control: The low heat mentioned in Step 2 isn’t just a suggestion—it’s the key to preventing separation or burni…
- Preparation Matters: Don’t skip the 5-10 minute resting time for cold butter in Step 1. I learned this the hard way w…
Frequently Asked Questions
How long does it take to melt butter on the stovetop?
On low heat, butter melts in 2–4 minutes, depending on the amount. Stir occasionally to prevent burning. For faster melting (1–2 minutes), use medium-low heat but watch closely—butter can go from melted to browned (or burned) quickly!
Can I melt butter in the microwave? Is it the best method?
Yes! The microwave is the fastest method (30–60 seconds on 50% power). Use a microwave-safe bowl and check every 15 seconds to avoid splattering or overheating. However, stovetop melting gives you more control for recipes like sauces.
What’s the best way to melt butter without it separating?
To prevent butter from splitting into liquids and solids, melt it slowly on low heat (or in short microwave bursts). If it separates, whisk in 1 tsp cold water or let it cool slightly—it’ll re-emulsify! Avoid high heat, which accelerates separation.
Can I substitute melted butter for softened butter in recipes?
Not always! Melted butter adds more moisture, which can alter textures (e.g., cookies may spread too much). For baking, softened butter (creamed with sugar) is ideal. Use melted butter only if the recipe specifies it—or for pancakes, sauces, or drizzles!
Why does my melted butter smell or taste burnt?
Burnt butter happens when the milk solids overheat. To fix it: strain out the solids (use the clear liquid) or start fresh with lower heat. For a nutty flavor without burning, try browning butter carefully!
Melting butter perfectly is all about gentle heat and patience—whether you choose the stovetop, microwave, or even a warm bowl. 🌟 Avoid high temperatures to keep that rich, golden flavor intact without a hint of burning. Now that you’ve mastered the technique, why not put it to use? Try whipping up a batch of homemade cookies, drizzling it over popcorn, or elevating your next sautéed dish. Happy cooking—your buttery creations await! 🍪✨

Trained in classic French technique but raised on slow-cooked ribs and spicy rubs, she blends culinary skill with smoke and soul.
- Recipe for Boneless Pork Chops in Cast Iron Skillet: Sear and Baste to Juicy Perfection - October 3, 2026
- Recipe for Boneless Cross Rib Roast: Slow-Roasted Beef with Herb Crust - October 3, 2026
- Hamburgers in Sauce Recipe Crock Pot: Slow-Cooked Savory Delight - October 3, 2026