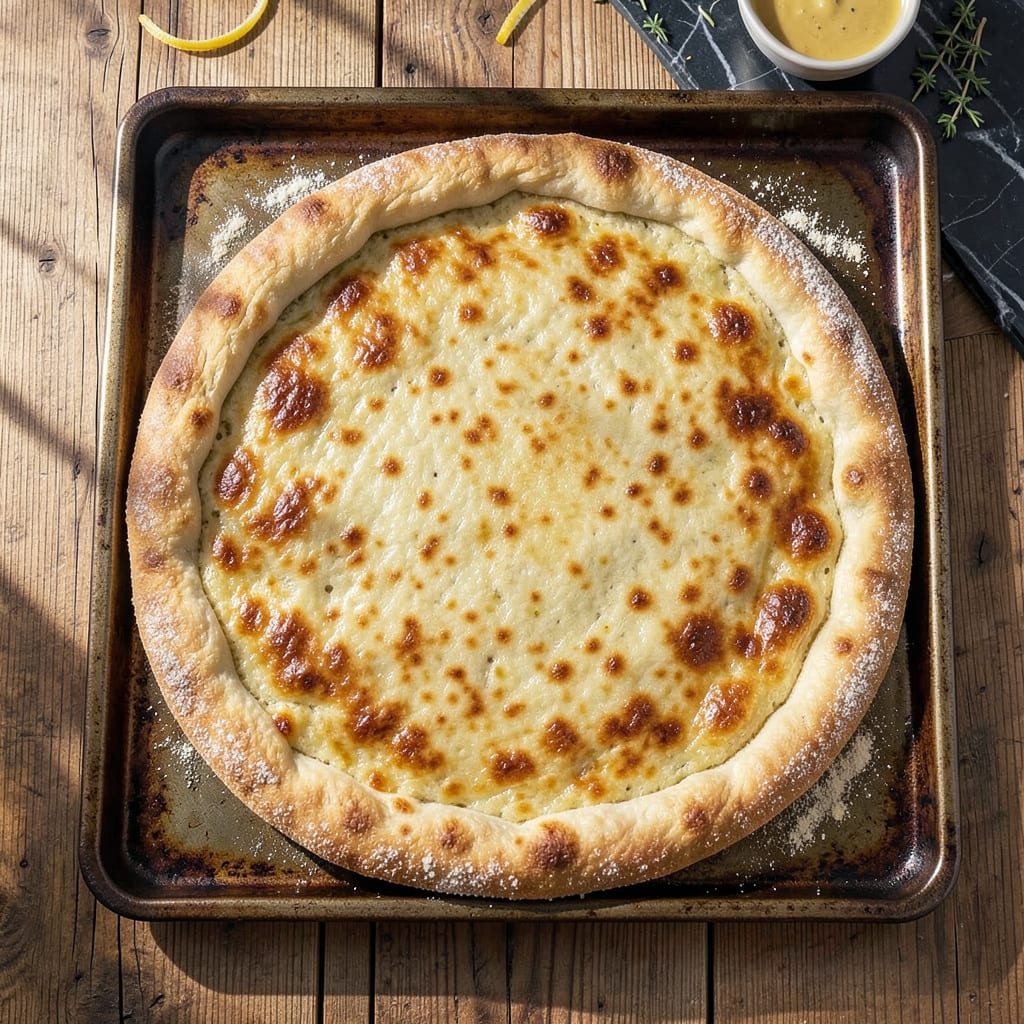
Let me tell you about the pizza game-changer I wish I’d discovered years ago. Blind baking your crust before adding toppings is the secret to that elusive crispy bottom we all crave. No more soggy centers, no more disappointing slices that bend under their own weight. Just perfect, cracker-like crust every single time.
Here’s the thing—I spent years struggling with pizza that looked great but fell apart when you tried to eat it. The problem was always the same: all those delicious toppings would steam the crust, turning it limp. Then I learned this simple technique: bake the crust alone first, then add toppings after. It’s like giving your pizza a head start in the oven.
What you get is a crust that stays crispy from first bite to last, with toppings that cook perfectly without turning your base into a soggy mess. The difference is night and day—like comparing a New York slice to a frozen pizza. And the best part? It only adds about 5 extra minutes to your process.
Whether you’re making classic margherita or loading up with veggies, this method works. I’ve tested it with everything from simple cheese pizzas to fully-loaded vegetable pies. The crust holds up beautifully, giving you that satisfying crunch with every bite. Ready to transform your homemade pizza?
📚 In This Guide
- What You’ll Need
- Instructions
- Tips and Common Mistakes
What Youll Need
- ● Pizza dough: 1 lb (450g) of room-temperature store-bought or homemade dough (enough for a 12-inch crust). Cold dough won’t stretch properly! ⚠️
- ● Parchment paper or silicone baking mat: 1 sheet (12-inch diameter or larger) to prevent sticking.
- ● Dried beans, pie weights, or granulated sugar: 1–2 cups for blind baking (beans/sugar can be reused! Sugar caramelizes slightly for extra crispiness.)
- ● Olive oil or cooking spray: 1–2 tsp to lightly coat the dough (prevents bubbles and adds flavor).
- ● Fork or docking tool: For poking holes (docking) to stop air pockets. A wooden skewer works too!
- ● Baking sheet or pizza stone/steel: 1 (preheated for 30+ minutes if using stone/steel for best results).
- ○ Aluminum foil (optional): 1 sheet to cover edges if they brown too quickly.
- ○ Cornmeal or semolina (optional):strong> 1–2 tbsp for dusting the peel/pan for extra crunch.
- ○ Thermometer (optional but helpful): Oven thermometer to confirm your oven hits 475–500°F (245–260°C)—key for crispiness!
Instructions
Here’s how to blind bake your pizza crust for that perfect crispy foundation every time.
Prepare Your Crust and Pan
Start with your favorite pizza dough, whether store-bought or homemade. Let it come to room temperature if it’s been refrigerated—cold dough is harder to stretch and shape. I like to roll out my dough on a lightly floured surface to about ¼-inch thickness, making sure it’s slightly smaller than your pizza pan or stone.
Transfer the rolled dough to your pizza pan or stone. If you’re using a pan, lightly brush it with olive oil first—this helps create that extra-crispy bottom we’re after. Gently press the dough into the pan, working it toward the edges to form a slight rim. Don’t stretch it too thin at the edges or they’ll burn before the center crisps.
Dock the Dough to Prevent Bubbles
Here’s the secret to a flat, even crust: docking. Use a fork to poke holes all over the dough surface, spacing them about ½ inch apart. This allows steam to escape during baking, preventing those giant air bubbles that can ruin your perfect crust.
Be thorough but don’t press too hard—you want to pierce the surface without going all the way through. Pay special attention to the center where bubbles tend to form most. If you’re using a particularly wet dough, you might want to dock it twice in different directions for extra insurance against bubbling.
Blind Bake for the Perfect Foundation
Preheat your oven to 425°F with your pizza stone or pan inside if possible. When the oven reaches temperature, carefully place your docked crust in the oven. Bake for 8-10 minutes until the edges just begin to turn light golden brown and the surface looks dry but not fully cooked.
Watch closely during this step—the goal is to partially cook the crust without browning it completely. You’ll know it’s ready when the dough no longer looks raw but still has some give when pressed gently. This partial baking creates a sturdy base that won’t turn soggy when you add your toppings later.
Add Toppings and Finish Baking
Remove the partially baked crust from the oven and add your sauce and toppings. Since the crust is already partially cooked, you’ll need less time in the oven for the final bake. Return the pizza to the 425°F oven and bake for 8-12 minutes until the cheese is melted and bubbly.
The beauty of this method is that your toppings will heat through perfectly while the pre-baked crust stays crisp. You’ll end up with a pizza that holds its shape when sliced, with no soggy bottom to disappoint you. The crust should be golden brown on the bottom and edges, with a satisfying crunch when you take that first bite.
Rest Briefly Before Serving
When your pizza comes out of the oven, let it rest for 2-3 minutes before slicing. This brief rest allows the cheese to set slightly, preventing all your toppings from sliding off when you cut into it. The crust will also firm up just a bit more during this time.
Use a pizza wheel or sharp knife to slice through that perfectly crisp crust. You should hear a satisfying crunch as you cut—music to any pizza lover’s ears. Serve immediately while the cheese is still gooey and the crust is at its crispiest. This method guarantees you’ll never have to deal with that dreaded soggy bottom again!
Tips and Common Mistakes
Blind baking pizza crust is simpler than you think—these key details will ensure you get that perfect crispy base every single time.
Docking Done Right: In Step 2, when you’re piercing the dough with a fork, make sure your holes are evenly spaced about ½ inch apart and go deep enough to penetrate the surface without tearing through. I’ve found that docking in two directions (like a crosshatch pattern) works best for wetter doughs, preventing those frustrating air pockets that can form during the 8-10 minute blind bake at 425°F. Pay extra attention to the center where bubbles love to form.
The Perfect Partial Bake: During Step 3’s blind baking, you’re looking for edges that are just beginning to turn light golden brown while the center still has some give when pressed. This partial cook at 425°F creates the sturdy foundation that prevents sogginess later. Don’t walk away during these 8-10 minutes—the difference between perfectly par-baked and overdone is just a minute or two. The crust should look dry but not fully cooked when you pull it out.
Oven Strategy: For best results in Step 3, preheat your oven with the pizza stone or pan already inside. This ensures the baking surface is properly hot when you add your dough, which helps create that initial crispness. If using a stone, let it heat for at least 30 minutes before baking. The consistent 425°F temperature is key—too hot and the edges burn before the center cooks, too cool and you won’t get that crisp texture we’re after.
Topping Timing: When you add toppings in Step 4, remember the crust is already partially cooked, so it needs less time in the oven. The 8-12 minute final bake at 425°F is just enough to melt the cheese and heat through the toppings without overcooking the base. Watch for the cheese to become bubbly and just starting to brown in spots—that’s your signal it’s ready to come out.
Pro Tips for Blind Bake Pizza Crust
- Blind baking pizza crust is simpler than you think—these key details will ensure you get that perfect crispy base eve…
- Docking Done Right: In Step 2, when you’re piercing the dough with a fork, make sure your holes are evenly spaced abo…
- The Perfect Partial Bake: During Step 3’s blind baking, you’re looking for edges that are just beginning to turn ligh…
Frequently Asked Questions
Do I need to blind bake pizza crust every time?
Not always! Blind baking is ideal for topping-heavy pizzas (like veggie-loaded or BBQ chicken) or when using wet ingredients (e.g., fresh mozzarella). For classic cheese or pepperoni pizzas, a hot oven and preheated stone often work fine without it. Test both methods to see what you prefer!
How long should I blind bake pizza dough?
For most homemade crusts, 5–7 minutes at 475°F (245°C) is perfect—just until it’s lightly golden but still pliable. Thicker crusts (like deep-dish) may need 10–12 minutes. Watch closely to avoid over-browning!
What can I use instead of pie weights or dried beans?
No weights? No problem! Try:
- Uncooked rice or lentils (reuse them only for baking)
- Granulated sugar (dissolves if spilled, but works in a pinch)
- A second baking sheet pressed on top
Why did my crust puff up while blind baking?
Puffing happens when trapped air expands. To prevent it:
- Dock the dough (poke holes with a fork) before baking
- Use heavy weights (beans/rice) to press it down
- Roll the dough thinner for even baking
Can I blind bake store-bought pizza dough?
Store-bought dough benefits from blind baking too—especially if it’s pre-risen. Reduce time to 3–5 minutes since it’s often thinner. Check the package for specific temps, as some brands vary.
Mastering the blind bake pizza crust technique is your ticket to a perfectly crispy, restaurant-worthy base every time—no soggy disappointments! 🍕✨ With just a few extra minutes of prep and the right tools, you’ll unlock a foolproof method for pizzas that impress. Now that you’ve got the know-how, grab your dough, preheat that oven, and put this trick to the test on your next pizza night. Your taste buds (and dinner guests) will thank you!

Trained in classic French technique but raised on slow-cooked ribs and spicy rubs, she blends culinary skill with smoke and soul.
- Recipe for Boneless Pork Chops in Cast Iron Skillet: Sear and Baste to Juicy Perfection - October 3, 2026
- Recipe for Boneless Cross Rib Roast: Slow-Roasted Beef with Herb Crust - October 3, 2026
- Hamburgers in Sauce Recipe Crock Pot: Slow-Cooked Savory Delight - October 3, 2026