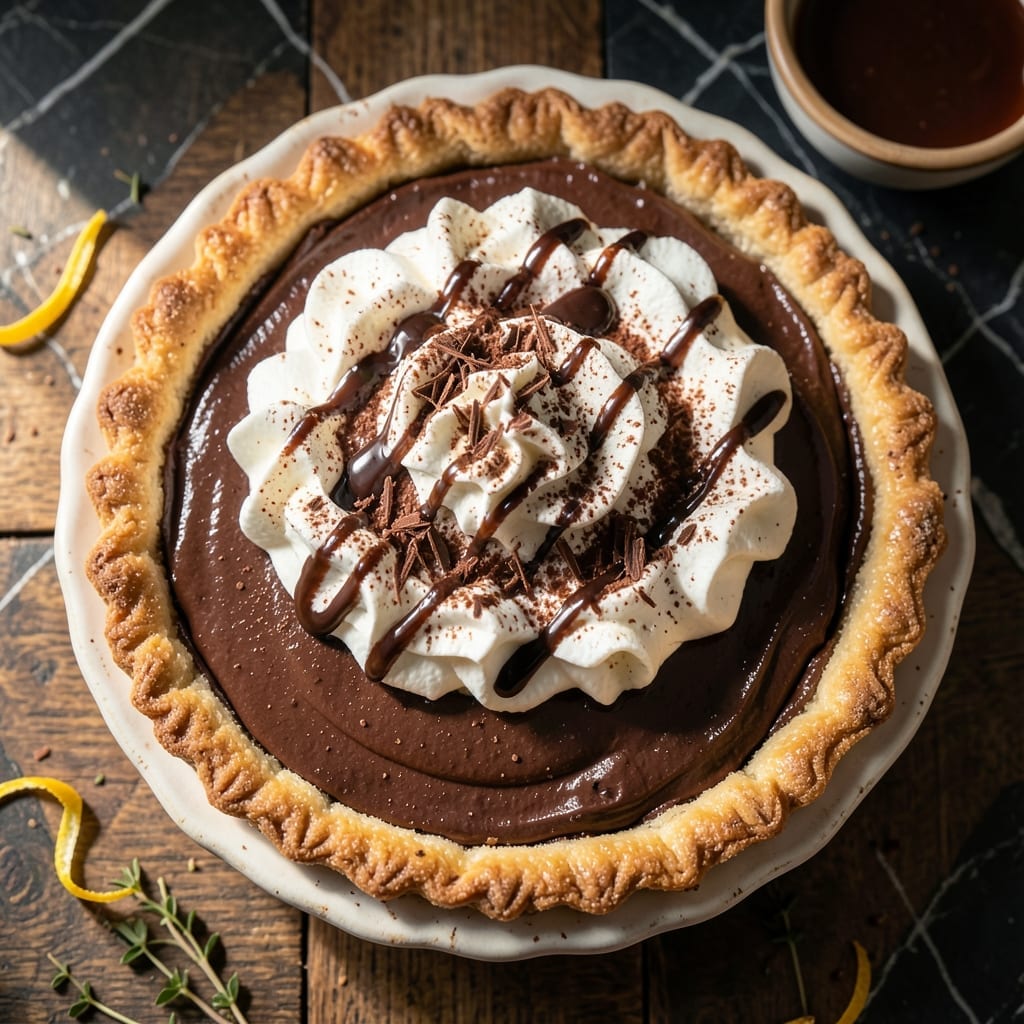
This chocolate cream pie delivers the flaky crust and silky filling that made Bloomingdale’s famous. A perfect balance of rich cocoa and velvety texture comes from a proven technique.
The secret lies in properly blind-baking the crust to maintain its crispness against the luxurious filling. A slow-cooked custard base ensures that signature smoothness without any risk of curdling.
What emerges is a dessert with layers of contrast: the crisp shell giving way to a cloud-like chocolate center. The finishing touch of whipped cream adds a light counterpoint to the deep cocoa flavors.
Serve chilled for the best texture and flavor development. This is the recipe that turns dessert into an event.
Ingredients for Bloomingdale’s Chocolate Cream Pie
Flaky crust, silky filling, and whipped cream finish define this luxurious dessert experience.
| Ingredient | Amount | Notes |
|---|---|---|
| All-Purpose Flour 🌾 | 2 cups | Plus extra for dusting |
| Granulated Sugar 🍚 | ¼ cup | Fine grain preferred |
| Salt 🧂 | ½ tsp | Fine sea salt |
| Unsalted Butter 🧈 | 1 cup | Cold, cubed for crust |
| Ice Water 💧 | ¼ cup | Plus 1 tbsp as needed |
| Granulated Sugar 🍚 | 1 ½ cups | For filling, divided |
| Cornstarch 🌾 | ⅓ cup | For thickening custard |
| Unsweetened Cocoa Powder 🍫 | ¾ cup | Dutch-process preferred |
| Whole Milk 🥛 | 3 cups | Full-fat for richness |
| Large Egg Yolks 🥚 | 5 pieces | Room temperature |
| Vanilla Extract 🌿 | 2 tsp | Pure vanilla preferred |
| Salt 🧂 | ½ tsp | For filling |
| Heavy Cream 🥣 | 2 cups | For whipped topping |
| Powdered Sugar 🍚 | ¼ cup | For sweetening whipped cream |
| Vanilla Extract 🌿 | 1 tsp | For whipped cream |
[recipe_ingredient_scaler]
The crust demands precision. King Arthur Flour for all-purpose gives consistent results, and European-style butter (like Plugrá) offers higher fat content for superior flakiness. Blind-baking requires pie weights or dried beans—never skip this step or the bottom will sog. The cocoa powder should be Dutch-process for smoother flavor, though natural works in a pinch.
Need to adjust? Swap 2 tbsp cornstarch for flour in the filling if you’re out—texture stays nearly identical. Whole milk can become half-and-half for extra richness, or 2% in a bind (less velvety). No egg yolks? Don’t attempt this recipe—they’re structurally essential. The whipped cream can be stabilized with 1 tsp unflavored gelatin if serving outdoors.
Assembled pie keeps 3 days refrigerated, though the crust softens over time. Filling alone holds 5 days chilled. Whipped cream is best fresh but can be made 12 hours ahead. For make-ahead, bake crust and prepare filling separately, then assemble day-of for optimal texture contrast.
Why You’ll Love This Recipe
- No-Fuss Crust: I use just flour, butter, sugar, and ice water—no fancy techniques, and it still turns out flaky every time.
- Rich Chocolate Dream: That deep cocoa flavor against the silky cream filling? Honestly, it’s the reason I keep making it.
- Crowd-Pleasing Dessert: Between us, this pie disappears at potlucks, and no one guesses how simple it is.
- Budget-Friendly Indulgence: Butter and basic pantry staples stretch into a dessert that feels like a splurge, but costs pennies.
Step-by-Step Instructions for Chocolate Cream Pie
Achieve bakery-quality results with this precise method for a flaky crust and silky filling.
Step 1: Prepare the Pie Crust
In a large bowl, combine the 2 cups All-Purpose Flour, 0.25 cup Granulated Sugar, and 0.5 tsp Salt. Cut in the 1 cup Unsalted Butter (cold and cubed) using a pastry blender until the mixture resembles coarse crumbs with pea-sized butter pieces.
Gradually add the 0.25 cup Ice Water, one tablespoon at a time, mixing just until the dough comes together. Overworking develops gluten, which toughens the crust. Form into a disk, wrap in plastic, and chill for 1 hour—this relaxes the gluten and prevents shrinking during baking.
Step 2: Blind-Bake the Crust
Roll out the chilled dough on a lightly floured surface to a 12-inch circle. Transfer to a 9-inch pie dish, crimp the edges, and prick the bottom all over with a fork. Freeze for 15 minutes to prevent slumping.
Line with parchment paper and fill with pie weights or dried beans. Bake at 375°F for 15 minutes, then remove the weights and parchment. Bake for an additional 10-12 minutes until the crust is golden brown and fully set. Cool completely on a wire rack.
Step 3: Make the Chocolate Custard Filling
In a medium saucepan, whisk together the 1.5 cups Granulated Sugar, 0.33 cup Cornstarch, 0.75 cup Unsweetened Cocoa Powder, and 0.5 tsp Salt. Gradually whisk in the 3 cups Whole Milk until smooth.
Cook over medium heat, stirring constantly, until the mixture thickens and comes to a full boil. Boil for 1 minute, then remove from heat. In a separate bowl, whisk the 5 pieces Large Egg Yolks. Slowly temper the yolks by drizzling in about 1 cup of the hot milk mixture while whisking vigorously. Return the tempered yolks to the saucepan and cook for an additional 2 minutes, stirring constantly, until thick and glossy.
Remove from heat and stir in the 2 tsp Vanilla Extract. Pour the custard into the cooled pie crust. Press plastic wrap directly onto the surface to prevent a skin from forming. Chill for at least 4 hours or until fully set.
Step 4: Prepare the Whipped Cream Topping
In a chilled bowl, whip the 2 cups Heavy Cream with the 0.25 cup Powdered Sugar and 1 tsp Vanilla Extract until soft peaks form. Be careful not to over-whip, or the cream will become grainy.
Spread or pipe the whipped cream over the chilled pie just before serving. For best results, garnish with chocolate shavings or cocoa powder. Serve immediately—the contrast of the creamy filling and flaky crust is at its peak when freshly assembled.
Pro Tips For Making Bloomingdale’S Chocolate Cream Pie
- Chill the Butter: Keep your unsalted butter ice cold before cutting it into the flour—this makes a real difference in getting that flaky crust Bloomingdale’s pie is known for. I learned this the hard way after ending up with a dense, chewy base.
- Use Ice Water: The ice water needs to stay icy when mixing the dough. About 4-5 tablespoons is usually enough, but add it slowly—too much and the crust turns tough.
- Rest the Dough: After mixing, let the dough rest in the fridge for at least 30 minutes. Skipping this step means the crust will shrink when baked, and nobody wants a sad, shrunken pie shell.
- Blind Bake First: Pre-bake the crust (with pie weights or dried beans) for 10-12 minutes at 375°F before adding the filling. This prevents the soggy bottom that ruins an otherwise perfect chocolate cream pie.
Common Mistakes When Making This Dish
Overworking the Dough
Mix the crust just until it comes together—overworking develops gluten, making it tough. I use a pastry blender and stop when I see pea-sized butter pieces. Chill the dough for 1 hour to relax the gluten before rolling. 💪
Skipping Blind-Baking
Never skip blind-baking or you’ll end up with a soggy bottom. Freeze the crust for 15 minutes before baking at 375°F with pie weights. This creates a crisp shell that holds up to the silky filling.
Curdling the Custard
Temper the egg yolks properly by slowly adding 1 cup of hot milk mixture while whisking. Return to heat and cook for 2 minutes until thick. Rushing this step risks scrambled eggs in your filling.
Under-Chilling the Pie
Chill the filled pie for at least 4 hours—this sets the custard completely. Press plastic wrap directly on the surface to prevent a skin from forming. Patience here ensures that perfect silky texture.
Over-Whipping the Cream
Whip the cream just to soft peaks—over-whipping makes it grainy. Use a chilled bowl and beaters for best results. The cream should hold its shape but still be smooth and spreadable. 💫
Using Wrong Cocoa
Stick with Dutch-process cocoa for smoother flavor. Natural cocoa works but may taste slightly sharper. The difference is subtle but noticeable in this delicate filling.
Nutrition Facts
Frequently Asked Questions
Can I use a store-bought crust?
Yes, but blind-bake it first at 375°F for 10-12 minutes to prevent sogginess. Homemade crust offers better flakiness, but a quality pre-made crust works in a pinch.
Why does my filling turn lumpy?
Lumps usually mean the custard wasn’t whisked enough during cooking. Stir constantly over medium heat until thick and smooth. If lumps form, strain through a fine-mesh sieve before chilling.
How far in advance can I make this?
Prepare the crust and filling separately up to 2 days ahead. Assemble and chill for 4 hours before serving. Add whipped cream just before serving for best texture.

Trained in classic French technique but raised on slow-cooked ribs and spicy rubs, she blends culinary skill with smoke and soul.
- Recipe for Boneless Pork Chops in Cast Iron Skillet: Sear and Baste to Juicy Perfection - October 3, 2026
- Recipe for Boneless Cross Rib Roast: Slow-Roasted Beef with Herb Crust - October 3, 2026
- Hamburgers in Sauce Recipe Crock Pot: Slow-Cooked Savory Delight - October 3, 2026