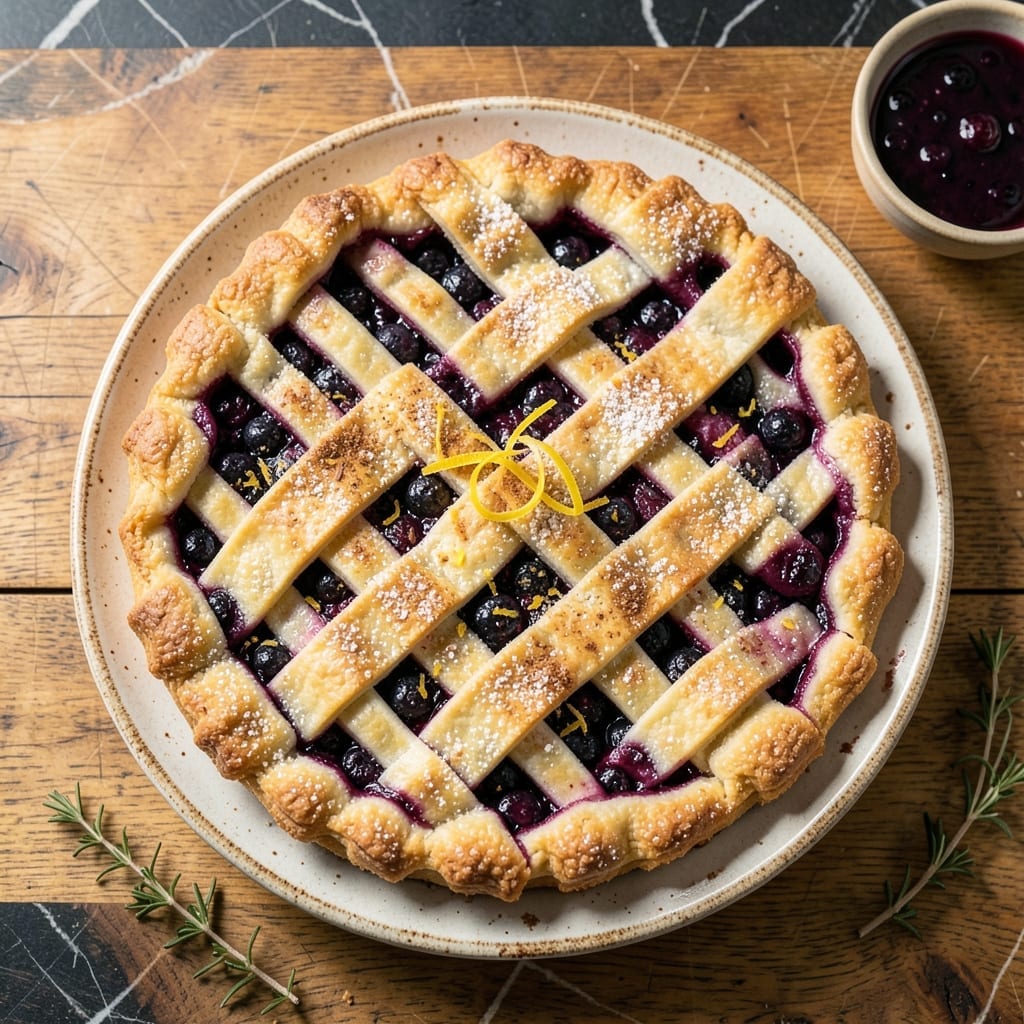
There’s a secret to making pie with frozen blueberries that locks in their natural juiciness. This method ensures every bite bursts with perfect texture and flavor without turning mushy.
By using a few simple techniques, you’ll achieve a filling that’s thick, vibrant, and packed with that signature juicy blueberry taste. The crust stays flaky while holding up to the fruit’s richness.
Ingredients for Blueberry Pie Recipe Using Frozen Blueberries
Frozen blueberries shine with just a few pantry staples for perfect texture.
| Ingredient | Amount | Notes |
|---|---|---|
| Frozen Blueberries 🫐 | 5 cups | Do not thaw before using |
| Granulated Sugar 🍚 | ¾ cup | Adjust to taste preference |
| Cornstarch 🌾 | ¼ cup | For thickening the filling |
| Lemon Juice 🍋 | 1 tbsp | Freshly squeezed preferred |
| Lemon Zest 🍋 | 1 tsp | From one lemon |
| Ground Cinnamon 🌿 | ¼ tsp | Optional, for warmth |
| Unsalted Butter 🧈 | 1 tbsp | For dotting the filling |
| All-Purpose Flour 🌾 | 2 ½ cups | Plus extra for dusting |
| Salt 🧂 | ½ tsp | Divided between crust and filling |
| Ice Water 💧 | ½ cup | For pie dough |
| Large Egg 🥚 | 1 whole | For egg wash |
[recipe_ingredient_scaler]
The blueberries are the star—look for wild or cultivated varieties without added sugar or syrup. Trader Joe’s or Costco have excellent frozen options that hold their shape well. For the flour, King Arthur or Gold Medal all-purpose work perfectly. The butter should be cold, straight from the fridge, for flaky layers. Don’t substitute salted butter; the unsalted version lets you control the seasoning precisely.
No cornstarch? Arrowroot powder or tapioca starch at the same ratio will thicken the filling just as well. Fresh lemon juice is ideal, but bottled works in a pinch (just use one teaspoon less). If you’re out of cinnamon, a pinch of nutmeg adds a nice warmth. For a richer crust, swap half the water for cold buttermilk—it adds a subtle tang.
The pie dough can rest in the fridge for up to 2 days, or freeze it for 1 month. Once baked, the pie keeps at room temperature for 1 day or in the fridge for 4 days. Reheat slices in a 350°F oven for 10 minutes to revive the crust.
Why You’ll Love This Recipe
- No Thaw Needed: I just dump the frozen blueberries straight into the filling—no waiting, no mess, and the cornstarch thickens it perfectly.
- Bright & Zesty: That pop of lemon zest cuts the sweetness so the berries taste fresh, not cloying.
- Sunday or Tuesday: Honestly, it’s just as at home at a potluck as it is for a random weeknight dessert.
- Stays Fresh: Leftovers (if there are any) keep beautifully, and the flavors actually deepen overnight.
Step-by-Step Instructions for Blueberry Pie Using Frozen Blueberries
Here’s the method. Straightforward, tested, works every time.
Step 1: Prepare the Pie Dough
In a large bowl, combine the 2.5 cups all-purpose flour with ¼ teaspoon salt. Cut in the 1 tablespoon unsalted butter until the mixture resembles coarse crumbs. I use my fingers for this—it gives me better control over the texture.
Gradually add the ½ cup ice water, mixing just until the dough comes together. Don’t overwork it; you want a tender crust, not a tough one. Divide the dough into two equal portions, shape into disks, wrap in plastic, and refrigerate for 1 hour.
Step 2: Prepare the Blueberry Filling
In a large bowl, gently toss the 5 cups frozen blueberries with the ¾ cup granulated sugar, ¼ cup cornstarch, 1 tablespoon lemon juice, 1 teaspoon lemon zest, and ¼ teaspoon ground cinnamon. The cornstarch will thicken the filling as it bakes, while the lemon adds brightness.
Let the mixture sit for 10-15 minutes while you roll out the dough. This gives the blueberries a chance to release some juices and the cornstarch time to begin absorbing them. Stir once or twice during this time to ensure even coating.
Step 3: Assemble the Pie
On a lightly floured surface, roll out one disk of dough into a 12-inch circle. Transfer it to a 9-inch pie dish, pressing gently into the bottom and sides. Trim the excess dough, leaving a ½-inch overhang.
Pour the blueberry filling into the crust, spreading it evenly. Dot the top with small pieces of the remaining 1 tablespoon unsalted butter. This adds richness and helps create steam, which prevents the filling from drying out.
Roll out the second disk of dough and place it over the filling. Trim and crimp the edges to seal, then cut a few slits in the top crust to allow steam to escape. Brush the top with a beaten large egg for a golden finish.
Step 4: Bake to Perfection
Preheat your oven to 425°F. Place the pie on a baking sheet lined with parchment paper to catch any drips. Bake for 20 minutes, then reduce the heat to 375°F and continue baking for 35-40 minutes.
The pie is done when the crust is golden brown and the filling is bubbling through the slits. If the edges begin to brown too quickly, cover them with foil or a pie shield. Let the pie cool for at least 2 hours before slicing to allow the filling to set completely.
Pro Tips For Making Blueberry Pie Recipe Using Frozen Blueberries
- Thaw the Berries: I learned this the hard way—toss frozen blueberries with sugar and lemon juice first, then let them sit for 15-20 minutes to release juices before adding cornstarch.
- Boost the Cornstarch: Frozen berries release more liquid, so use 1 extra tablespoon of cornstarch per cup of blueberries to prevent a soggy filling.
- Zest Before Juicing: Grate the lemon zest first, then juice it—this saves time and guarantees you won’t forget the zest, which brightens the pie’s flavor.
- Vent the Top Crust: Cut 4-5 small slits in the top crust or it’ll steam and separate from the filling, leaving you with a lopsided pie.
Essential Equipment for blueberry pie recipe using frozen blueberries
Pie Dish Essentials
A standard 9-inch glass pie dish is my go-to because it conducts heat evenly and lets you monitor the bottom crust. I prefer Pyrex for its durability and heat resistance. Metal pans work too but may require 5-10 minutes less baking time. 💡
Rolling Pin Choice
A French-style tapered rolling pin gives you better control for even thickness. For beginners, a pin with handles like OXO’s Good Grips is more comfortable. Always roll on a lightly floured surface to prevent sticking.
Crust Tools
A pastry blender makes quick work of cutting butter into flour for your crust. I use the RSVP Endurance model with stainless steel blades. For crimping edges, a simple fork works, but a pie crust crimper gives professional results.
Baking Sheet
Place your pie on a half-sheet pan lined with parchment to catch drips. A 13×18-inch pan with a rim like Nordic Ware’s gives you plenty of space. This prevents oven messes and makes transfer easier.
Cooling Rack
After baking, transfer your pie to a wire cooling rack to allow air circulation. This prevents the bottom crust from becoming soggy. I use a simple stainless steel rack that fits over my counter. 🌟
Bonus Gadgets
A pie shield or aluminum foil strips protect the crust edges from over-browning. For perfect slices, a pie server with a wide, thin blade like Williams Sonoma’s is ideal for clean cuts.
Nutrition Facts
Frequently Asked Questions
Do I need to thaw frozen blueberries first?
No, use them straight from the freezer to prevent mushiness. Thawing releases excess liquid, which can make your filling watery and the crust soggy.
Why does the recipe use cornstarch?
Cornstarch thickens the juices as the pie bakes, creating that perfect gooey texture. Without it, the filling would be runny. For a glossier finish, you can use tapioca starch instead.
How do I prevent a soggy bottom crust?
Bake on the lower oven rack and use a preheated baking sheet. This ensures the bottom crust cooks through before the filling softens it. Let it cool 2 hours before slicing.
Can I make this pie ahead of time?
Yes! Bake it 1 day in advance and store at room temperature. Reheat slices at 350°F for 10 minutes to restore the crust’s crispness.

Trained in classic French technique but raised on slow-cooked ribs and spicy rubs, she blends culinary skill with smoke and soul.
- Recipe for Boneless Pork Chops in Cast Iron Skillet: Sear and Baste to Juicy Perfection - October 3, 2026
- Recipe for Boneless Cross Rib Roast: Slow-Roasted Beef with Herb Crust - October 3, 2026
- Hamburgers in Sauce Recipe Crock Pot: Slow-Cooked Savory Delight - October 3, 2026