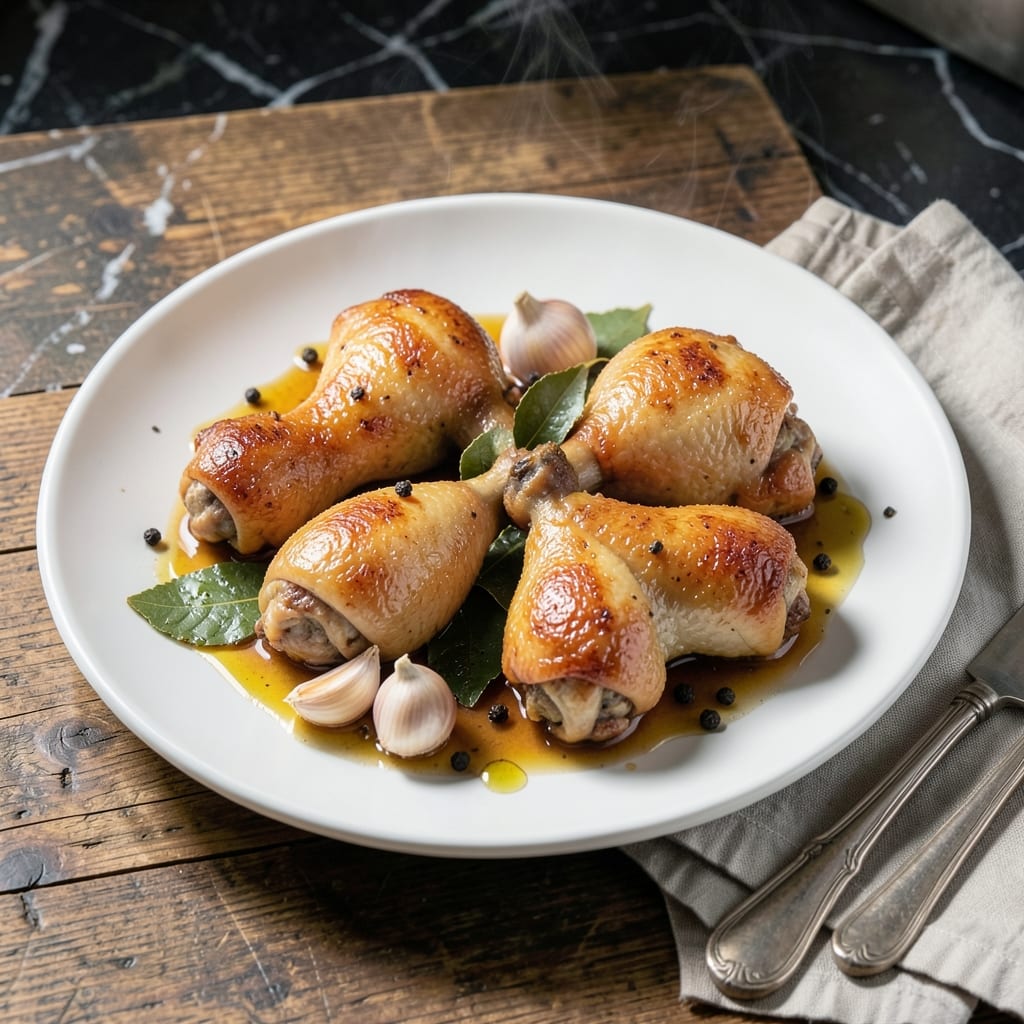
This method delivers fork-tender chicken every time with minimal effort. After years of refining my approach at The Smoky Pig, I’ve found boiling produces reliably juicy drumsticks without drying them out.
The key is maintaining a gentle simmer, not a rolling boil, which keeps the meat moist while infusing it with subtle flavor. I learned this technique during my apprenticeship, and it’s become my go-to for meal prep.
You’ll end up with perfectly cooked chicken that shreds easily for salads, soups, or tacos. The meat stays succulent and picks up any seasonings you add to the water.
This approach works for large batches too. The drumsticks cook evenly and stay tender for days in the fridge.
Ingredients for Boiled Chicken Drumsticks
Simple ingredients for juicy, fork-tender chicken that holds up all week long.
| Ingredient | Amount | Notes |
|---|---|---|
| Chicken Drumsticks 🍗 | 2 lb | Skin-on, bone-in preferred |
| Water 💧 | 8 cups | Enough to cover drumsticks |
| Kosher Salt 🧂 | 1 tbsp | Diamond Crystal preferred |
| Black Peppercorns 🌶️ | 1 tsp | Whole, for simmering |
| Garlic Cloves 🧄 | 4 cloves | Smashed, peeled |
| Bay Leaves 🍃 | 2 pieces | Dried, for aroma |
| Fresh Thyme Sprigs 🌿 | 3 pieces | Optional, for depth |
| Onion 🧅 | 1 whole | Quartered, for flavor |
| Carrot 🥕 | 1 whole | Roughly chopped |
| Celery Stalks 🥬 | 2 pieces | Roughly chopped |
| Lemon 🍋 | ½ whole | Sliced, for brightness |
| Olive Oil 🫒 | 1 tbsp | For post-cook finishing |
[recipe_ingredient_scaler]
The chicken quality matters here. Look for plump drumsticks with smooth skin—avoid any with dark spots or strong odor. I grab mine from Costco for bulk savings, but any grocery store’s fresh selection works. The bone-in, skin-on variety gives the best flavor and texture, though boneless will cook faster (just reduce simmer time by 5 minutes).
No fresh thyme? Dried thyme at half the amount works fine. Swap the bay leaves for a pinch of ground bay if that’s what you’ve got. The veggies (onion, carrot, celery) are classic for flavor, but leeks or fennel add a nice twist. Out of lemon? A splash of apple cider vinegar brightens the broth just as well.
Cooked drumsticks keep beautifully in the fridge for 4-5 days, or freeze for 3 months. Store in their broth for maximum moisture. Perfect for shredding into tacos or chopping for salads—no waste, all flavor.
Why You’ll Love This Recipe
- Set and Forget: I toss everything in a pot, cover with water, and let it simmer—no babysitting required.
- Garlic-Infused Bite: The garlic cloves and peppercorns turn the broth golden, and the drumsticks soak up every bit of flavor.
- Meal Prep Magic: Shred for tacos, slice for salads, or serve whole with rice—three meals in one pot.
- Penny-Wise Protein: A bag of drumsticks, a few pantry staples, and I’ve got a protein-packed meal for under $10.
Step-by-Step Instructions for Boiled Chicken Drumsticks
Here’s my method for achieving perfectly tender meat that stays juicy every time.
Step 1: Prep the Drumsticks and Aromatics
Rinse the 2 lb Chicken Drumsticks under cold water and pat them dry with paper towels. This removes any bone fragments and ensures a clean base for the broth. I like to leave the skin on for extra flavor, but you can remove it if you prefer.
Quarter the Onion and roughly chop the Carrot and 2 pieces Celery Stalks. Smash the 4 cloves Garlic Cloves with the side of your knife—this releases their oils without mincing. Slice the 0.5 whole Lemon into wedges. This prep work ensures all the aromatics infuse the broth evenly.
Step 2: Build the Flavorful Broth
In a large pot, combine the 8 cups Water, 1 tbsp Kosher Salt, 1 tsp Black Peppercorns, 2 pieces Bay Leaves, and 3 pieces Fresh Thyme Sprigs. Add the prepared aromatics—Onion, Carrot, Celery Stalks, Garlic Cloves, and Lemon.
Bring the mixture to a boil over high heat. You’ll start to smell the garlic and herbs as the water heats up. Once it reaches a rolling boil, reduce the heat to medium-low to maintain a gentle simmer. This step extracts all the flavors into the broth.
Step 3: Simmer the Drumsticks to Perfection
Carefully add the 2 lb Chicken Drumsticks to the simmering broth, ensuring they’re fully submerged. If needed, add a bit more water to cover them completely. Return the broth to a gentle simmer—you want small bubbles breaking the surface, not a vigorous boil.
Cook the drumsticks for 25-30 minutes. You’ll know they’re done when the meat pulls away from the bone slightly and an instant-read thermometer inserted into the thickest part reads 165°F. The broth should be fragrant, and the chicken will be fork-tender.
Step 4: Rest and Finish with Olive Oil
Using tongs, transfer the drumsticks to a plate. Discard the aromatics from the broth, but save the liquid if you plan to use it for soups or sauces. Drizzle the 1 tbsp Olive Oil over the warm drumsticks and let them rest for 5-10 minutes.
This resting period allows the juices to redistribute, keeping the meat moist and flavorful. The olive oil adds a silky finish and enhances the overall taste. Serve the drumsticks warm, either as-is or shredded for your favorite recipes.
Pro Tips For Making Boiled Chicken Drumsticks
- Start Cold: Place drumsticks in cold water with salt and aromatics before turning on the heat. I learned this the hard way—starting hot makes the meat tough and unevenly cooked.
- Smash the Garlic: Lightly crush garlic cloves with the flat of your knife before adding them. Sounds weird, but it works: the flavor infuses better without overpowering the broth.
- Skim the Foam: As the water heats, skim off the gray foam that rises to the top. Skip this and your broth will be cloudy and bitter—your future self will thank you.
- Rest Before Serving: Let the drumsticks sit in the hot broth for 10 minutes off the heat after cooking. My grandmother swore by this, and she was right: it keeps them juicy.
Pro Cooking Tips for This Dish
Simmer Control
Maintain a gentle simmer, not a rolling boil, to prevent tough meat. I use a heavy-bottomed Dutch oven for even heat distribution. The bubbles should break the surface occasionally, like a lazy river, not a bubbling cauldron. 🌡️
Perfect Timing
For 2 lb Chicken Drumsticks, simmer for 25-30 minutes. Start checking at 20 minutes—the meat should pull slightly from the bone. Overcooking by even 5 minutes can make them dry.
Thermometer Check
Always verify doneness with an instant-read thermometer. The thickest part should hit 165°F. I use a ThermoWorks Thermapen for accuracy. Without one, pierce the meat—juices should run clear, not pink.
Resting Matters
Let the drumsticks rest for 5-10 minutes after cooking. This lets juices redistribute for maximum tenderness. Drizzle with 1 tbsp Olive Oil during resting to add a silky finish.
Broth Savvy
Strain and save the cooking liquid—it’s liquid gold for soups or gravies. I freeze mine in 1-cup portions for future recipes. The aromatics infuse it with deep, savory flavor.
Salt Strategy
Use 1 tbsp Kosher Salt per 8 cups Water. Diamond Crystal is my go-to for its clean taste. Taste the broth before adding the chicken—it should be lightly seasoned, not salty. 💪
Nutrition Facts
Frequently Asked Questions
What’s the ideal simmering temperature?
Keep the water at a gentle simmer, around 180-190°F. A rolling boil can make the meat tough. Small bubbles should occasionally break the surface.
Can I use frozen drumsticks?
Yes, but thaw them completely first in the fridge. Adding frozen chicken will lower the water temperature and lead to uneven cooking. Plan for 24 hours of thawing time.
How do I keep the meat from drying out?
Don’t overcook—pull them at 165°F. Also, let them rest for 5-10 minutes after cooking. This keeps the juices locked in.
Can I reuse the cooking broth?
Strain and store it in the fridge for 3-4 days or freeze for up to 3 months. It’s perfect for soups or sauces.

Trained in classic French technique but raised on slow-cooked ribs and spicy rubs, she blends culinary skill with smoke and soul.
- Recipe for Boneless Pork Chops in Cast Iron Skillet: Sear and Baste to Juicy Perfection - October 3, 2026
- Recipe for Boneless Cross Rib Roast: Slow-Roasted Beef with Herb Crust - October 3, 2026
- Hamburgers in Sauce Recipe Crock Pot: Slow-Cooked Savory Delight - October 3, 2026