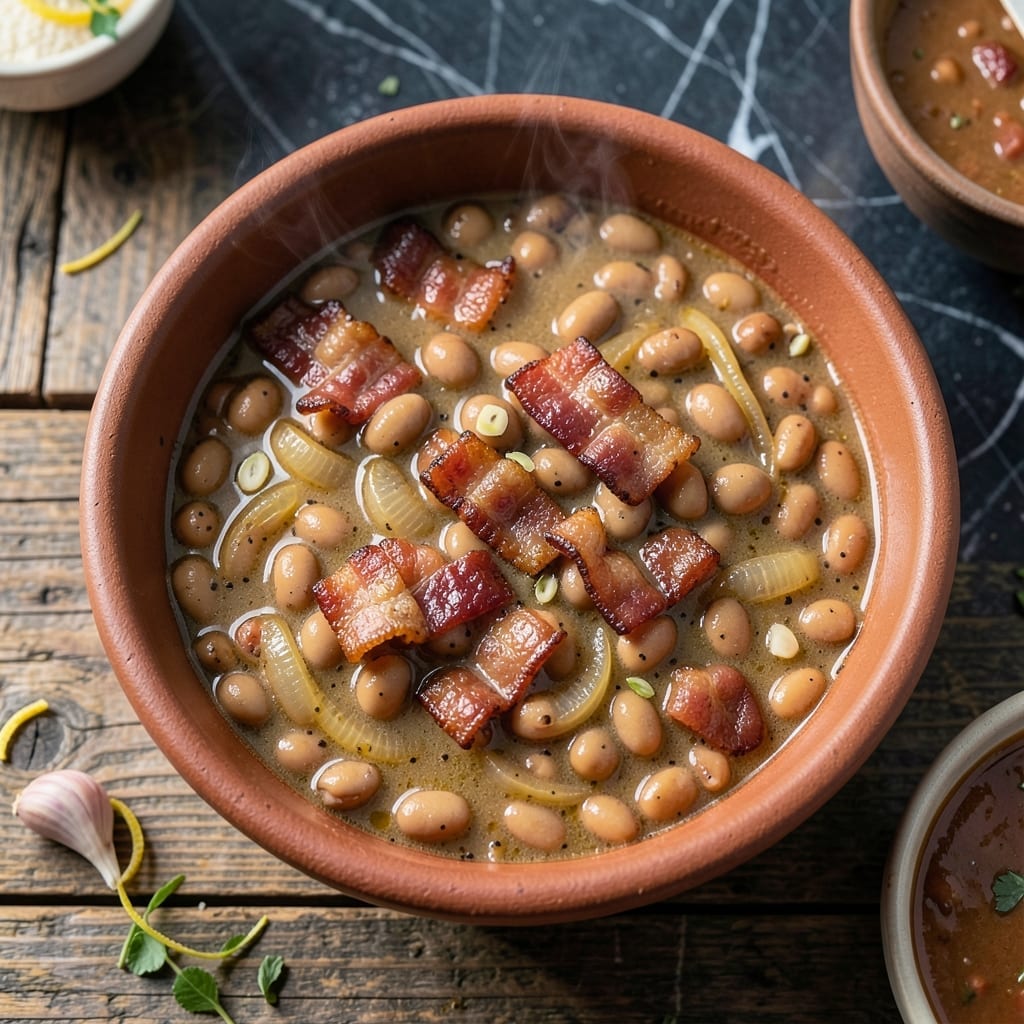
Southern pinto beans deserve a place at every table, and this recipe delivers that creamy texture we all crave. Slow cooking is the secret.
I learned this method from old family pitmasters who knew how to coax maximum flavor from simple ingredients. The result speaks for itself.
Ingredients for Bojangles Pinto Beans
Simple, hearty ingredients come together for that signature Southern creaminess everyone loves.
| Ingredient | Amount | Notes |
|---|---|---|
| Dried Pinto Beans 🌱 | 1 lb | Rinsed and picked over |
| Smoked Bacon 🥓 | ½ lb | Chopped into small pieces |
| Yellow Onion 🧅 | 1 whole | Medium-sized, diced |
| Garlic Cloves 🧄 | 4 cloves | Minced finely |
| Chicken Broth 🍲 | 4 cups | Low-sodium preferred |
| Water 💧 | 2 cups | For soaking and cooking |
| Apple Cider Vinegar 🍏 | 2 tbsp | For brightness and tang |
| Brown Sugar 🍚 | 2 tbsp | Light or dark variety |
| Salt 🧂 | 1 ½ tsp | Kosher or sea salt |
| Black Pepper 🌶️ | 1 tsp | Freshly ground preferred |
| Dried Thyme 🌿 | 1 tsp | Crushed for better flavor |
| Bay Leaf 🍃 | 1 whole | Removed before serving |
[recipe_ingredient_scaler]
The beans are the foundation here. Dried pintos from the bulk section at Whole Foods or your local market work best—avoid pre-cooked canned beans. The bacon adds that smoky depth pitmasters swear by. Thick-cut hickory-smoked from a trusted butcher or Wright Brand at the grocery store delivers authentic flavor. Soaking overnight (or at least 4 hours) ensures they cook evenly and achieve that creamy texture.
No bacon? Smoked ham hock or even liquid smoke at 1 tsp works in a pinch. Chicken broth can be swapped for vegetable broth for a lighter version. If you’re out of apple cider vinegar, white vinegar at half the amount keeps the tang. Brown sugar can be replaced with maple syrup or molasses, but the flavor profile will shift slightly. Fresh thyme at triple the amount if you’ve got it.
Store dried beans in a cool, dark place for up to 1 year. Once cooked, these keep beautifully in the fridge for 5 days or freeze for 3 months. The flavor actually deepens overnight, making leftovers a treat.
Why You’ll Love This Recipe
- Set and Forget: I just dump the beans, bacon, and broth in the pot and let it simmer while I do other things.
- Smoky Richness: That smoked bacon infuses every bite with a deep, savory flavor that’s hard to resist.
- Meal Prep Magic: I make a big batch on Sunday and it tastes even better reheated for lunches all week.
- Pocket-Friendly Feast: A pound of dried beans and a few slices of bacon feed my whole family for pennies per serving.
Step-by-Step Instructions for Southern-Style Pinto Beans
This method ensures tender beans with a rich, velvety texture that defines Southern comfort cooking.
Step 1: Soak and Prep the Dried Pinto Beans
Rinse the 1 lb Dried Pinto Beans thoroughly under cold water to remove any debris, then place them in a large bowl. Cover with the 2 cups Water and at least 4 cups of additional water for soaking.
Let the beans soak for 8 hours or overnight at room temperature. This step is crucial for achieving that creamy texture—it softens the beans and reduces cooking time. Drain and rinse the beans again before cooking to remove any residual starch.
Step 2: Render the Bacon and Sauté Aromatics
In a large Dutch oven or heavy pot, cook the 0.5 lb Smoked Bacon over medium heat for 6-8 minutes, stirring occasionally, until the fat renders and the bacon becomes crispy. Remove the bacon with a slotted spoon, leaving the fat in the pot.
In the same pot with the bacon fat, add the 1 whole Yellow Onion and cook for 4-5 minutes until softened and translucent. Stir in the 4 cloves Garlic Cloves and cook for 30 seconds until fragrant. This builds a deep flavor foundation for the beans.
Step 3: Simmer the Beans to Creamy Perfection
Add the soaked and drained Dried Pinto Beans, 4 cups Chicken Broth, 2 tbsp Brown Sugar, 1.5 tsp Salt, 1 tsp Black Pepper, 1 tsp Dried Thyme, and 1 whole Bay Leaf to the pot. Stir well to combine.
Bring the mixture to a boil, then reduce the heat to low. Cover and simmer for 1.5 to 2 hours, stirring occasionally, until the beans are tender and creamy. Check the pot periodically and add a splash of water if the liquid level drops too low.
Step 4: Finish with Tang and Adjust Seasoning
Once the beans are tender, stir in the 2 tbsp Apple Cider Vinegar. This adds the signature bright, tangy note that balances the rich, smoky flavors. Taste and adjust the seasoning if needed—add a pinch more Salt or Black Pepper to suit your preference.
Return the crispy Smoked Bacon to the pot, stir to combine, and let the beans simmer uncovered for an additional 10 minutes to allow the flavors to meld. The beans should be thick and creamy, with a glossy sauce clinging to each one.
Remove and discard the Bay Leaf before serving. The beans are ready when they’re tender enough to mash slightly with a spoon but still hold their shape.
Pro Tips For Making Bojangles Pinto Beans
- Soak Overnight: I learned this the hard way—dried pinto beans need at least 8 hours in cold water to soften properly, or you’ll be waiting forever for them to cook through.
- Render the Bacon: Cook the smoked bacon low and slow first to extract maximum flavor into the pot, then use that fat to sauté the onion and garlic for deeper taste.
- Skip the Salt Early: Adding salt too soon toughens the beans—wait until they’re tender before seasoning, usually after 45 minutes of simmering.
- Use Broth, Not Water: Chicken broth instead of water adds richness you can’t fake later, and it’s the easiest upgrade for these beans.
Storing and Reheating Leftovers
Fridge Storage
Let your beans cool for no more than 2 hours before transferring to airtight containers. I use glass jars from my local farmers market for storage. They’ll keep in the fridge for up to 5 days, and honestly, the flavor improves overnight. ❄️
Freezer Storage
For longer storage, portion the cooled beans into freezer-safe containers, leaving 1 inch of headspace for expansion. I prefer quart-sized freezer bags—they stack neatly and thaw quickly. Your beans will stay delicious for up to 3 months in the freezer.
Stovetop Reheating
This is my go-to method for maintaining that creamy texture. Warm the beans in a heavy pot over medium-low heat with a splash of chicken broth or water. Stir occasionally for 10-15 minutes until heated through. 🔥
Microwave Reheating
For quick meals, microwave individual portions covered with a damp paper towel. Heat on 70% power for 2-3 minutes, stir, then continue in 30-second intervals until reaching 165°F. Add a splash of broth if they look dry.
Thawing Frozen Beans
Transfer frozen beans to the fridge and let them thaw overnight for best results. In a pinch, you can thaw them in the microwave on the defrost setting, but stir frequently to avoid hot spots.
Nutrition Facts
Frequently Asked Questions
Can I use canned beans instead of dried?
Not recommended. Dried beans absorb flavors better during slow cooking. Canned beans may turn mushy and lack depth, though in a pinch, use 3 cans and reduce simmer time to 30 minutes.
Why soak the beans overnight?
Soaking shortens cooking time and ensures even tenderness. It also removes starches that can cause gas. Skip it only if using the quick-soak method: boil 2 minutes, then rest 1 hour.
How do I fix beans that are too thin?
Mash a few beans against the pot side to thicken naturally. Or mix 1 tbsp cornstarch with cold water, stir in, and simmer 5 minutes. Avoid over-reducing, as they thicken when cooled.
Can I make this without bacon?
Yes! Use 1 tbsp liquid smoke for similar depth, or swap in smoked paprika. Vegetarians can use olive oil and add 1 tsp soy sauce for umami.

Trained in classic French technique but raised on slow-cooked ribs and spicy rubs, she blends culinary skill with smoke and soul.
- Recipe for Boneless Pork Chops in Cast Iron Skillet: Sear and Baste to Juicy Perfection - October 3, 2026
- Recipe for Boneless Cross Rib Roast: Slow-Roasted Beef with Herb Crust - October 3, 2026
- Hamburgers in Sauce Recipe Crock Pot: Slow-Cooked Savory Delight - October 3, 2026