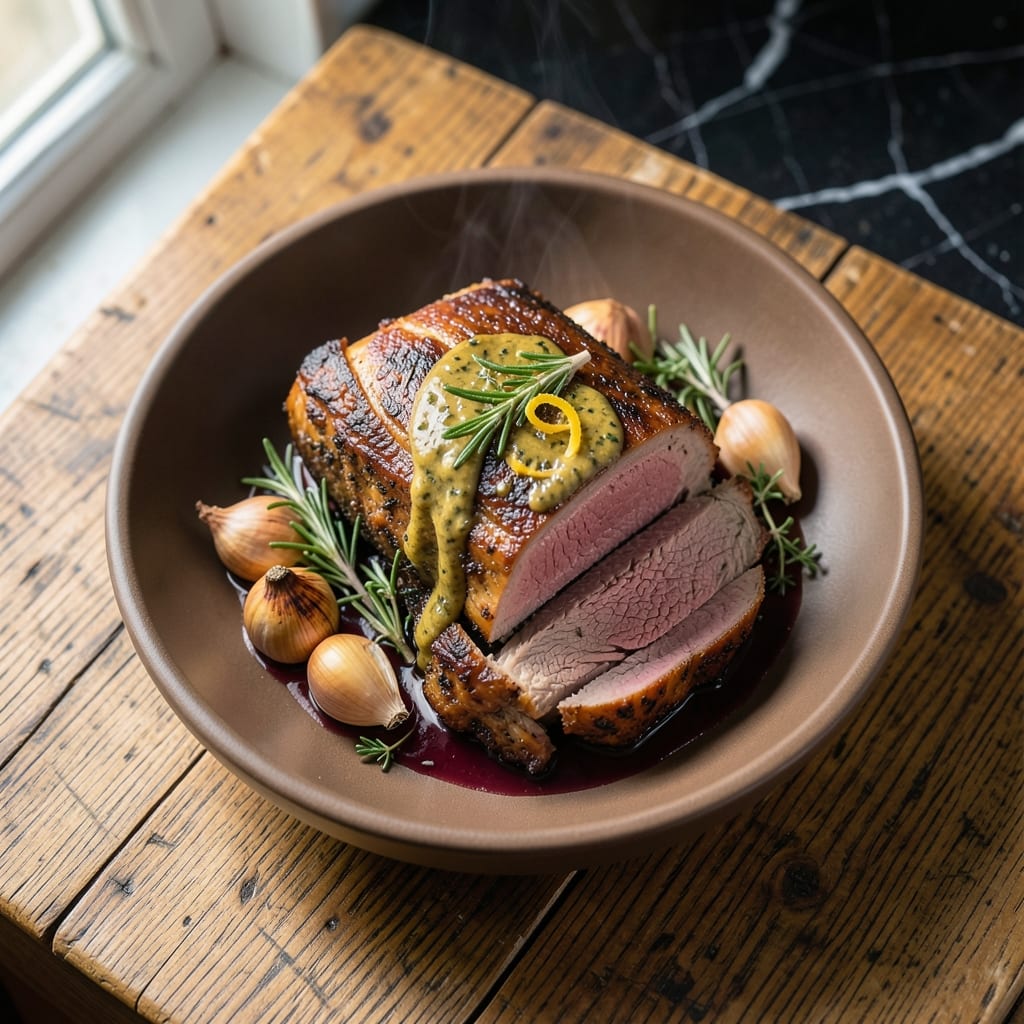
This slow-roasted bottom round roast transforms an affordable cut into a tender, herb-crusted centerpiece worthy of any dinner table.
I developed this method after years of testing tougher cuts in my small Boston kitchen, discovering that patience and a low oven temperature unlock incredible flavor and texture.
The herb crust forms a fragrant seal that locks in juices while creating a golden, aromatic exterior. Every slice reveals perfectly cooked beef with rich, developed flavors.
Ideal for Sunday suppers or special occasions, this recipe proves budget-friendly cuts can deliver exceptional results.
Ingredients for Bottom Round Roast
Transform an affordable cut with these carefully selected ingredients for a showstopping herb-crusted roast.
| Ingredient | Amount | Notes |
|---|---|---|
| Bottom Round Roast 🥩 | 3 lb | Well-marbled, trimmed of excess fat |
| Kosher Salt 🧂 | 2 tsp | Diamond Crystal preferred for even seasoning |
| Freshly Ground Black Pepper 🌶️ | 1 tsp | Coarse grind for robust flavor |
| Fresh Rosemary 🌿 | 3 tbsp | Finely chopped, stems discarded |
| Fresh Thyme 🍃 | 2 tbsp | Leaves stripped from stems |
| Garlic Cloves 🧄 | 6 cloves | Minced for maximum flavor infusion |
| Dijon Mustard 🟡 | 2 tbsp | High-quality for herb crust binding |
| Extra-Virgin Olive Oil 🫒 | ¼ cup | Cold-pressed for depth of flavor |
| Red Wine 🍷 | 1 cup | Dry variety for braising liquid |
| Beef Stock 🥩 | 1 cup | Low-sodium to control seasoning |
| Carrots 🥕 | 3 whole | Peeled and cut into chunks |
| Yellow Onion 🧅 | 1 whole | Large, quartered for braising |
| Celery Stalks 🌿 | 2 whole | Cut into 2-inch pieces |
| All-Purpose Flour 🌾 | 1 tbsp | For thickening pan juices |
[recipe_ingredient_scaler]
The beef selection is critical for this preparation. Bottom round roast with visible marbling ensures tenderness after slow-roasting. Source from Whole Foods or local butchers who specialize in well-aged cuts. For the herb crust, fresh rosemary and thyme are non-negotiable—dried simply won’t deliver the aromatic intensity required for this dish’s signature crust.
Substitutions require careful consideration to maintain integrity. Beef broth can replace beef stock in a pinch, but reduce added salt. If red wine isn’t available, additional beef stock with 1 tbsp balsamic vinegar provides similar depth. For the mustard, whole-grain Dijon offers pleasant texture variation without compromising flavor.
Store the roast uncovered in the refrigerator for 1-2 days before cooking to develop a better crust. Prepared herb mixture keeps 24 hours refrigerated. Leftovers maintain quality for 4-5 days and freeze beautifully for 3 months without texture degradation.
Why You’ll Love This Recipe
- Set It and Forget: I just season, sear, and let the oven do the work—no babysitting required.
- Herb-Infused Magic: The rosemary and thyme make every bite taste like a Sunday dinner, even on a weekday.
- Feeds the Whole Crew: One roast, endless possibilities: sandwiches today, tacos tomorrow, stew the next.
- Budget-Friendly Star: A cheaper cut that still feels fancy. Honestly, my wallet and my taste buds both win.
Instructions
Follow this professional method for perfectly tender beef with a rich herb-infused crust.
Step 1: Prepare the Herb Crust and Season the Roast
In a small bowl, combine the 3 tbsp Fresh Rosemary, 2 tbsp Fresh Thyme, 6 cloves Garlic Cloves, 2 tsp Kosher Salt, 1 tsp Freshly Ground Black Pepper, 2 tbsp Dijon Mustard, and 0.25 cup Extra-Virgin Olive Oil to form a thick paste. This aromatic blend will create a flavorful crust that locks in moisture.
Pat the 3 lb Bottom Round Roast dry with paper towels to ensure the herb mixture adheres properly. Rub the paste evenly over the entire surface of the roast, pressing gently to form a uniform coating. This step is crucial for developing deep flavor and a beautiful crust during roasting.
Step 2: Sear the Roast for Maximum Flavor
Preheat your oven to 325°F. In a large Dutch oven or heavy oven-safe pot, sear the roast over medium-high heat for 3-4 minutes per side until the exterior is deeply browned. This searing process creates a fond—the flavorful browned bits—that will enhance the braising liquid.
Once seared, remove the roast from the pot and set it aside. The roast should have a dark, caramelized crust with visible herb flecks. This visual cue indicates the Maillard reaction has occurred, ensuring complex, savory flavors in your finished dish.
Step 3: Build the Braising Liquid and Vegetables
In the same pot, add the 3 whole Carrots, 1 whole Yellow Onion, and 2 whole Celery Stalks. Cook for 3-4 minutes until the vegetables begin to soften and develop color. This step builds a flavor base that will infuse into the braising liquid.
Pour in the 1 cup Red Wine and 1 cup Beef Stock, scraping the bottom of the pot to deglaze and incorporate the fond. Bring the liquid to a gentle simmer. The wine should reduce slightly, intensifying its flavor before the roast returns to the pot.
Step 4: Braise to Tenderness
Return the roast to the pot, spooning some of the braising liquid and vegetables over the top. Cover tightly with a lid and transfer to the preheated oven. Braise for 2.5 to 3 hours, turning the roast halfway through, until the meat is fork-tender and the internal temperature reaches 195-200°F.
Check the roast periodically after the 2-hour mark. The beef is done when it shreds easily with a fork and the braising liquid has reduced to a rich, flavorful sauce. The vegetables should be soft and infused with the meat’s juices.
Step 5: Thicken the Sauce and Rest Before Serving
Remove the roast from the pot and transfer it to a cutting board. Tent loosely with foil and let it rest for 15-20 minutes. This resting period allows the juices to redistribute, ensuring a moist, tender result.
Place the pot with the braising liquid on the stovetop over medium heat. Mix the 1 tbsp All-Purpose Flour with a small amount of cold water to create a slurry, then whisk it into the braising liquid. Simmer for 3-4 minutes until the sauce thickens slightly. Slice the roast against the grain and serve with the reduced sauce and vegetables.
Pro Tips For Making Bottom Round Roast
- Sear It Hard: Crank the heat to medium-high and sear the bottom round on all sides until deeply browned—about 3-4 minutes per side. I learned this the hard way: a pale sear means flavorless meat.
- Season Overnight: Rub the roast with kosher salt, pepper, rosemary, and thyme the night before. Sounds weird, but it works: the salt penetrates deeply, guaranteeing juicier meat.
- Skip the Rush: Resist the urge to slice right after roasting. Tent it with foil and wait a solid 15-20 minutes—this keeps all those juices inside where they belong.
- Use a Thermometer: After burning one too many roasts, I finally figured out: pull it at 130°F for medium-rare. The temperature will climb to 135°F as it rests, and it’ll be perfect every time.
Pro Cooking Tips for This Recipe
Low and Slow Wins
This tough cut demands patience. I set my Dutch oven in a 325°F oven for 2.5-3 hours, turning once. The collagen breaks down beautifully at this temperature, transforming chewy connective tissue into gelatin that keeps the meat moist.
Sear Properly First
Don’t rush the sear. I use medium-high heat and give each side 3-4 minutes in my enameled cast iron. Look for a deep brown crust—this builds the flavor foundation that makes the long cook worthwhile.
Liquid Matters
Your braising liquid needs acidity. I always include 1 cup dry red wine with the 1 cup beef stock to cut through the richness. The wine reduces first, concentrating its fruit notes before the stock joins the party. 🍷
Rest Like a Pro
After removing from the oven, tent the roast loosely with foil and let it rest 15-20 minutes. This lets the juices that have been driven to the center redistribute throughout the meat, so every slice stays succulent.
Slice Against Grain
Look for the natural lines in the meat—they’re the muscle fibers. I slice perpendicular to these at about ¼-inch thickness. This shortens the fibers, making each bite more tender, especially important for this leaner cut.
Sauce Perfection
I always thicken the braising liquid with a 1 tbsp flour slurry. Simmer it for 3-4 minutes after adding to remove the raw flour taste. The result should coat the back of a spoon but still be fluid enough to pour. 💡
Nutrition Facts
Frequently Asked Questions
What temperature should I use for the best results?
Set your oven to 325°F for slow, even cooking. This lower temperature allows the collagen to break down gradually, ensuring a tender result without drying out the meat.
Can I use a different type of wine?
Use a dry red wine for best flavor, but a rich beef broth with 1 tbsp balsamic vinegar works as a substitute. Avoid sweet wines, as they can make the sauce overly sugary.
How do I know when it’s done?
Check for doneness when the internal temperature reaches 195-200°F. The meat should shred easily with a fork and feel very tender throughout.
What if my sauce is too thin?
Create a slurry with 1 tbsp flour and cold water, then whisk it into the simmering sauce. Cook for 3-4 minutes until thickened to your desired consistency.

Trained in classic French technique but raised on slow-cooked ribs and spicy rubs, she blends culinary skill with smoke and soul.
- Recipe for Boneless Pork Chops in Cast Iron Skillet: Sear and Baste to Juicy Perfection - October 3, 2026
- Recipe for Boneless Cross Rib Roast: Slow-Roasted Beef with Herb Crust - October 3, 2026
- Hamburgers in Sauce Recipe Crock Pot: Slow-Cooked Savory Delight - October 3, 2026