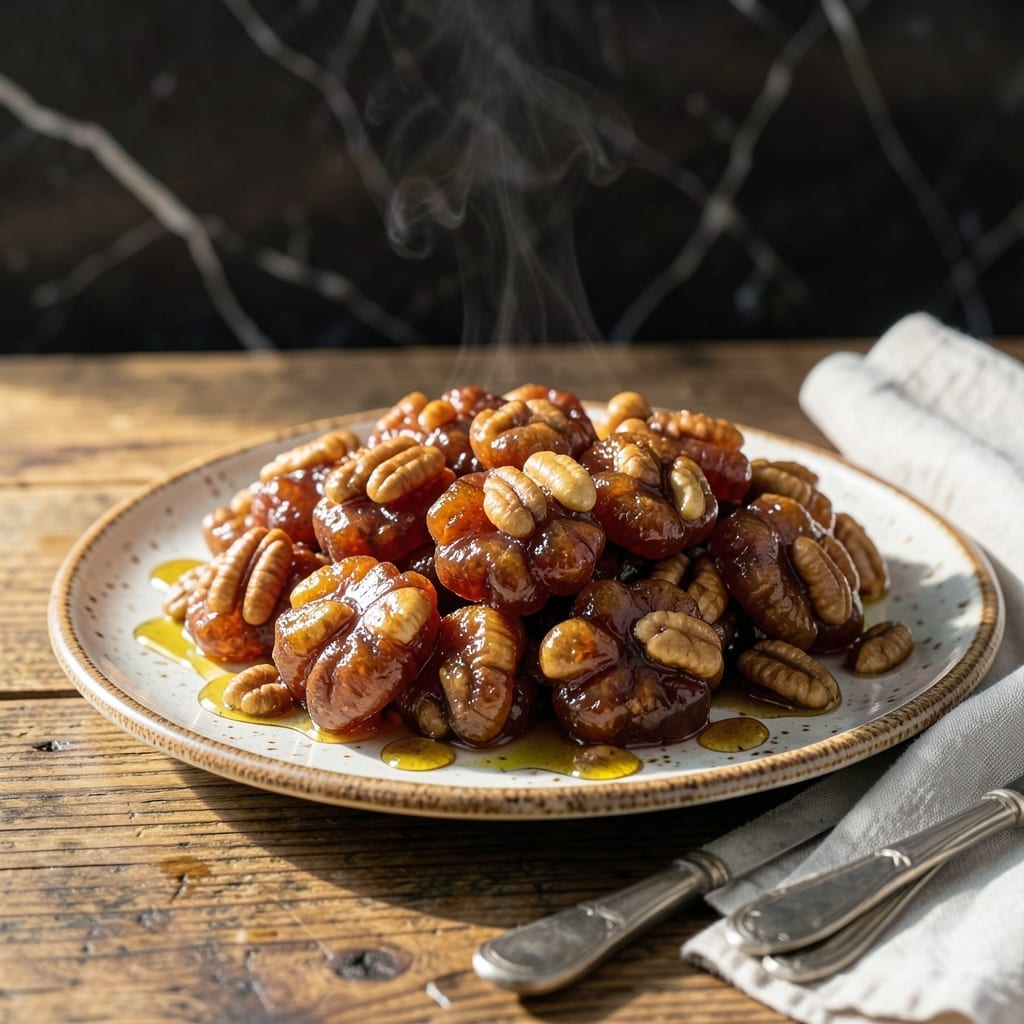
This recipe brings back the nostalgic taste of classic maple nut candies with a homemade touch. I’ve refined the technique to balance that signature crunch with rich, sweet maple flavor.
With simple ingredients and precise timing, you’ll achieve the perfect texture and flavor that made Brach’s famous. The result is a treat worth savoring, just like the original.
Ingredients for Brach’s Maple Nut Goodies
Classic candies with rich maple flavor and satisfying crunch made easy.
| Ingredient | Amount | Notes |
|---|---|---|
| Granulated Sugar 🍚 | 2 cups | White granulated for base |
| Pure Maple Syrup 🍁 | 1 cup | Dark grade B preferred |
| Light Corn Syrup 💧 | ½ cup | Prevents crystallization |
| Unsalted Butter 🧈 | 4 tbsp | Cubed for even melting |
| Pecans 🌰 | 2 cups | Chopped, toasted for crunch |
| Vanilla Extract 🌿 | 1 tsp | Pure extract for flavor |
| Salt 🧂 | ¼ tsp | Fine grain for balance |
| Baking Soda 🧪 | ½ tsp | For airy texture |
| Heavy Cream 🥛 | ¼ cup | Whipped for lightness |
| Powdered Sugar 🍚 | ½ cup | For dusting finished candies |
[recipe_ingredient_scaler]
The maple syrup is non-negotiable here. Grade B dark syrup has the robust flavor that defines this candy. Most grocery stores carry it, but Trader Joe’s or Whole Foods have great options. The pecans need toasting—skip this and you lose that signature crunch. Buy pecan pieces instead of halves to save chopping time.
No Grade B syrup? Grade A dark works in a pinch (avoid light syrup—too mild). Corn syrup can be swapped for honey or agave, but texture may vary slightly. For nut-free, try toasted pumpkin seeds (pepitas) for similar crunch. The butter must be unsalted—salted throws off the flavor balance.
Store in an airtight container at room temperature. Keeps 2-3 weeks if they last that long. A dusting of powdered sugar before serving refreshes the look. These actually improve overnight as the flavors meld.
Why You’ll Love This Recipe
- I’ll be real: these keep in an airtight container for weeks. Not that they last that long in my house.
- One Bowl Wonder: I dump everything in a single pot—sugar, maple syrup, butter—and let the stove do the work. No mixer, no fuss.
- Sweet & Buttery: That first bite of maple-kissed pecans wrapped in rich, buttery caramel? Honestly, it’s like a hug in candy form.
- Holiday Staple: I make a double batch at Christmas because everyone expects it now. Between us, it’s also perfect for random Tuesdays.
Step-by-Step Instructions for Maple Nut Goodies
Master the technique for perfectly crisp clusters with a maple-kissed crunch.
Step 1: Prepare the Candy Base
In a heavy-bottomed saucepan, combine the 2 cups Granulated Sugar, 1 cup Pure Maple Syrup, and 0.5 cup Light Corn Syrup. Stir just until combined—you want to avoid splashing the mixture up the sides of the pan.
Place the saucepan over medium heat and bring to a boil. I never stir once it starts boiling; this can cause crystallization. Instead, gently swirl the pan occasionally to ensure even heating. Cook until the mixture reaches 245-250°F on a candy thermometer.
Step 2: Add Butter and Finish Cooking
Once the sugar mixture reaches temperature, remove it from heat and stir in the 4 tbsp Unsalted Butter until fully melted. The mixture will bubble vigorously—that’s normal. Return the saucepan to medium heat and continue cooking until it reaches 290°F.
At this stage, the syrup should be a deep amber color and have a thick, glossy appearance. If you don’t have a candy thermometer, test by dropping a small amount into cold water—it should form hard, brittle threads when cooled.
Step 3: Incorporate Baking Soda and Nuts
Remove the saucepan from heat once more. Quickly stir in the 0.5 tsp Baking Soda, 1 tsp Vanilla Extract, and 0.25 tsp Salt. The mixture will foam up dramatically, so be prepared. Fold in the 2 cups Pecans until they’re evenly coated in the syrup.
This step requires speed—the baking soda reaction is immediate. Work quickly but carefully to avoid burns from the hot syrup. The pecans should glisten with a thin, even layer of the maple mixture.
Step 4: Shape and Cool the Clusters
Immediately drop rounded spoonfuls of the nut mixture onto a parchment-lined baking sheet. I use two spoons for this: one to scoop and the other to push the mixture off. Space the clusters about 2 inches apart to prevent them from merging as they spread slightly.
Let the clusters cool completely at room temperature, about 20-25 minutes. They’ll harden as they cool, becoming crisp and firm to the touch. Avoid the temptation to touch them while warm—they’ll be sticky and can lose their shape.
Step 5: Add the Finishing Touches
While the clusters cool, whip the 0.25 cup Heavy Cream until it forms soft peaks. Once the candies are completely set, dollop or pipe a small amount of whipped cream onto each cluster. Dust lightly with 0.5 cup Powdered Sugar for a delicate finish.
The contrast of the creamy, airy topping with the crisp maple-pecan clusters is what makes this treat special. Serve immediately, or store in an airtight container at room temperature for up to 5 days.
Pro Tips For Making Brach’S Maple Nut Goodies
- Use a Candy Thermometer: I learned this the hard way—maple syrup mixtures can go from perfect to burnt in seconds. Aim for 235°F (soft-ball stage) for that ideal chewy texture.
- Toast the Pecans: Sounds weird, but it works: Spread pecans on a baking sheet at 350°F for 8-10 minutes before adding them. It deepens their flavor and keeps them crisp in the final clusters.
- Skip the Substitutes: Pure maple syrup is non-negotiable here—pancake syrup or “maple-flavored” versions won’t give you the same depth or consistency. After ruining a batch with imitation, I never cheat again.
- Butter the Pan First: Even if using parchment, lightly grease the pan with unsalted butter before pouring the mixture. It makes a real difference when you’re trying to lift the clusters later without half sticking to the paper.
Common Mistakes When Making This Dish
Overstirring the Mixture
Once your sugar syrup starts boiling, resist the urge to stir. Stirring can cause sugar crystals to form on the sides of the pan, leading to a grainy texture. I learned this the hard way during my first attempt. Instead, gently swirl the pan as needed.
Wrong Temperature
Using a candy thermometer is non-negotiable. Stopping at 280°F will give you soft candies, while going past 300°F can burn the mixture. The sweet spot is 290°F for that perfect crunch. 🌡️
Skipping the Baking Soda
This ingredient might seem small, but it creates the airy texture. Omitting it results in dense, hard candies. I always measure it precisely—½ tsp makes all the difference in the final product.
Untested Pecans
Raw pecans can add unwanted moisture. Always toast them first at 350°F for 8-10 minutes until fragrant. This ensures they stay crisp when coated in syrup. I spread them on a baking sheet for even toasting.
Uneven Cluster Sizes
Inconsistent portions lead to some pieces being too thick or too thin. Use two spoons to create uniform 1.5-inch mounds. This way, they all cool and harden at the same rate.
Rushing the Cooling
Let the clusters cool completely before adding whipped cream. Moving them too soon can cause them to lose shape. I give mine a full 25 minutes to set properly before the final step. 💡
Nutrition Facts
Frequently Asked Questions
Can I substitute walnuts for pecans?
Walnuts work well and provide a similar crunch. Toast them at 350°F for 8-10 minutes first to enhance their flavor and remove moisture.
Why does the mixture foam when adding baking soda?
Baking soda creates a chemical reaction with the acid in maple syrup, producing carbon dioxide bubbles. This is what gives the candies their light, airy texture. Stir quickly to incorporate it evenly.
How do I store these candies long-term?
Keep them in an airtight container at room temperature. They’ll stay fresh for 2-3 weeks, though the whipped cream topping is best added fresh.
What if my candy doesn’t reach 290°F?
Stop cooking immediately—your candies will be too soft. Use a calibrated thermometer and ensure your pan is heavy-bottomed for even heating. Low heat or impatience often causes this issue.

Trained in classic French technique but raised on slow-cooked ribs and spicy rubs, she blends culinary skill with smoke and soul.
- Recipe for Boneless Pork Chops in Cast Iron Skillet: Sear and Baste to Juicy Perfection - October 3, 2026
- Recipe for Boneless Cross Rib Roast: Slow-Roasted Beef with Herb Crust - October 3, 2026
- Hamburgers in Sauce Recipe Crock Pot: Slow-Cooked Savory Delight - October 3, 2026