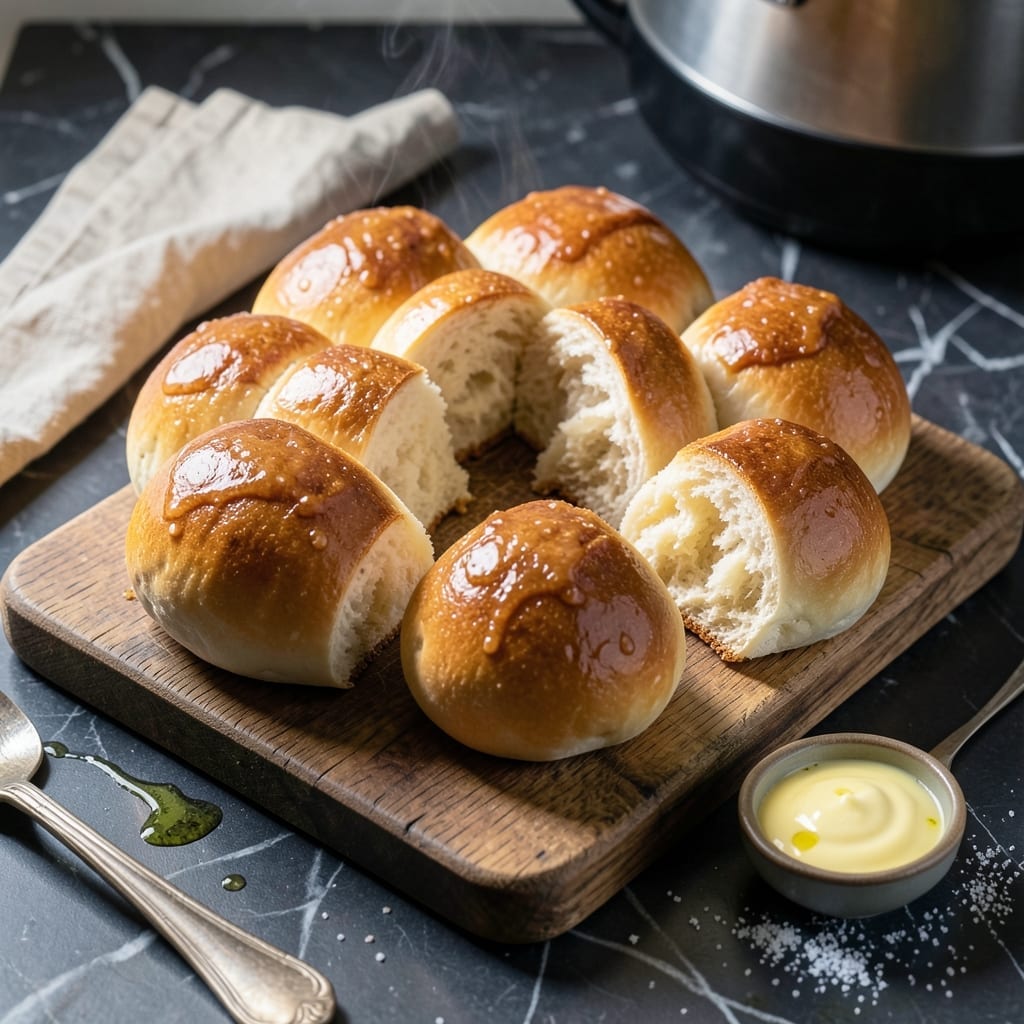
This bread maker recipe delivers golden, hands-off rolls with minimal effort. The machine handles kneading and rising, ensuring consistent results every time.
You’ll get soft, fluffy buns perfect for dinner or sandwiches. The process is simple, with precise settings and timing for foolproof baking.
Ingredients for Bread Roll Recipe Bread Maker
Golden, fluffy rolls start with these carefully measured bread maker ingredients for foolproof results.
| Ingredient | Amount | Notes |
|---|---|---|
| Bread Flour 🌾 | 4 cups | High-protein for structure |
| Warm Water 💧 | 1 ¼ cups | 110°F for yeast activation |
| Active Dry Yeast 🍞 | 2 ¼ tsp | One packet plus extra |
| Granulated Sugar 🍚 | 2 tbsp | Feeds the yeast |
| Unsalted Butter 🧈 | 3 tbsp | Softened to room temperature |
| Large Egg 🥚 | 1 whole | Room temperature for even mixing |
| Sea Salt 🧂 | 1 ½ tsp | Fine grain for even distribution |
| Whole Milk 🥛 | ½ cup | Warmed to 110°F |
| Honey 🍯 | 1 tbsp | Adds subtle sweetness |
| Olive Oil 🫒 | 1 tbsp | For greasing pan |
| Dried Onion Flakes 🧅 | 1 tbsp | Optional for flavor depth |
| Garlic Powder 🧄 | 1 tsp | Optional for savory notes |
[recipe_ingredient_scaler]
The flour is critical here. King Arthur Bread Flour (available at Whole Foods or Target) has the 12-14% protein content needed for proper rise. Yeast must be fresh—check the expiration date on the packet. Fleischmann’s or Red Star are reliable brands. For the milk and water, use a thermometer to verify 110°F (lukewarm to the touch) for optimal yeast activation.
No bread flour? All-purpose plus 1 tbsp vital wheat gluten per cup gets you close. Instant yeast can be used at the same amount without proofing. Out of honey? Maple syrup or sugar works equally well. For dairy-free, unsweetened almond milk substitutes for whole milk with no texture compromise. The egg adds richness but can be omitted for a slightly denser roll.
Store flour in an airtight container for up to 6 months. Yeast keeps in the freezer for 1 year past its expiration date. These rolls are best served warm but can be stored in an airtight container for 3 days or frozen for 1 month (reheat wrapped in foil at 350°F for 10 minutes).
Why You’ll Love This Recipe
- Hands-Off Magic: The bread maker does all the kneading and rising while I sip my coffee. Honestly, it’s like having a tiny bakery in my kitchen.
- Buttery Perfection: That golden crust from the unsalted butter and the slight sweetness from the sugar? I’ll be real—it’s the reason my family begs for seconds.
- Meal Prep Hero: I bake a batch on Sunday, then freeze half for busy weeknights. Between us, warm rolls in 10 minutes flat save dinner more often than I’d like to admit.
- Pantry Staples Only: Bread flour, yeast, and a few basics I always have on hand. No last-minute grocery runs, just soft, pillowy rolls whenever the craving hits.
Step-by-Step Instructions for Bread Rolls in a Bread Maker
This method delivers consistent, golden-brown buns with minimal effort and maximum precision.
Step 1: Activate the Yeast and Combine Wet Ingredients
Begin by warming the 1.25 cups Warm Water and 0.5 cup Whole Milk to 110°F—this temperature is critical for yeast activation without killing it. In the bread maker pan, add the warmed liquids first, then sprinkle the 2.25 tsp Active Dry Yeast evenly over the surface. Let it sit for 5-7 minutes until the yeast becomes foamy and active. This visual confirmation ensures your yeast is viable.
Next, add the 2 tbsp Granulated Sugar, 1 tbsp Honey, 1 whole Large Egg, and 3 tbsp Unsalted Butter (softened to room temperature). The sugar and honey feed the yeast, while the egg and butter enrich the dough for a tender crumb. Whisk these gently with a fork to combine before adding the dry ingredients.
Step 2: Incorporate Dry Ingredients and Optional Flavorings
Measure the 4 cups Bread Flour precisely—using a kitchen scale ensures accuracy. Sprinkle the flour evenly over the wet mixture in the pan. Add the 1.5 tsp Sea Salt in a separate corner of the pan to prevent it from directly contacting the yeast, which could inhibit activation.
For added depth, sprinkle the 1 tbsp Dried Onion Flakes and 1 tsp Garlic Powder over the flour. These optional ingredients enhance the savory profile of your rolls. Avoid stirring at this stage; the bread maker’s paddle will handle the mixing once the program starts.
Step 3: Select the Dough Setting and Monitor the Kneading
Secure the pan in the bread maker and select the dough setting. This program typically runs for 1 hour 30 minutes to 2 hours, which includes kneading and the first rise. After 10 minutes of kneading, check that the dough has formed a smooth, elastic ball. If it appears too dry, add warm water 1 teaspoon at a time. If too sticky, add bread flour 1 tablespoon at a time.
The dough should pull away from the sides of the pan but still be slightly tacky to the touch. The bread maker’s consistent temperature and kneading action eliminate the guesswork, ensuring even gluten development for light, airy rolls.
Step 4: Shape, Proof, and Bake the Rolls
Once the dough cycle completes, remove the dough from the pan and place it on a lightly floured surface. Divide it into 12 equal portions (about 3 ounces each) and shape each into a smooth ball by rolling it under your palm. This technique creates surface tension for a uniform rise.
Place the shaped rolls on a baking sheet lined with parchment paper, spacing them 2 inches apart. Cover with a damp towel and let them proof at room temperature for 30-45 minutes, or until nearly doubled in size. Preheat your oven to 375°F during the last 15 minutes of proofing.
Brush the rolls lightly with the 1 tbsp Olive Oil for a golden finish, then bake for 15-18 minutes until they’re deep golden brown and sound hollow when tapped. This visual and auditory cue confirms they’re fully baked. Transfer to a wire rack to cool slightly before serving.
Pro Tips For Making Bread Roll Recipe Bread Maker
- Check Yeast First: Always proof your active dry yeast in the warm water with a pinch of sugar for 5-10 minutes—if it doesn’t foam, your rolls won’t rise, and I learned this the hard way after wasting a whole batch of flour.
- Use Room-Temp Butter: Take the unsalted butter out 30 minutes before starting so it softens evenly; cold butter won’t incorporate properly, and you’ll end up with dense, uneven rolls.
- Don’t Overfill the Maker: Resist the urge to max out the bread maker’s capacity—leave at least 1 inch of space for the dough to rise, or it’ll spill over and bake into a messy, flat loaf.
- Brush with Butter: Right after baking, brush the rolls with melted unsalted butter for a softer crust and richer flavor—I skip this when I’m lazy, but the difference is noticeable every time.
Regional Styles of These Flavors
Southern-Style Buttermilk Rolls
Swap the milk for 1.25 cups buttermilk (warm to 110°F) and reduce water to 1 cup. The tangy buttermilk creates a slightly denser, more flavorful roll reminiscent of classic Southern baking. I love these with honey butter for a true taste of the South. 💛
French Brioche-Style
For a richer roll, replace the egg with 2 eggs and increase butter to 5 tbsp. Add 1 tbsp vanilla extract for a sweet, buttery brioche-style roll. These shine as dinner rolls or for French toast the next morning.
German Kaiser Rolls
Shape the dough into 5-6 larger rolls (about 5 oz each) and create a cross pattern on top with a sharp knife before baking. Brush with a cornstarch-water slurry for a crisp, glossy crust. These hearty rolls are perfect for sandwiches.
Italian Focaccia Rolls
After shaping, dimple each roll with your fingers and drizzle with 2 tbsp olive oil and 1 tsp dried rosemary. Sprinkle with flaky sea salt before baking. The result is a rustic, herb-infused roll with a crisp exterior.
Bake at 400°F for 12-15 minutes for extra crispiness. 🌿
Scandinavian Cardamom
Add 1 tsp ground cardamom to the dry ingredients for a warm, aromatic twist. This spice is a staple in Scandinavian baking and pairs beautifully with the sweetness of the dough. Serve warm with coffee.
Nutrition Facts
Frequently Asked Questions
What setting should I use on my bread maker?
Use the dough setting for kneading and first rise. This typically runs 1 hour 30 minutes to 2 hours depending on your machine.
Can I make these without a bread maker?
Yes, but you’ll need to knead by hand or mixer for 8-10 minutes and let rise 1-2 hours until doubled. The texture may vary slightly.
Why are my rolls dense instead of fluffy?
This usually means the yeast wasn’t active or the dough didn’t rise enough. Check your yeast freshness and ensure liquids were 110°F.
How do I store leftover rolls?
Keep in an airtight container at room temperature for 3 days, or freeze for up to 1 month. Reheat wrapped in foil at 350°F for 10 minutes.

Trained in classic French technique but raised on slow-cooked ribs and spicy rubs, she blends culinary skill with smoke and soul.
- Recipe for Boneless Pork Chops in Cast Iron Skillet: Sear and Baste to Juicy Perfection - October 3, 2026
- Recipe for Boneless Cross Rib Roast: Slow-Roasted Beef with Herb Crust - October 3, 2026
- Hamburgers in Sauce Recipe Crock Pot: Slow-Cooked Savory Delight - October 3, 2026