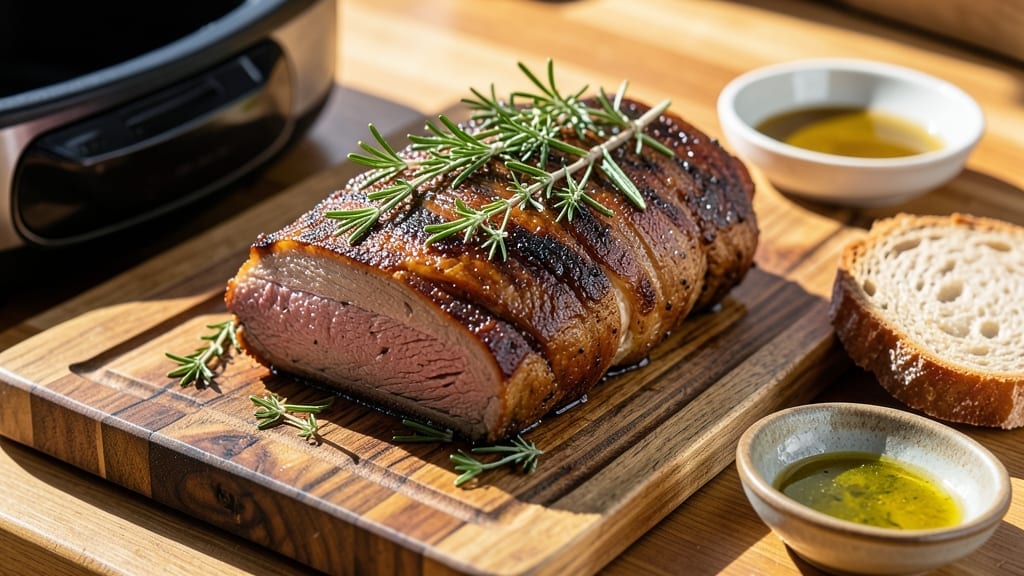
Mastering brisket in an electric roaster transforms tough cuts into melt-in-your-mouth perfection with minimal effort. The key lies in precise temperature control and patience—no smokehouse required. I’ve refined this method over years to deliver restaurant-quality results at home, ensuring every slice falls apart effortlessly.
This approach preserves moisture while developing deep, smoky flavors through slow cooking.
The process begins with a simple yet effective brine to enhance tenderness, followed by a balanced seasoning that lets the meat shine. Your electric roaster will handle the rest, maintaining a steady 225°F environment for up to 12 hours, depending on size.
The low-and-slow method breaks down collagen naturally, turning connective tissue into rich, velvety juices that coat each bite.
By the time your brisket reaches an internal temperature of 195°F–203°F, it will be fork-tender with a bark-like crust that’s crisp yet yielding. Resting properly ensures juices redistribute, guaranteeing that first slice is as juicy as the last.
The result? A brisket so tender it practically dissolves, with a depth of flavor that rivals traditional pit-smoked methods.
Serve with classic sides like pickled onions, cornbread, or a tangy BBQ sauce for the full experience. This recipe proves you don’t need a smoker to achieve showstopping brisket—just the right technique and a little time. Let’s get started on your perfect cut.
Ingredients for brisket in electric roaster
A few key ingredients transform tough brisket into melt-in-your-mouth perfection in your electric roaster.
| Ingredient | Amount | Notes |
|---|---|---|
| Beef Brisket (Packer Cut) 🥩 | 6 lb | Whole packer cut preferred |
| Yellow Onion 🧅 | 1 whole | Sliced into wedges |
| Garlic Cloves 🧄 | 8 cloves | Whole, peeled |
| Kosher Salt 🧂 | ½ cup | Diamond Crystal preferred |
| Black Peppercorns 🌶️ | 2 tbsp | Freshly cracked |
| Granulated Garlic 🧄 | 1 tbsp | For dry rub |
| Smoked Paprika 🌶️ | 2 tbsp | High quality for smokiness |
| Ground Cumin 🌿 | 1 tbsp | Toasted for depth |
| Brown Sugar 🍯 | 2 tbsp | Light or dark |
| Apple Cider Vinegar 🍎 | ½ cup | For brine |
| Water 💧 | 4 cups | Filtered preferred |
| Beef Broth 🍲 | 1 cup | Low-sodium preferred |
| Beef Fat (Tallow or Shortening) 🧈 | ¼ cup | For bark development |
| Yellow Mustard 🍯 | 1 tbsp | For final coating |
[recipe_ingredient_scaler]
The brisket cut is everything here. Packer cuts with good marbling deliver the best results—look for a thick fat cap and vibrant color. Most grocery stores carry these in the butcher section, but Costco or local meat markets often have higher-quality options. If you can’t find a whole packer, a flat cut will work, though it’ll cook slightly faster. The fat cap is non-negotiable—it protects the meat from drying out during those long hours. I always ask the butcher to trim excess silver skin but leave the fat intact. For a 6-pound brisket, plan on about 12 hours in the roaster at 225°F.
No smoked paprika? Regular paprika plus a pinch of liquid smoke gets you close, though nothing beats the real thing. The beef fat can be swapped for unsalted butter (same amount) if you prefer, though it won’t develop that classic bark. For the brine, white vinegar works too, but apple cider adds subtle sweetness. The yellow mustard isn’t just for flavor—it helps the bark adhere. If you’re short on time, skip the brine and just focus on a thick dry rub (double the spices, halve the water). The onions and garlic in the roaster? They caramelize beautifully and add depth—don’t skip them!
This brisket tastes even better the next day, so plan ahead. Wrap tightly in butcher paper (not foil) and let it rest at room temperature for 2 hours before slicing. Store leftovers in the fridge for 5-6 days or freeze for 3 months. For easy serving, portion into 1/2-inch slices and stack with pickled onions between layers. The fat cap will render down beautifully—save it for compound butter or to baste other dishes. Pro tip: The first slice is always the best, so save it for last when serving!
Why You’ll Love This Recipe
- No-Fuss Cooking: Honestly, the magic happens while you’re doing other things. Just toss the brisket in a brine with apple cider vinegar and kosher salt for 12 hours, then let the electric roaster do the heavy lifting at 225°F for 6-8 hours. I mean, really—this isn’t a recipe that demands your attention every 10 minutes. The onions and garlic in the bottom just add aroma without any extra effort.
- Crispy Outside, Creamy Inside: That bark? Chef’s kiss. The beef fat and yellow mustard mixture creates a crust so dark and flavorful it’ll make your guests think you’ve been smoking brisket for years. But the real star is the inside—so tender it practically falls apart when you slice it against the grain. The smoked paprika and toasted cumin in the dry rub? They’re the secret to that depth of flavor that’ll have everyone asking for seconds.
- Feeds a Crowd (or Your Weeknight): This recipe is basically a party in a pot. Six pounds of brisket means you’ve got enough for a big family dinner, a tailgate, or even leftovers for three lunches. And because it’s so forgiving—just set it, forget it, and let it cook—I’ve made it on a Tuesday night when I’m exhausted and still ended up with a showstopper. Plus, it reheats beautifully, so you’re not stuck with cold brisket the next day.
- Budget-Friendly Luxury: Brisket is one of those cuts that’s affordable but feels like a splurge when it’s done right. The key ingredients—beef fat, smoked paprika, even the beef broth—are pantry staples that cost next to nothing. And because the electric roaster locks in all that flavor, you’re not wasting a single ounce. Five to six days in the fridge or three months in the freezer? This is the kind of meal that stretches your budget and your meal prep game.
Step-by-step instructions for brisket in electric roaster
Here’s the foolproof method for brisket that’s fork-tender and packed with flavor.
Prepare the Brisket and Create the Brine
Start by trimming the beef brisket (packer cut) of any excess fat, leaving about ¼-inch layer for flavor and moisture. Place the trimmed brisket in a large resealable bag and set aside. In a separate bowl, combine the ½ cup kosher salt, 2 tbsp black peppercorns (freshly cracked), 1 tbsp granulated garlic, 2 tbsp smoked paprika, 1 tbsp ground cumin, and 2 tbsp brown sugar. This dry rub will create a flavorful crust while tenderizing the meat.
In a measuring cup, mix the ½ cup apple cider vinegar with 4 cups water and 1 cup beef broth to create a brine. Pour this liquid over the brisket in the bag, ensuring it’s fully submerged. Seal the bag and refrigerate for 12-24 hours, turning occasionally. This step ensures deep penetration of flavor and moisture, setting the foundation for perfect tenderness. The acidity from the vinegar also helps break down connective tissues for that melt-in-your-mouth texture.
Build the Roaster Base and Season the Brisket
After brining, remove the brisket and pat it dry thoroughly with paper towels. This step is crucial—any moisture left on the surface will prevent proper bark formation. While the brisket rests, preheat your electric roaster to 225°F. In a small bowl, combine the ¼ cup beef fat (tallow or shortening) with 1 tbsp yellow mustard. This mixture will create the perfect crust and add a subtle tangy depth to the bark.
Rub the brisket generously with the beef fat and yellow mustard mixture, pressing it into the surface so it adheres well. Place the sliced yellow onion wedges and 8 peeled garlic cloves in the bottom of the roaster. The onions and garlic will infuse the brisket with aromatic flavors as it cooks. Position the brisket fat-side up on the roaster rack, ensuring it’s elevated and not touching the bottom. This allows heat to circulate evenly and prevents steaming, which is key for developing that coveted bark.
Cook Low and Slow to Perfection
Place the lid on the roaster and set the temperature to 225°F. Cook the brisket for 6-8 hours, resisting the urge to open the lid. The goal is to maintain a steady temperature and moisture level. You’ll notice the brisket will hit “the stall” around 165-170°F internal temperature, where the cooking process temporarily halts as moisture evaporates. This is normal and expected—don’t panic or adjust the heat.
Once the brisket reaches 203°F internal temperature (use a meat thermometer for accuracy), it’s ready to rest. The probe should slide in like butter with no resistance. Transfer the brisket to a cutting board, tent loosely with foil, and let it rest for 1-2 hours. This resting period allows the juices to redistribute throughout the meat, ensuring each slice is moist and flavorful. The brisket will continue to rise in temperature during this time, reaching a perfect 210°F—this carryover cooking is essential for achieving that ideal texture.
Slice and Serve with Confidence
After resting, slice the brisket against the grain into ¼-inch thick slices. The grain direction will be visible as lines running through the meat. Use a sharp carving knife to cut through the fibers cleanly. Serve immediately with any accumulated juices from the roaster pan. The result should be brisket that’s fork-tender, with a dark mahogany bark on the outside and a beautiful pink smoke ring just beneath the surface.
Each slice should pull apart with minimal effort, offering a perfect balance of rich, beefy flavor and tender texture. The yellow mustard and beef fat mixture will add a subtle tang and help create a crispy, flavorful crust that’s sure to impress. This method guarantees brisket that’s so tender it practically melts in your mouth, with layers of flavor that come from the slow cook and the carefully chosen spices.
Pro Tips For Making Brisket In Electric Roaster
- Skip the Fat Trimming: That ¼-inch fat layer isn’t just for looks—it’s the flavor shield. I used to trim it all off for a “cleaner” look, but the fat renders down during cooking, keeping the meat moist and adding depth. Leave it, even if it means your brisket looks a little rugged going in.
- Crack Those Peppercorns: Freshly cracked black peppercorns make a real difference in texture and aroma. I learned this the hard way—using pre-ground pepper gave me a dull, sandy bite instead of the bright, sharp punch the recipe promises. A mortar and pestle or rolling pin works fine; no fancy tools needed.
- Don’t Rush the Brine: The 12-24 hours in the vinegar-water mix isn’t optional. I tried cutting it to 6 hours once, and the brisket turned out tougher, with less flavor penetration. If you’re short on time, at least hit the 18-hour mark—your future self (and your guests) will notice the difference.
- Elevate the Brisket: That roaster rack isn’t just for looks—it’s non-negotiable for even cooking. I used to pile the brisket directly on the bottom once, and it steamed instead of roasted, leading to a soggy bark. Fat-side up, elevated, and clear of the pan is the only way to get that mahogany crust and juicy center.
Troubleshooting perfect results
Temperature Control
Your electric roaster’s consistency is everything—225°F is non-negotiable. If the temperature fluctuates more than ±10°F, your brisket will either dry out or cook unevenly. I use a Thermoworks Smoke probe thermometer to monitor both the roaster and the brisket’s internal temp.
Pro tip: If your roaster struggles with stability, let it preheat for 30 minutes before adding the brisket to avoid sudden temperature drops. 🌡️
Brine Time Pitfalls
Skipping the 12-24 hour brine is a common mistake—it’s where the magic happens. If you’re short on time, at least 4 hours is better than nothing. But if you rush it, the salt won’t penetrate deeply enough, and your brisket will lack that juicy, tender texture.
I’ve learned the hard way: under-brined brisket tastes flat, no matter how long you cook it.
Opening the Lid Too Soon
Resist the urge to check on your brisket before 6 hours—every time you open the lid, you lose 15-30 minutes of cooking time and risk uneven heat distribution.
The stall phase (around 165-170°F) is when moisture evaporates, so opening the lid here can stall progress even longer. Trust the process—your brisket will thank you later.
Fat-Side Up vs. Down
Positioning your brisket fat-side up is critical for bark formation, but don’t let the fat cap exceed ¼-inch—any thicker, and it’ll render too quickly, leaving you with a greasy mess.
If your brisket starts to steam instead of crisp up, flip it fat-side down for the last 1-2 hours of cooking. This balances bark and moisture beautifully.
Resting Like a Pro
Skipping the 1-2 hour rest after cooking is a rookie move—it’s when the juices redistribute, ensuring every slice is moist. If you slice too soon, you’ll waste perfectly good brisket.
I wrap mine loosely in foil and let it sit on a cutting board while I prep sides. This step is non-negotiable for that melt-in-your-mouth texture. 💡
Thermometer Misuse
Placing your thermometer probe in the fat cap instead of the thickest part of the meat gives false readings. For accuracy, insert it into the center of the flat or point section, avoiding bone or fat layers.
A digital instant-read thermometer is your best friend here—it’s the only way to guarantee 203°F perfection. No excuses!
Nutrition facts
Frequently asked questions
Why does my brisket need a brine before cooking?
The 12-24 hour brine with apple cider vinegar and beef broth breaks down tough connective tissues, ensuring fork-tender results. The salt and acidity penetrate deeply, infusing flavor while keeping the meat moist throughout the long cook. Skipping this step can leave your brisket dry or flavorless, no matter how long it cooks.
How do I know when my brisket is done without cutting into it?
Use a digital thermometer to check the thickest part of the meat—it should reach 203°F. The probe should slide in easily with no resistance. The brisket will continue cooking during the 1-2 hour rest, reaching 210°F naturally. This is the only reliable way to avoid overcooking or undercooking.
Can I use regular salt instead of kosher salt in the brine?
Yes, but adjust the amount—kosher salt is coarser, so use ¾ cup instead of ½ cup for the same effect. The texture and flavor won’t be identical, but it’ll still work. The key is proper measurement to avoid over-salting. Always taste your brine first if substituting!
What if my electric roaster isn’t stable at 225°F?
Preheat your roaster for 30 minutes before adding the brisket to let it stabilize. If it fluctuates more than ±10°F, use a probe thermometer to monitor and adjust settings manually. Consistency is critical—even small temperature swings can dry out your brisket.
Is it okay to flip the brisket during cooking?
No, flipping disrupts the bark formation and can cause uneven cooking. Keep it fat-side up for the first 6-8 hours. If the fat renders too quickly, flip it fat-side down for the last 1-2 hours to balance moisture and crust. This is the only exception to the rule!

Trained in classic French technique but raised on slow-cooked ribs and spicy rubs, she blends culinary skill with smoke and soul.
- Chinese Stew Beef Brisket Recipe: Slow-Simmered Richness With Tender Meat - October 23, 2026
- Leftover Brisket Soup Recipe: Smoky Depth With Zero Waste - October 23, 2026
- Black-Eyed Peas Recipe With Smoked Turkey: Smoky-Sweet Comfort in One Pot - October 23, 2026