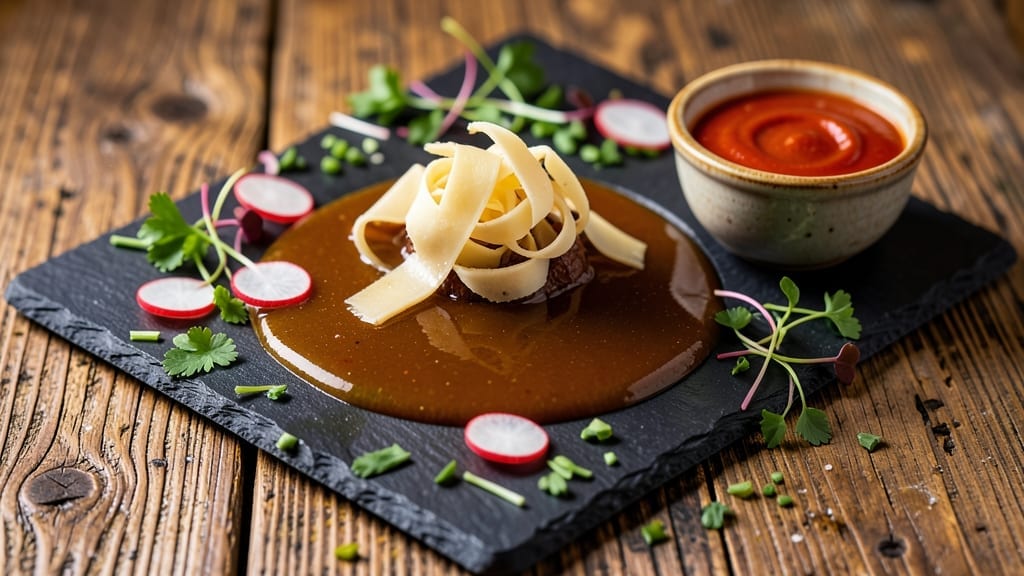
Transforming tough brisket into melt-in-your-mouth perfection starts with this beef broth injection recipe—my go-to method for achieving ultra-tender, moist results every time.
The secret lies in the science of moisture infusion: a carefully balanced beef broth mixture that penetrates deep into the muscle fibers, breaking down collagen while keeping the meat juicy from the inside out.
I first mastered this technique during a particularly competitive BBQ pit challenge, where the difference between a good brisket and a showstopper came down to this one critical step.
This isn’t just about throwing broth into the meat—it’s about precision. You’ll need a quality beef broth (homemade if possible), a meat injection tool, and patience to distribute the mixture evenly at 1-inch intervals across the brisket’s surface and deep into the thickest cuts.
The injection process takes about 20 minutes of careful work, but those minutes pay off when you slice into a brisket that’s so tender it practically falls apart. The key is working with a brisket that’s been trimmed and rubbed but hasn’t yet hit the smoker—timing is everything.
Once injected, the brisket goes into the smoker at 225°F, where it cooks low and slow for 12-16 hours, depending on size.
The beef broth infusion ensures moisture retention even through long cooking times, while the smoker works its magic on the exterior, creating that beautiful bark we all crave.
By the time it’s done, you’ll have a brisket that’s juicy in the center, with a crust that’s perfectly balanced between tender and chewy. The aroma alone will have everyone gathering around the table before the timer even goes off.
Serve it sliced against the grain with classic sides like baked beans and tangy coleslaw—this is the kind of brisket that makes people ask for seconds before the plate is even cleared.
The injection method works equally well for grilled or braised brisket, making it a versatile technique for any cooking method. Let’s get started on creating that restaurant-quality tenderness at home.
Ingredients for brisket injection recipe beef broth
Pantry staples plus a few fresh herbs. The secret to restaurant-quality brisket starts here.
| Ingredient | Amount | Notes |
|---|---|---|
| Beef Broth 🥩 | 2 cups | Homemade preferred, high-quality |
| Yellow Onion 🧅 | 1 whole | Finely minced for infusion |
| Garlic Cloves 🧄 | 6 cloves | Peeled and minced finely |
| Fresh Rosemary 🌿 | ½ cup | Chopped, fresh preferred |
| Fresh Thyme 🌿 | ¼ cup | Leaves only, chopped |
| Worcestershire Sauce 🍯 | 1 tbsp | Lea & Perrins preferred |
| Apple Cider Vinegar 🍎 | 1 tbsp | For acidity balance |
| Brown Sugar 🍚 | 1 tbsp | Light or dark |
| Black Peppercorns 🌶️ | 1 tsp | Freshly cracked |
| Smoked Paprika 🌶️ | ½ tsp | For subtle smokiness |
| Kosher Salt 🧂 | 1 tsp | Diamond Crystal preferred |
| Beef Brisket 🥩 | 6 lb | Packer cut, trimmed |
| Meat Injection Tool 🔪 | 1 whole | 18-gauge needle recommended |
[recipe_ingredient_scaler]
The beef broth is non-negotiable—homemade from beef bones gives the deepest flavor, but high-quality store-bought like Kettle & Fire works in a pinch. Grab fresh rosemary and thyme from the grocery store’s produce section (the Whole Foods or Trader Joe’s sections have the freshest). For the brisket, packer cut from Costco is ideal—look for good marbling and ask the butcher to trim it evenly. The injection tool? 18-gauge needles distribute the mixture best without tearing the meat. I always buy mine from Amazon—they’re cheap and last forever.
No homemade broth? Beef bouillon powder mixed with hot water works in a bind, but it won’t taste as rich. Fresh herbs wilt fast—if yours are already drying out, dried rosemary and thyme at half the amount keep the flavor. The Worcestershire sauce can be swapped for soy sauce if you’re avoiding vinegar, but it’ll taste different. For the brisket, if you can’t find packer cut, flat cut trimmed to 1-inch thickness works too. Just make sure it’s well-trimmed—fat doesn’t inject well. The smoked paprika adds depth without overpowering; skip it if you’re using a smoker with hickory or cherry wood.
Store the injection mixture in an airtight container in the fridge for up to 5 days. The brisket itself? Use within 2 days of trimming for best results. I always make double batches of the injection mix—portion it into ziplock bags and freeze for later. Thaw overnight in the fridge before using. The brisket can be injected up to 4 hours before smoking, but work with it as soon as possible for best texture. Leftovers? Slice thin, reheat in a 350°F oven for 15 minutes.
Why You’ll Love This Recipe
- Here’s what sold me: the injection creates steam during smoking, which locks in moisture while still letting that perfect bark form. The smoked paprika and Worcestershire sauce add depth, but the real magic? That creamy, fall-apart texture without drying out. It’s like the brisket is begging you to take another bite.
- No-Fuss Flavor Boost: I’ll be honest—this injection is the secret weapon that turns a simple brisket into something special. The beef broth, garlic, and fresh rosemary and thyme blend into a fragrant infusion that melts into the meat like a flavor hug. No fancy marinades or hours of prep; just a simmer and strain, and suddenly your brisket tastes like it’s been marinating for days.
- Steam-Powered Tenderness: Here’s what sold me: the injection creates steam during smoking, which locks in moisture while still letting that perfect bark form. The smoked paprika and Worcestershire sauce add depth, but the real magic? That creamy, fall-apart texture without drying out. It’s like the brisket is begging you to take another bite.
- Leftovers That Shine: I always make this for big gatherings, but honestly, it’s just as good the next day. Slice the leftover brisket into sandwiches or tacos—it tastes even better cold because the flavors have had time to marry. And if you’re feeding a crowd, the injection mixture itself can be refrigerated for up to five days, so you’re never left scrambling.
Step-by-step instructions for brisket injection recipe with beef broth
Here’s how to infuse your brisket with unmatched moisture and depth using just these ingredients.
Prepare the Brisket Injection Mixture
In a medium saucepan, combine the 2 cups beef broth, 1 tbsp Worcestershire sauce, 1 tbsp apple cider vinegar, 1 tbsp brown sugar, 1 tsp kosher salt, ½ tsp smoked paprika, and 1 tsp freshly cracked black peppercorns. Bring the mixture to a gentle simmer over medium-low heat for 10 minutes, allowing the flavors to meld together.
While the broth heats, finely mince the 1 yellow onion and 6 garlic cloves using a sharp knife or food processor. Add these to the simmering broth along with the ½ cup chopped fresh rosemary and ¼ cup chopped fresh thyme. Reduce the heat to low and let the infusion steep for an additional 15 minutes. This step ensures every flavor is fully extracted and ready to penetrate the brisket deeply.
Strain the mixture through a fine-mesh sieve into a clean bowl, pressing gently on the herbs to release all their essence. You should have about 2 cups of rich, aromatic infusion—this is your moisture and flavor base. Let it cool completely before injecting to prevent cooking the brisket prematurely.
Inject the Brisket with Precision
Place the 6 lb beef brisket on a stable cutting board, fat-side up. Using the meat injection tool (18-gauge needle), begin injecting the cooled infusion mixture evenly throughout the meat. Start at one end and work your way to the other, spacing the injections about 1 inch apart in a grid pattern. This ensures even distribution and maximum moisture retention.
Here’s the thing—don’t rush this step. The needle should penetrate deep into the meat, but you don’t want to inject directly into the bone. Aim for the thickest parts of the muscle. As you inject, you’ll see the brisket begin to plump slightly—this visual cue tells you the liquid is taking hold. Once you’ve covered the entire surface, flip the brisket and repeat the process on the other side.
After injecting, let the brisket rest uncovered in the refrigerator for at least 4 hours, or ideally overnight. This resting period allows the injection to fully absorb and the flavors to meld with the meat. Real talk: Skipping this step means you’ll miss out on that ultra-tender, juicy payoff.
Smoke the Brisket to Perfection
Preheat your smoker to 225°F using your choice of hardwood (oak or hickory work best). Place the injected brisket fat-side up on the smoker grates. The injection will create steam as it hits the heat, which helps develop that coveted bark while keeping the meat moist. Smoke the brisket undisturbed for 6 hours, maintaining a consistent temperature.
After 6 hours, check the internal temperature using a meat thermometer. It should read 165-170°F—this is when you’ll hit “the stall,” a natural pause in temperature rise. Don’t panic; this is normal and expected. Wrap the brisket tightly in butcher paper and return it to the smoker. Continue cooking until the internal temperature reaches 203°F, at which point the meat will be fork-tender and ready to rest.
Once the brisket reaches the target temperature, remove it from the smoker and let it rest for 1 hour before slicing. This resting period is critical—it allows the juices to redistribute, ensuring every bite is moist and flavorful. The injection you prepared earlier will have transformed the brisket into a tender, juicy masterpiece that falls apart with ease.
Pro Tips For Making Brisket Injection Recipe Beef Broth
- STRAIN LIKE YOU MEAN IT: The herbs in your infusion are stubborn—don’t just pour through the sieve and call it done. Press the rosemary and thyme with the back of a spoon while straining, or wrap them in a clean towel and squeeze gently. This forces out every last drop of flavor, so you’re not left with watery injection liquid. (I used to skip this, and the brisket never tasted as rich.)
- CHOP HERBS UNIFORMLY: Finely mincing the onion and garlic—think almost paste-like—means they’ll dissolve completely into the broth instead of settling as gritty bits. A food processor makes this easier, but if you’re chopping by hand, take your time. Uneven chunks will make your infusion taste like you threw in a handful of raw herbs instead of a smooth, aromatic base.
- COOL THE INJECTION FULLY: Warm liquid will cook the surface of your brisket before you even hit the smoker, turning it into a sad, gray sponge. Let the infusion sit at room temperature for 20 minutes, then pop it in the fridge for 30 minutes before injecting. Patience here means juicy meat, not a brisket that’s already sweating before the party starts.
- INJECT IN A GRID, NOT A RUSH: Space those injections about 1 inch apart in a neat grid—don’t just stab randomly like you’re playing darts. The goal is even distribution, so every bite gets that infused goodness. And slow down: Injecting too fast means the liquid pools instead of penetrating deep. (I’ve seen briskets where half the meat was dry because the injections were clustered.)
Essential equipment for perfect results
Your Injection Tool Arsenal
First, invest in a high-quality meat injection tool—I swear by the 18-gauge needle for even distribution without tearing the meat. Brands like Meater or Hudson Valley Smoke offer durable, ergonomic designs that make this process a breeze.
Avoid cheap plastic tools—they bend and don’t penetrate properly. I keep mine in my toolbox next to my smoker, ready for action. 🔪
Precision Thermometers
Temperature control is everything when injecting brisket. A dual-probe thermometer like the ThermoWorks Smoke lets you monitor both the brisket’s internal temp and your smoker’s accuracy simultaneously. This prevents overcooking and ensures the injection liquid stays cold until it hits the meat.
I’ve burned brisket before because I skipped this step—trust me, it’s not worth it.
Smoker Accessories
For the smoker itself, a pellet grill with temperature probe (like the Traeger Pro 575) is my go-to for consistent 225°F cooking. If you’re using a traditional offset smoker, invest in a chimney starter for reliable fires and a water pan to maintain humidity.
I also recommend a smoke tube for even wood distribution—it’s a game-changer for bark development.
Butcher Paper Wraps
Butcher paper is my secret weapon for wrapping brisket during the stall phase. Unlike foil, it allows moisture to escape while keeping the meat wrapped snugly. Look for heavy-duty butcher paper from brands like Diamond Packaging—it’s thick enough to handle the steam without tearing.
I keep a roll in my smoker setup because wrapping at the right moment makes all the difference in texture.
Cutting Board & Knife
Never skip the stable cutting board for injecting brisket. A 30×18-inch plastic board from ButcherBlock gives you enough space to work without the meat shifting. Pair it with a sharp boning knife for trimming fat—dull knives crush muscle fibers, which ruins the injection process.
I keep my knife honed like a razor because precision matters here.
Nutrition facts
Frequently asked questions
Why does the injection mixture need to steep with herbs?
The steeping process extracts maximum flavor from the rosemary and thyme, infusing the beef broth with aromatic compounds that penetrate deep into the brisket. Without this step, the herbs would release minimal flavor—think of it as the difference between a hint of herbs and a full herbal symphony in every bite. The 15-minute steep ensures every ounce of the infusion works its magic!
Can I use this injection method for other cuts of beef?
This technique works beautifully for pork shoulder or lamb leg, though adjust the injection spacing based on thickness. For tougher cuts like beef chuck, use the same infusion but inject slightly deeper—aim for 1.5-inch intervals. The key is adapting the technique to the cut’s texture.
What if I don’t have fresh herbs?
Dried herbs work in a pinch—use half the amount (e.g., ¼ cup dried rosemary instead of ½ cup fresh) and steep for 20 minutes instead of 15. The flavor won’t be identical, but the infusion will still add depth. Just make sure to grind dried herbs into fine powder first for better extraction.
How do I know if I’ve injected the brisket enough?
Look for visual cues: the brisket should appear slightly plump and moist where injected, with no dry patches. If you’re unsure, inject a little extra—it’s easier to trim excess moisture later than to under-inject. The 1-inch grid pattern ensures full coverage without overdoing it. Trust your eyes and the slight resistance when the needle penetrates.

Trained in classic French technique but raised on slow-cooked ribs and spicy rubs, she blends culinary skill with smoke and soul.
- Slow Cooker Barbecue Pork Recipe: Fall-Apart Tender With Smoky Depth - November 2, 2026
- Pork Butt Smoker Recipe: Low and Slow to Juicy, Fall-Off-Bone Tenderness - November 2, 2026
- Brisket Recipe Slow Cooker: Fall-Apart Tender With Minimal Effort - November 2, 2026