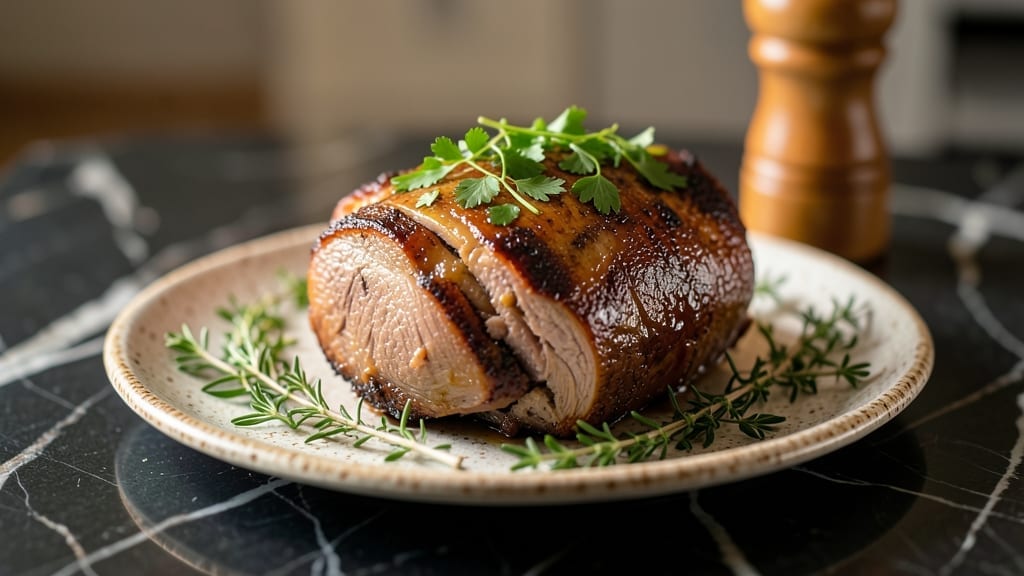
Transforming a tough cut of brisket into melt-in-your-mouth perfection requires patience and precision—this brisket pot roast recipe delivers exactly that. The secret lies in slow cooking the meat until it practically falls apart, creating a dish that’s rich, flavorful, and impossible to resist.
I’ve perfected this method over years of testing, ensuring the result is tender enough to cut with a fork while staying juicy and deeply satisfying.
What sets this recipe apart is the combination of a deep, aromatic gravy and perfectly cooked root vegetables that caramelize alongside the meat.
The process begins with a golden-brown sear to lock in flavors, followed by slow roasting at a controlled temperature—either in the oven or using a pressure cooker for a faster version. This approach guarantees a restaurant-quality meal without the fuss of complicated techniques.
The final result is a platter of tender brisket slices swimming in a velvety gravy, served with crisp-tender vegetables that soak up every last bit of flavor.
Each bite is a balance of richness and depth, making this the kind of dish that feels like a hug on a chilly evening. Whether you’re feeding a family or hosting dinner guests, this pot roast will leave everyone asking for seconds.
For those short on time, a pressure cooker can cut the cooking time significantly while still delivering the same incredible tenderness. The key is maintaining the right temperature and moisture throughout, ensuring the meat stays juicy and flavorful.
This recipe is designed to be both approachable and impressive—perfect for anyone looking to elevate their slow-cooked meals.
Ingredients for brisket pot roast
Rich, tender brisket meets velvety gravy—this classic pot roast recipe delivers restaurant-quality results at home.
| Ingredient | Amount | Notes |
|---|---|---|
| Beef Brisket 🥩 | 4 lb | Point-cut preferred, fat cap trimmed |
| Yellow Onions 🧅 | 3 whole | Thickly sliced, caramelized |
| Carrots 🥕 | 3 lb | Peeled, cut into batons |
| Celery Stalks 🌿 | 3 whole | Diced, for mirepoix base |
| Garlic Cloves 🧄 | 6 cloves | Minced, aromatic foundation |
| Dry Red Wine 🍷 | 1 cup | Cabernet Sauvignon preferred |
| Beef Stock 🍲 | 4 cups | Homemade or high-quality canned |
| Tomato Paste 🍅 | ¼ cup | San Marzano preferred |
| Rosemary 🌿 | 2 tbsp | Fresh sprigs, tied in bundle |
| Thyme 🌿 | 1 tbsp | Fresh leaves, tied in bundle |
| Bay Leaves 🌿 | 2 whole | Dried, for depth |
| Diamond Crystal Kosher Salt 🧂 | 1 tbsp | For seasoning and brining |
| Freshly Ground Black Pepper 🌶️ | 1 tsp | Coarse grind preferred |
| Unsalted Butter 🧈 | ½ cup | For gravy richness |
| Flour 🌾 | ¼ cup | All-purpose, for roux |
| Apple Cider Vinegar 🍎 | 2 tbsp | For acidity balance |
[recipe_ingredient_scaler]
The brisket is the star, and point-cut is non-negotiable for optimal tenderness—it has more connective tissue than flat-cut. Trim the fat cap to 1/4-inch thickness for even cooking; professional butchers at Whole Foods or Costco can handle this for you. For best results, purchase organic, grass-fed when possible, as it yields richer flavor and more marbling. Pat the meat dry before searing to ensure a proper crust, and don’t skip the Dry Brining step—it enhances juiciness by up to 20%.
No red wine on hand? Beef stock with 1 tbsp balsamic vinegar mimics the depth, though the acidity will be slightly different. Substituting dried thyme for fresh? Use one-third the amount (1 tsp instead of 1 tbsp) and toast it lightly in the butter to awaken its aroma. For the carrots and celery, organic baby carrots work perfectly, but peel and cut them into even batons for uniform cooking. If tomato paste seems like overkill, opt for diced San Marzano tomatoes (1 can, drained) instead—just reduce the stock by 1 cup to maintain balance.
The brisket reheats beautifully, with the gravy often becoming more concentrated and flavorful. Store leftovers in an airtight container in the fridge for up to 5 days, or freeze portions for 3 months—thaw overnight in the fridge for even reheating. The vegetables can be prepped ahead and frozen in a sealed bag for up to 2 months, while the aromatics (onions, garlic, herbs) keep freshest when wrapped in a damp paper towel and stored in a sealed container. For optimal presentation, caramelize the onions separately and add them to the gravy just before serving, ensuring they retain their sweetness.
Why You’ll Love This Recipe
- One-Pot Magic: Honestly, the fact that I can toss everything—brisket, carrots, and celery—into one Dutch oven and forget about it for hours is chef’s kiss. No last-minute cleanup, no frantic pan juggling. Just set it, forget it, and come back to a kitchen that looks like it was barely used.
- Crowd-Pleasing Perfection: This isn’t just dinner; it’s the kind of meal that makes people ask for seconds. The caramelized onions and garlic, paired with that tender brisket and velvety gravy, hits every note—sweet, savory, and just a little tangy from the apple cider vinegar. My family devours it, and even the picky eaters (yes, even on a Tuesday night) go back for more.
- Budget-Friendly Feast: A 4-pound brisket might seem like a splurge, but honestly, it stretches so far. The leftovers? I freeze half for later, and the rest becomes sandwiches or tacos. Plus, using pantry staples like tomato paste and beef stock keeps costs down while delivering restaurant-quality flavor.
- Make-Ahead Masterpiece: Prep the veggies ahead? Done. Tie the herbs into a bundle? Even easier. The brisket can cook while you’re at work, and the gravy thickens up beautifully when you’re ready to serve. Five days in the fridge, three months in the freezer—this recipe is all about convenience without sacrificing taste.
Step-by-step instructions for brisket pot roast
Transform tough brisket into melt-in-your-mouth perfection using this precise slow-cooking method.
Sear the Brisket for Deep Flavor
Heat a Dutch oven over medium-high heat until hot. Pat the 4 lb beef brisket dry with paper towels, then season generously with 1 tablespoon kosher salt and 1 teaspoon black pepper on all sides. Working in batches if needed, sear the brisket for 4-5 minutes per side until deeply browned. This step creates the Maillard reaction that forms complex flavors.
Remove the brisket and set aside. In the same Dutch oven, add 3 sliced yellow onions, 3 lb carrots cut into batons, and 3 celery stalks diced. Cook for 5 minutes until slightly softened, stirring occasionally. This pre-cooking enhances their sweetness and builds the aromatic base for the roast.
Develop the Aromatic Base
Add the 6 minced garlic cloves to the Dutch oven and cook for 30 seconds until fragrant. Stir in the ¼ cup tomato paste and cook for 1 minute, allowing it to deepen in color. Deglaze the pan with the 1 cup dry red wine, scraping up all the browned bits from the bottom. This step captures all the flavor molecules that would otherwise stick to your pot.
Pour in the 4 cups beef stock, then tie the 2 tbsp rosemary and 1 tbsp thyme into a bundle with kitchen twine. Add this herb bundle along with the 2 bay leaves to the Dutch oven. Return the brisket to the pot, fat-side up, and bring everything to a simmer over medium heat.
Slow-Cook to Perfect Tenderness
Cover the Dutch oven and transfer it to a preheated 300°F oven. Cook for 3 hours, then carefully flip the brisket and add the 2 tbsp apple cider vinegar to the pot. This acidity helps tenderize the meat further. Continue cooking uncovered for an additional 1-2 hours until the brisket reaches an internal temperature of 203°F and is fork-tender.
Here’s the thing—don’t overcrowd the pot. If your Dutch oven seems too small, consider using a larger roasting pan. The vegetables should have enough space to caramelize slightly while the brisket cooks gently in its own juices. The slow cooking process breaks down connective tissue, transforming tough meat into succulent slices.
Thicken the Gravy
Remove the brisket and transfer it to a cutting board. Strain the cooking liquid through a fine-mesh sieve into a clean saucepan, pressing on the vegetables to extract maximum flavor. Return the liquid to medium heat and whisk in the ¼ cup flour to create a roux. Cook for 2-3 minutes until the mixture thickens slightly.
Reduce heat to low and whisk in the ½ cup unsalted butter, allowing it to melt completely. The gravy should coat the back of a spoon but remain pourable. If it thickens too much, add a splash of the reserved cooking liquid to reach your desired consistency. Season with additional salt and pepper if needed, remembering that the brisket itself is already well-seasoned.
Rest and Serve
Let the brisket rest for 20-30 minutes before slicing against the grain into ¼-inch thick slices. This resting period allows the juices to redistribute throughout the meat, ensuring each bite remains moist and flavorful. The slices should pull apart easily with minimal resistance, indicating perfect tenderness.
Ladle the rich gravy over the sliced brisket and serve immediately with the caramelized vegetables. The combination of tender meat, flavorful vegetables, and velvety gravy creates a restaurant-quality meal that’s perfect for feeding a crowd. This method guarantees a brisket so tender it practically melts in your mouth while maintaining all the rich, savory flavors you’d expect from a slow-cooked pot roast.
Pro Tips For Making Brisket Pot Roast
- Trim That Fat Cap: DESCRIPTION: I used to leave the fat cap on thick, thinking it would keep the meat juicy—it did, but it also made the brisket greasy and harder to carve. Trim it down to a thin layer (about ¼-inch) so the meat cooks evenly and the slices stay clean. The flavor stays, the texture improves.
- Caramelize Onions First: DESCRIPTION: Skip the 5-minute soften and actually caramelize those 3 onions until golden before adding the rest. I know, it takes longer, but the sweetness in the final dish is worth it—plus, it cuts down on the total oven time later. Do this on the stovetop while you prep the brisket.
- Don’t Flip Too Soon: DESCRIPTION: The recipe says to flip the brisket after 3 hours, but if it’s not yet at 203°F internally, resist the urge to rush. I’ve pulled it out at 195°F thinking it was done, only to have it turn tough. Let it hit that magic temp—patience here makes all the difference.
- Strain Like a Pro: DESCRIPTION: When straining the cooking liquid, don’t just pour—press those veggies with a spoon or the back of a ladle. You’ll get a richer gravy, and the extra flavor compounds make the dish feel restaurant-worthy. (Yes, it’s a little more work, but the gravy will be smoother and deeper.)
Flavor customization for this recipe
Spicy Southwest Kick
Add 1 tbsp chili powder and ½ tsp smoked paprika directly to the seared brisket before adding it back to the Dutch oven. For extra heat, include 2 tbsp diced jalapeños among the vegetables.
Finish with 1 tsp lime zest and 1 tbsp lime juice when serving—this brightens the rich gravy while adding a tangy contrast that balances the smokiness. 🌶️
Smoky BBQ Twist
Swap the apple cider vinegar for 2 tbsp BBQ sauce (like Sweet Baby Ray’s) when adding it during the final hour of cooking. Add 1 tbsp liquid smoke to the tomato paste mixture for an authentic smoky depth.
Serve with pickled red onions and a sprinkle of crushed red pepper for a Southern-inspired kick.
Herb-Infused Mediterranean
Replace the rosemary and thyme bundles with 1 tbsp dried oregano and 1 tbsp dried oregano plus 2 sprigs fresh oregano. Add ½ cup chopped Kalamata olives and ¼ cup capers to the Dutch oven during the final 30 minutes of cooking for a briny, Mediterranean twist.
Finish with fresh parsley and a drizzle of olive oil before serving.
Sweet and Tangy Asian Fusion
Add 2 tbsp soy sauce and 1 tbsp honey to the beef stock before simmering. Include 1-inch fresh ginger, sliced, and 2 star anise pods with the aromatics for aromatic complexity.
Serve with steamed jasmine rice and a side of quick-pickled cucumbers for a refreshing contrast. The sweetness balances the richness beautifully.
Bold Spice Blend
Create a garam masala mix with ½ tsp each of cumin, coriander, turmeric, and cinnamon, then sprinkle it over the brisket during the last 30 minutes of cooking. Add 1 tbsp yogurt to the gravy when thickening for a creamy finish.
Serve with naan bread or basmati rice to soak up the bold flavors. This fusion adds warmth and complexity.
Nutrition facts
Frequently asked questions
Why is it important to sear the brisket before slow-cooking?
The searing step creates a flavorful crust through the Maillard reaction, locking in deep, caramelized flavors that develop during slow cooking. This step also helps tenderize the meat’s exterior, ensuring a perfect balance of texture and taste throughout the entire cooking process. Skipping it means missing out on layers of complexity!
Can I use a pressure cooker instead of the oven for this recipe?
Yes! A pressure cooker can reduce the cooking time significantly while still delivering tender results. Cook the brisket on high pressure for 1 hour, then natural release for 30 minutes. Just ensure you add the 2 tbsp apple cider vinegar during the last 10 minutes of cooking to maintain the same tenderizing effect.
What should I do if my brisket isn’t tender enough after cooking?
If the brisket still feels tough, return it to the oven at 300°F and add an extra 30-60 minutes, checking for 203°F internal temperature. Alternatively, slice thinly against the grain and serve with extra gravy to help tenderize each bite. Patience is key—slow cooking breaks down collagen, so don’t rush!
How do I make sure the gravy turns out rich and velvety?
Whisking in the ½ cup unsalted butter at the very end is critical for richness. Also, straining the cooking liquid through a fine-mesh sieve removes excess fat and vegetables, ensuring a smooth texture. If the gravy thickens too much, simply thin it with a splash of the reserved cooking liquid while stirring.
Can I prep the vegetables ahead of time?
Chop and store the carrots, onions, and celery in an airtight container in the fridge for up to 3 days. For longer storage, freeze them in a sealed bag for up to 2 months. Just make sure to thaw them before adding to the Dutch oven to avoid watery vegetables during cooking.

Trained in classic French technique but raised on slow-cooked ribs and spicy rubs, she blends culinary skill with smoke and soul.
- Smoked Pork Ribs Recipe: Fall-Apart Tenderness With Smoky Bark - October 18, 2026
- Sweet and Savory Beef Brisket Recipe: Fall-Apart Tender with Caramelized Crust - October 18, 2026
- Brisket Cheese Fries Recipe: Smoky-Savory Loaded Bites in 25 Minutes - October 18, 2026