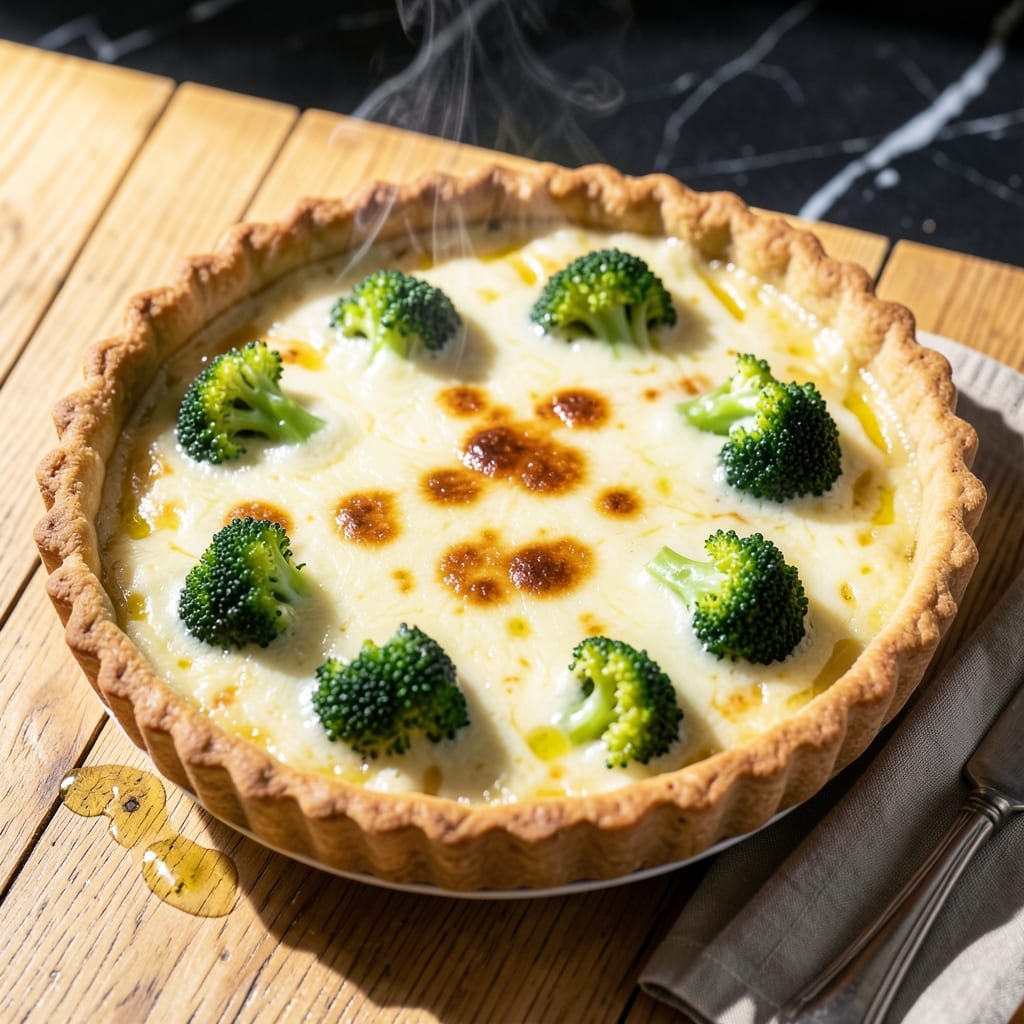
There’s something special about a quiche with a flaky crust and rich, cheesy filling that makes brunch feel like a celebration. This recipe combines tender broccoli and nutty Swiss cheese in a creamy custard, baked to golden perfection.
What sets this apart is the attention to detail—pre-baking the crust ensures it stays crisp, while steaming the broccoli maintains its vibrant color and texture. The custard strikes the ideal balance between creamy and firm, with the cheese adding depth.
By the time it emerges from the oven, you’ll have a dish with a golden, flaky pastry and a filling that’s rich without being heavy. It’s equally at home on a lazy Sunday morning or as part of a holiday spread.
Serve warm or at room temperature for a meal that’s satisfying yet light. Here’s how to make it.
Ingredients for Broccoli and Swiss Cheese Quiche
A flaky crust, tender broccoli, and nutty Swiss cheese create this rich yet balanced brunch classic.
| Ingredient | Amount | Notes |
|---|---|---|
| Pie Crust 🥧 | 1 whole | Pre-made or homemade, unbaked |
| Broccoli Florets 🥦 | 2 cups | Fresh, cut into bite-sized pieces |
| Swiss Cheese 🧀 | 1 ½ cups | Shredded from a block |
| Large Eggs 🥚 | 4 whole | Room temperature for best texture |
| Heavy Cream 🥛 | 1 cup | Full-fat for creaminess |
| Whole Milk 🥛 | ½ cup | Or substitute with half-and-half |
| Unsalted Butter 🧈 | 2 tbsp | For pre-baking the crust |
| All-Purpose Flour 🌾 | 2 tbsp | For thickening custard |
| Salt 🧂 | ½ tsp | Kosher or sea salt |
| Black Pepper 🌶️ | ¼ tsp | Freshly ground preferred |
| Ground Nutmeg 🌰 | 0.125 tsp | Freshly grated for best flavor |
| Onion 🧅 | ¼ whole | Finely diced, yellow or white |
| Garlic Cloves 🧄 | 1 clove | Minced for savory depth |
[recipe_ingredient_scaler]
The crust is everything here. Pillsbury refrigerated pie crust saves time and delivers that flaky texture, but a from-scratch butter crust takes it next level. For the Swiss cheese, avoid pre-shredded (it doesn’t melt as smoothly). Emmental or Gruyère work beautifully too. Most grocery stores carry good options—Whole Foods has an excellent selection of block cheeses.
No Swiss? Sharp cheddar or Monterey Jack make fine substitutes. Short on heavy cream? Half-and-half plus an extra egg keeps it rich. Fresh broccoli is ideal, but frozen works in a pinch (thaw and drain well). The nutmeg might seem optional, but a pinch really enhances the custard’s depth. Don’t skip steaming the broccoli—it prevents a soggy filling.
Quiche keeps 3-4 days in the fridge and reheats like a dream. Freeze slices for up to 2 months (thaw overnight before reheating). The crust stays crispest if you warm it in the oven rather than the microwave.
Why You’ll Love This Recipe
- One Bowl Wonder: I just dump eggs, cream, cheese, and pre-cooked broccoli into the crust—no extra bowls, no fuss.
- Melted Swiss Magic: That nutty Swiss cheese gets all gooey and pairs perfectly with the tender broccoli in every bite.
- Brunch or Dinner: Honestly, I serve this for lazy Sunday brunch or a quick weeknight dinner with a side salad.
- Second-Day Victory: Leftovers taste even better the next day, and it reheats like a dream in the microwave.
Step-by-Step Instructions for Broccoli and Swiss Cheese Quiche
Achieve a perfectly flaky crust and rich custard filling with this time-tested method.
Step 1: Pre-Bake the Pie Crust
Preheat your oven to 375°F. Press the pie crust into a 9-inch pie dish, crimping the edges decoratively. Prick the bottom all over with a fork to prevent air bubbles from forming during baking.
Line the crust with parchment paper and fill it with pie weights or dried beans. Bake for 12-15 minutes until the edges begin to turn light golden brown. Remove the weights and parchment, then brush the bottom with 2 tbsp unsalted butter melted. Return to the oven for another 5-7 minutes until the entire crust is lightly golden.
Step 2: Prepare the Filling Vegetables
While the crust bakes, heat a skillet over medium heat. Add the 0.25 whole onion finely diced and cook for 3-4 minutes until translucent. Add the 1 clove garlic cloves minced and cook for another 30 seconds until fragrant.
Stir in the 2 cups broccoli florets and cook for 4-5 minutes until the broccoli is tender-crisp and bright green. Remove from heat and let cool slightly. This prevents the broccoli from releasing excess moisture into the quiche, which would make the custard soggy.
Step 3: Make the Custard Base
In a large bowl, whisk together the 4 whole large eggs until well combined. Add the 1 cup heavy cream, 0.5 cup whole milk, 2 tbsp all-purpose flour, 0.5 tsp salt, 0.25 tsp black pepper, and 0.125 tsp ground nutmeg. Whisk vigorously for 1 minute until the mixture is smooth and slightly frothy.
The flour helps stabilize the custard, ensuring it sets properly without curdling. The nutmeg adds a subtle warmth that complements the Swiss cheese beautifully. Make sure all ingredients are fully incorporated with no lumps.
Step 4: Assemble and Bake the Quiche
Sprinkle 1 cup of the 1.5 cups Swiss cheese shredded evenly over the pre-baked crust. Top with the cooked broccoli and onion mixture, spreading it out evenly. Sprinkle the remaining 0.5 cup Swiss cheese over the vegetables.
Pour the custard mixture evenly over the cheese and vegetables. Bake at 375°F for 35-40 minutes until the center is just set and the top is golden brown. A knife inserted near the center should come out clean. Let the quiche rest for 10 minutes before slicing to allow the custard to set fully.
Pro Tips For Making Broccoli And Swiss Cheese Quiche
- Blind Bake First: Always pre-bake your pie crust for 8-10 minutes at 375°F before adding the filling—this prevents the dreaded soggy bottom that ruins so many quiches.
- Blanche the Broccoli: Toss your broccoli florets in boiling water for 60 seconds, then shock in ice water to lock in color and texture—raw broccoli releases too much moisture into the custard.
- Grate Your Own Cheese: Skip the pre-shredded Swiss; freshly grated melts smoother and doesn’t have that anti-caking agent coating that keeps it from blending properly with the eggs.
- Warm the Cream: Take the chill off your heavy cream before whisking it with the eggs—cold cream can cause the fat to separate, leading to a less creamy custard texture.
Storing and Reheating This Dish
Refrigerator Storage
Let your quiche cool completely before storing—I usually wait about 2 hours. Transfer to an airtight container or wrap tightly with plastic wrap. It’ll keep in the fridge at 40°F or below for 3-4 days. Biscuit always tries to sneak a bite if I leave it out too long! ❄️
Freezer Storage
For longer storage, slice and freeze individual portions. Wrap each slice in plastic wrap, then place in a freezer bag. It’ll stay fresh for up to 2 months. Thaw overnight in the fridge before reheating.
Oven Reheating
Preheat your oven to 350°F and place the quiche slice on a baking sheet. Cover loosely with foil and heat for 10-15 minutes until warmed through. This method keeps the crust crisp and the filling creamy. 🔥
Microwave Reheating
For a quick option, microwave individual slices on 50% power for 1-2 minutes. Place a damp paper towel over the top to prevent drying. Let it rest for 1 minute after heating.
Make-Ahead Tip
You can assemble the quiche the night before and refrigerate it unbaked. In the morning, let it sit at room temperature for 20 minutes before baking as directed. This makes brunch prep effortless!
Nutrition Facts
Frequently Asked Questions
Can I use store-bought crust for this?
Yes! A pre-made 9-inch pie crust works perfectly. Just follow the pre-baking instructions in the recipe to ensure it stays crisp.
Why pre-bake the crust?
Pre-baking prevents a soggy bottom by creating a barrier between the crust and the wet custard filling. It also helps the crust hold its shape.
Can I swap the Swiss cheese?
Try Gruyère or sharp cheddar for a different flavor. Avoid pre-shredded cheese as it doesn’t melt as smoothly.
How do I know when it’s done?
The center should be just set with a slight jiggle, and the top golden brown. A clean knife inserted near the center confirms it’s ready.

Trained in classic French technique but raised on slow-cooked ribs and spicy rubs, she blends culinary skill with smoke and soul.
- Recipe for Boneless Pork Chops in Cast Iron Skillet: Sear and Baste to Juicy Perfection - October 3, 2026
- Recipe for Boneless Cross Rib Roast: Slow-Roasted Beef with Herb Crust - October 3, 2026
- Hamburgers in Sauce Recipe Crock Pot: Slow-Cooked Savory Delight - October 3, 2026