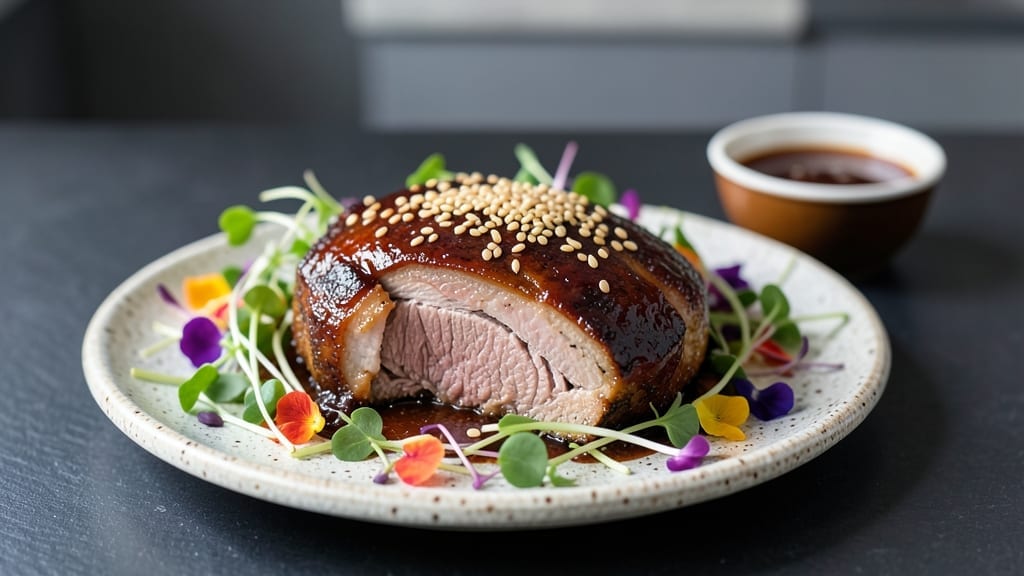
This brown sugar brisket recipe transforms a tough cut into melt-in-your-mouth perfection with a crispy bark and caramelized sweetness—all in your oven. 💛 I perfected this method after years of experimenting with slow-cooked brisket, and the brown sugar plays a starring role in creating that irresistible glaze and flavor depth.
The secret lies in balancing the sweetness with savory spices and proper cooking times to ensure tender meat every time.
The process begins with a dry rub of brown sugar, paprika, and garlic powder that forms an aromatic crust during the initial high-heat sear. After that, the brisket spends hours in the oven at a low temperature, allowing it to break down into succulent slices.
The brown sugar doesn’t just add sweetness—it helps create that coveted bark while keeping the meat moist and flavorful throughout.
By the time you’re ready to serve, you’ll have slices that are juicy, tender, and perfectly caramelized on the outside. The brown sugar glaze adds a sticky-sweet finish that pairs beautifully with classic sides like creamy mashed potatoes or tangy coleslaw.
This recipe delivers restaurant-quality results with minimal effort, making it ideal for special occasions or when you want to impress without spending hours in the kitchen.
Whether you’re feeding a crowd or treating yourself to a Sunday dinner, this brisket recipe delivers consistent, foolproof results. The key is patience—letting the oven do the work while you focus on perfecting the sides. Let’s get cooking!
Ingredients for brown sugar brisket recipe oven
Sweet, smoky, and packed with flavor—just these essentials for brisket perfection.
| Ingredient | Amount | Notes |
|---|---|---|
| Brisket 🥩 | 4 lb | Packer cut with good marbling |
| Light Brown Sugar 🍯 | ½ cup | Packed, not granulated |
| Smoked Paprika 🌶️ | 2 tbsp | For deep smoky flavor |
| Garlic Powder 🧄 | 2 tsp | Freshly ground preferred |
| Ground Black Pepper 🌶️ | 1 tsp | Freshly cracked for heat |
| Kosher Salt 🧂 | 1 ½ tbsp | Coarse grain preferred |
| Yellow Onion 🧅 | 1 whole | Sliced for glaze base |
| Beef Broth 💧 | 1 ½ cups | Low-sodium preferred |
| Apple Cider Vinegar 🍎 | 2 tbsp | For tenderizing touch |
| Unsalted Butter 🧈 | 2 tbsp | Cold for basting |
| Fresh Thyme Leaves 🌿 | ¼ cup | Or 1 tsp dried thyme |
| Olive Oil 🫒 | 2 tbsp | For initial sear |
[recipe_ingredient_scaler]
The brisket is non-negotiable here. Packer cut with visible marbling is what you want—ask your butcher for the point cut if available. I grab mine from Costco when I’m doing a big batch, but Whole Foods or local butchers usually have great options too. Look for a piece that’s about 1.5-2 inches thick—thinner cuts cook faster and can dry out. The brown sugar? Light brown works best—it’s less processed and caramelizes better. If you can only find granulated, mix it with a splash of water to make it packable. The smoked paprika gives that deep, smoky flavor without needing a smoker.
No smoked paprika? Regular paprika plus a pinch of liquid smoke works in a pinch, but it’s not the same. Short on thyme? Dried oregano at half the amount gets you close, but fresh thyme is ideal. The apple cider vinegar might sound odd, but it helps tenderize the meat and balances the sweetness. Substitute lemon juice if that’s what you’ve got. For the glaze, if you don’t have beef broth, water plus a bouillon cube works—just taste and adjust the salt. The butter for basting? Full-fat is a must—low-fat won’t give you that rich, glossy finish.
This brisket tastes even better the next day, so make extra. Wrap it tightly in foil and store in the fridge for up to 5 days. For longer storage, slice it and freeze in portions—it keeps for 3 months. I like to portion it into individual servings so I can grab and reheat without defrosting the whole thing. The glaze can be made ahead and reheated separately if needed. Leftovers reheat beautifully in the oven at 300°F for about 20 minutes, covered with foil.
Why You’ll Love This Recipe
- One-Pan Magic: Honestly, I love how this recipe turns one skillet into your whole dinner setup—no extra dishes, no last-minute cleanup chaos. Just sear the brisket in olive oil, slap on that brown sugar-scented rub, and let the oven do the heavy lifting while you prep sides or relax.
- Sweet-Smoky Surprise: The light brown sugar caramelizes into this sticky, tender blanket over the meat, while the smoked paprika and garlic powder give it that deep, woodsy warmth. That first bite? Crispy bark meets fall-apart tenderness—it’s like a hug for your taste buds.
- Feeds a Crowd (or Your Cravings): This 4-pound brisket isn’t just for parties—it’s my go-to for game day, potlucks, or even a lazy Sunday. The leftovers? Chef’s kiss. Reheat slices in the oven with a little broth, and they’re just as good the second day. (Yes, even on a Tuesday night.)
- Budget-Friendly Luxury: Brisket is one of the most affordable cuts, and with ingredients like beef broth and thyme, you’re not sacrificing flavor for savings. Plus, the recipe stretches to feed four hearty portions without breaking the bank—perfect for when you want to impress without stress.
Step-by-step instructions for brown sugar brisket
Here’s how to transform that tough brisket into fall-off-the-bone sweetness with a perfect crispy bark.
🔥 Step 1: Sear and Season for Maximum Flavor
Preheat your oven to 275°F. Heat a large oven-safe skillet over medium-high heat and add the 2 tablespoons olive oil. Once shimmering, place the 4 lb brisket fat-side down in the pan. Press down gently with a spatula for 1 minute to create good contact—this prevents curling and ensures even browning.
Sear for 3-4 minutes per side until deeply browned, about medium-dark in color. This initial sear locks in juices and builds that essential bark. While still hot, rub the brisket all over with a mixture of ½ cup light brown sugar, 2 tablespoons smoked paprika, 2 teaspoons garlic powder, 1 teaspoon ground black pepper, and 1½ tablespoons kosher salt. Press the rub firmly into the meat so it adheres well.
🥘 Step 2: Build the Sweet Glaze and Slice the Onion
In the same skillet, add the sliced 1 yellow onion and cook for 5 minutes until softened. Pour in 1½ cups beef broth and 2 tablespoons apple cider vinegar, scraping up all those browned bits from the bottom—they’re packed with flavor. Bring to a gentle simmer and let reduce by half (5-7 minutes) until syrupy.
Transfer the brisket to a plate and place it fat-side up in the skillet. Pour the reduced onion mixture evenly over the top, making sure it coats all sides. Sprinkle the ¼ cup fresh thyme leaves over the brisket—they’ll infuse the meat with aromatic flavor as it cooks. Cover the skillet tightly with foil.
🔥 Step 3: Slow Cook to Perfection
Transfer the skillet to the preheated 275°F oven and cook for 3 hours. This low-and-slow approach breaks down the tough connective tissue while allowing the sweet glaze to caramelize. After 3 hours, remove the foil and increase the oven temperature to 350°F.
Baste the brisket with the pan juices every 30 minutes for the final 1 hour of cooking. You’ll see the edges start to develop a deep mahogany color—that’s your crispy bark forming. The brisket is done when it reaches an internal temperature of 200-203°F at the thickest part (use a meat thermometer). This usually takes about 4 hours total.
🔪 Step 4: Rest and Create the Final Crisp
Remove the brisket from the oven and transfer it to a cutting board. Tent loosely with foil and let it rest for 20 minutes. This resting period allows the juices to redistribute throughout the meat. While it rests, place the skillet back on the stove over medium heat.
Add the 2 tablespoons unsalted butter and let it melt, then spoon it over the brisket. This final basting adds richness and helps create that perfect crispy exterior. Slice against the grain into ¼-inch thick pieces and serve immediately with the pan juices spooned over the top.
Pro Tips For Making Brown Sugar Brisket Recipe Oven
- Press the Rub Hard: I used to just sprinkle the brown sugar and spices on the brisket like it was a salad—big mistake. Pack that rub into every crevice, especially the fat cap, so it sticks like glue. The first time I did this properly, the bark stayed intact instead of flaking off halfway through cooking.
- Don’t Rush the Onion: Those 5 minutes of cooking the sliced onion might seem quick, but skipping them means your glaze will taste raw and dull. Let the onions soften and caramelize just a little—they’re the base flavor for that sticky, sweet sauce. I learned this after serving brisket with a glaze that tasted like beef broth and regret.
- Baste Like You Mean It: When the oven hits 350°F, basing every 30 minutes isn’t just a suggestion—it’s how you get that glass-like bark. Use a spoon to slather the pan juices directly on the edges, not just the top. The first time I skipped this, the sides stayed sad and pale.
- Use Cold Butter: That final basting with cold butter isn’t just for show—it melts into a glossy, crispy finish that’s actually better than hot butter. I used to melt it first, thinking it’d spread easier, but the texture suffers. Trust the recipe: cold butter wins.
Storing and reheating this recipe
Fridge Storage Tips
After cooking, let your brisket rest for 20 minutes before wrapping it tightly in double-layered foil to retain moisture. Store it in an airtight container in the fridge for up to 5 days.
I like using glass Pyrex containers because they keep flavors fresh longer. The brown sugar glaze will continue to caramelize slightly, intensifying the flavor over time. 💛
Freezing for Later
For longer storage, slice the brisket against the grain and freeze in quart-sized freezer bags. Label each bag with the date—it keeps beautifully for 3 months. I portion it into individual servings so I can grab just what I need without thawing the whole thing.
Freezing works best with the glaze still intact; just reheat from frozen if needed.
Reheating in the Oven
My favorite method for reheating is the oven—it maintains that perfect crispy bark. Preheat to 300°F, place the brisket (sliced or whole) on a baking sheet, and cover loosely with foil.
Reheat for 20-25 minutes, basting with pan juices halfway through. This method keeps the meat juicy and the glaze sticky-sweet. 🔥
Stovetop Revival
For a quicker option, use a heavy-bottomed skillet over medium-low heat. Add 2 tablespoons beef broth or water to prevent sticking, then cover and heat for 10-12 minutes, stirring occasionally.
The residual heat from the brisket will keep it warm without drying it out. I always taste and adjust seasoning—sometimes the glaze needs a pinch of salt after reheating.
Microwave Rescue
When I’m short on time, I reheat brisket slices in the microwave using a microwave-safe dish. Cover loosely with a damp paper towel and heat on 50% power for 2-3 minutes, stirring halfway.
Add a splash of water if it looks dry. While not ideal for texture, it’s a reliable backup when you’re craving brisket fast. ⏰
Nutrition facts
Frequently asked questions
Why does this recipe use brown sugar instead of white?
The light brown sugar adds depth and caramelization that white sugar can’t match. It contains molasses, which enhances the flavor and helps create that irresistible sticky-sweet glaze while keeping the meat moist. The molasses also reacts beautifully with the spices during searing, building a rich crust on the brisket.
Can I skip the initial sear step if I’m short on time?
While possible, skipping the sear will weaken the bark and reduce flavor depth. The 3-4 minutes per side at high heat develops that essential crust and locks in juices. If you’re pressed for time, at least sear each side for 2 minutes—it makes a noticeable difference in texture and taste.
What if my brisket reaches 200°F but still feels tough?
This happens when the connective tissue needs more time to break down. Return the brisket to the oven at 250°F (covered) for another 1-2 hours, checking every 30 minutes. The internal temp should rise to 203°F naturally—patience is key for tender results.
How do I prevent the glaze from burning during the final hour?
Watch closely during the 350°F basting phase—remove the foil after 3 hours but cover loosely with foil during the final hour. This lets the edges crisp while protecting the glaze. If it darkens too quickly, tent the brisket with foil and return it to the oven.
Can I use a different cut of beef if I can’t find brisket?
While Packer cut brisket is ideal for this recipe, you could use chuck roast or short ribs as substitutes. However, the cooking time will vary—chuck needs 1-2 hours less total, while short ribs benefit from even longer cooking. The glaze technique remains the same, but expect slightly different textures.

Trained in classic French technique but raised on slow-cooked ribs and spicy rubs, she blends culinary skill with smoke and soul.
- Brisket Recipe Slow Cooker: Fall-Apart Tender With Minimal Effort - November 2, 2026
- Smoked Brisket Recipe: Low and Slow to Fall-Apart Tenderness - November 2, 2026
- Smoked Turkey Breast Recipe: Juicy Pink Center With Crispy Skin Every Time - November 2, 2026