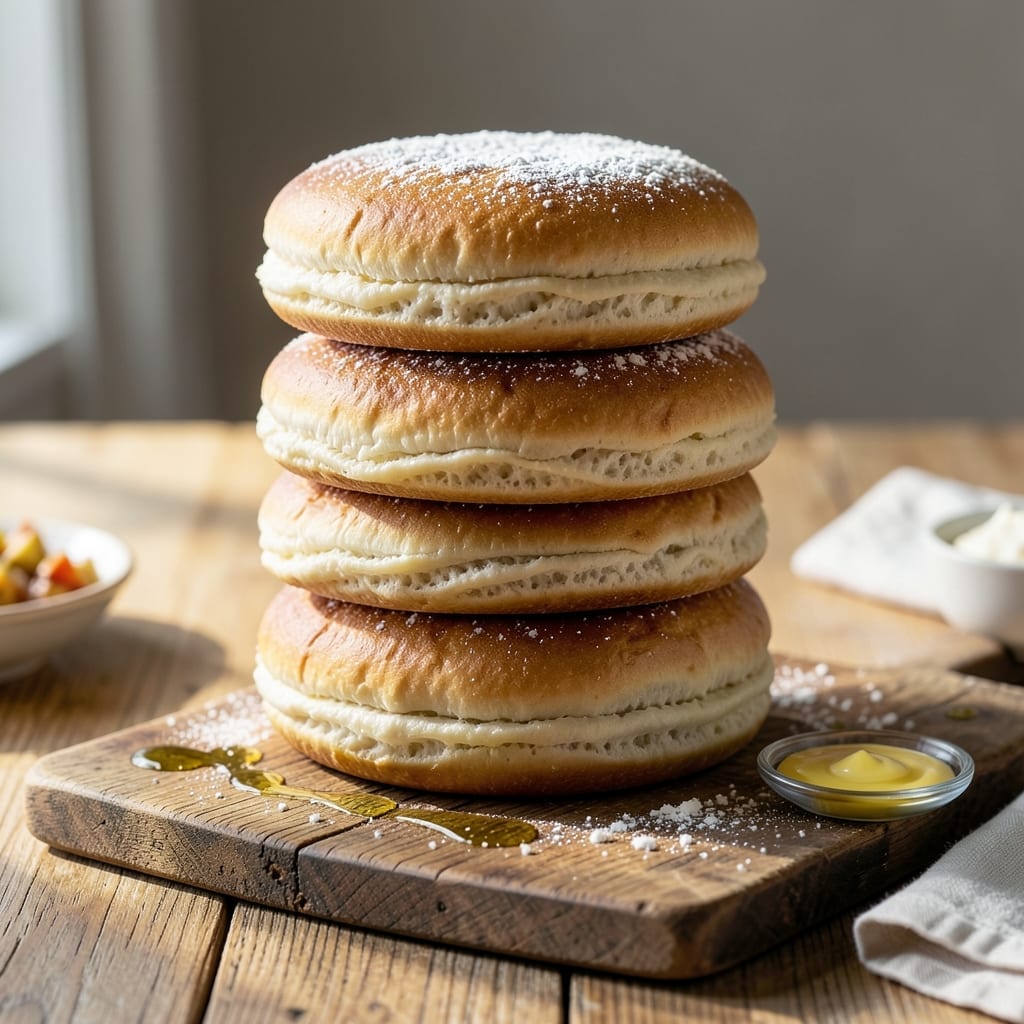
Homemade burger buns elevate any cookout with their soft, pillowy texture and subtle sweetness. This proven method delivers bakery-quality results without complicated techniques.
With simple ingredients and a straightforward process, you’ll create light, tender buns that hold up to the juiciest burgers. The dough comes together quickly and rises to perfection.
Ingredients for Burger Bun Recipe Easy
Simple pantry staples transform into bakery-quality buns with minimal effort required.
| Ingredient | Amount | Notes |
|---|---|---|
| Bread Flour 🌾 | 4 cups | High-protein for structure |
| Warm Water 💧 | 1 ¼ cups | 110-115°F for yeast activation |
| Granulated Sugar 🍚 | 2 tbsp | Feeds the yeast for rise |
| Active Dry Yeast 🍞 | 2 ¼ tsp | One packet plus a quarter |
| Salt 🧂 | 1 ½ tsp | Fine sea salt preferred |
| Unsalted Butter 🧈 | 3 tbsp | Softened, for richness |
| Large Egg 🥚 | 1 whole | Room temperature, for dough |
| Whole Milk 🥛 | ¼ cup | Warm, enhances softness |
| Honey 🍯 | 1 tbsp | Adds subtle sweetness |
| Sesame Seeds 🌰 | 2 tbsp | For topping, optional |
| Olive Oil 🫒 | 1 tbsp | For bowl greasing |
[recipe_ingredient_scaler]
The flour is critical here. King Arthur Bread Flour is the gold standard for its consistent protein content (12.7%), which gives these buns their structure. Yeast freshness matters—check the expiration date and store it in the freezer if you won’t use it within months. Whole Foods and Trader Joe’s carry reliable brands. For the butter, Plugrá European-style adds an extra layer of richness, but any unsalted will work.
No bread flour? All-purpose works at a 1:1 ratio, though the texture will be slightly less chewy. Out of honey? Maple syrup or agave can substitute in equal measure. For a dairy-free version, unsweetened almond milk replaces the whole milk without issue. The egg can be omitted (just add 2 tbsp extra water), but it does contribute to the golden crust and tender crumb.
The dough can be made a day ahead—cover the bowl tightly and refrigerate. For same-day baking, let it rise in a warm spot (75-80°F) until doubled, about 1-2 hours. Once baked, buns keep at room temperature for 2 days or freeze for up to 1 month.
Why You’ll Love This Recipe
- No-Fuss Dough: I just mix flour, yeast, sugar, and warm water—no fancy steps, no stand mixer needed.
- Buttery Softness: The sugar caramelizes slightly for that golden crust with a pillowy inside every time.
- Meal Prep Hero: I bake a batch Sunday and freeze half for spontaneous burger nights later.
- Penny-Pincher Win: Five basic pantry staples and I’ve got fresh buns cheaper than the bakery aisle.
Step-by-Step Instructions for Soft and Pillowy Burger Buns
This method ensures tender, bakery-style buns with minimal effort and maximum flavor.
Step 1: Activate the Yeast and Mix the Dough
In a stand mixer bowl, combine the 1.25 cups Warm Water, 2 tbsp Granulated Sugar, and 2.25 tsp Active Dry Yeast. Let sit for 5-10 minutes until foamy—this confirms the yeast is active and ready to work.
Add the 4 cups Bread Flour, 1.5 tsp Salt, 3 tbsp Unsalted Butter, 1 whole Large Egg, 0.25 cup Whole Milk, and 1 tbsp Honey. Using the dough hook attachment, mix on low for 2 minutes until combined, then increase to medium for 6-8 minutes until smooth and elastic.
Step 2: First Rise Until Doubled
Lightly grease a large bowl with the 1 tbsp Olive Oil and transfer the dough into it. Turn to coat all sides. Cover with a clean kitchen towel and let rise in a warm, draft-free place for 1-1.5 hours or until doubled in volume.
The dough should spring back slowly when poked with a finger. If your kitchen is cool, place the bowl on top of the refrigerator or near a warm (not hot) oven to speed up the process. This first rise develops the gluten structure for soft, pillowy buns.
Step 3: Shape and Second Rise
Turn the risen dough onto a lightly floured surface and divide into 8 equal portions (about 100g each). Roll each piece into a smooth ball, then flatten slightly into a 3.5-inch disc. Place on a parchment-lined baking sheet, spacing them 2 inches apart.
Cover loosely with greased plastic wrap and let rise for 45-60 minutes until puffy and nearly doubled. The buns should look slightly domed and feel light when gently pressed. Preheat your oven to 375°F during the last 15 minutes of rising.
Step 4: Bake to Golden Perfection
Brush the tops of the buns with a little Whole Milk or beaten egg for a glossy finish. Sprinkle with 2 tbsp Sesame Seeds if using. Bake for 15-18 minutes until the tops are golden brown and the internal temperature reaches 190°F.
Rotate the pan halfway through baking for even browning. The buns should sound hollow when tapped on the bottom and have a soft, tender crumb. Avoid overbaking, as this can make them dry.
Step 5: Cool and Store
Transfer the buns to a wire rack and let cool completely, about 30 minutes. This prevents condensation from making them soggy. Once cooled, they’re ready to use or can be stored in an airtight container at room temperature for up to 3 days.
For the best texture, warm the buns briefly in a 300°F oven for 5 minutes before serving. This restores their softness and enhances their buttery flavor, making them ideal for any burger creation.
Pro Tips For Making Burger Bun Recipe Easy
- Check Yeast First: I learned this the hard way—always bloom your active dry yeast in the warm water with a pinch of sugar for 5-10 minutes before mixing. If it doesn’t foam, your buns won’t rise, no matter how long you wait.
- Use Bread Flour: Skip the all-purpose and stick with bread flour for that chewy, bakery-style texture. The higher protein content actually changes the outcome, giving your buns structure to hold up to juicy burgers.
- Don’t Rush Proofing: After shaping, give the dough at least 1 hour to rise in a warm spot—yes, even if you’re impatient like me. Doubling in size is non-negotiable for light, airy buns.
- Brush with Egg Wash: Sounds simple, but a quick egg wash before baking makes a real difference for that golden, glossy finish. I was skeptical until I tried it, and now I never skip this step.
Essential Equipment for This Dish
Stand Mixer
A stand mixer with a dough hook is non-negotiable for this recipe. I use my KitchenAid Artisan—it handles the thick dough without straining. The 6-8 minutes of kneading develops the gluten perfectly for soft, pillowy results. 💪
Digital Scale
For consistent buns, weigh your dough portions. My OXO Good Grips 11lb scale gives precise 100g portions every time. Even distribution means uniform baking and professional presentation.
Baking Sheets
Use heavy-duty half-sheet pans with parchment paper. I prefer Nordic Ware for even heat distribution. The 2-inch spacing between buns ensures they rise upward, not outward.
Pastry Brush
A silicone pastry brush makes applying the milk wash effortless. I keep a dedicated brush just for egg/milk washes to avoid cross-contamination. The glossy finish it creates is bakery-quality.
Cooling Rack
Never skip the wire cooling rack—it prevents soggy bottoms. My stainless steel rack from Wilton has lasted years. The 30-minute cool is crucial for setting the texture.
Instant-Read Thermometer
Check internal temp hits 190°F with my ThermoWorks ThermoPop. This guarantees perfect doneness every batch. Underbaked buns taste doughy; overbaked ones dry out. ✨
Nutrition Facts
Frequently Asked Questions
Can I make these without a stand mixer?
Yes! Knead by hand for 10-12 minutes on a floured surface until smooth and elastic. The dough will be sticky at first but becomes manageable as gluten develops.
Why did my buns turn out dense?
Underproofing is the most common cause. Let the dough rise until truly doubled in size during both rises. Also, ensure your yeast is fresh and the water is 110-115°F.
Can I use all-purpose flour instead?
Substitute 1:1, but add 1-2 tbsp extra if the dough feels too sticky. Bread flour’s higher protein gives better structure, but all-purpose works in a pinch.
How do I store leftover buns?
Keep in an airtight container at room temperature for up to 3 days. For longer storage, freeze for up to 1 month and reheat in a 300°F oven for 5 minutes.

Trained in classic French technique but raised on slow-cooked ribs and spicy rubs, she blends culinary skill with smoke and soul.
- Recipe for Boneless Pork Chops in Cast Iron Skillet: Sear and Baste to Juicy Perfection - October 3, 2026
- Recipe for Boneless Cross Rib Roast: Slow-Roasted Beef with Herb Crust - October 3, 2026
- Hamburgers in Sauce Recipe Crock Pot: Slow-Cooked Savory Delight - October 3, 2026