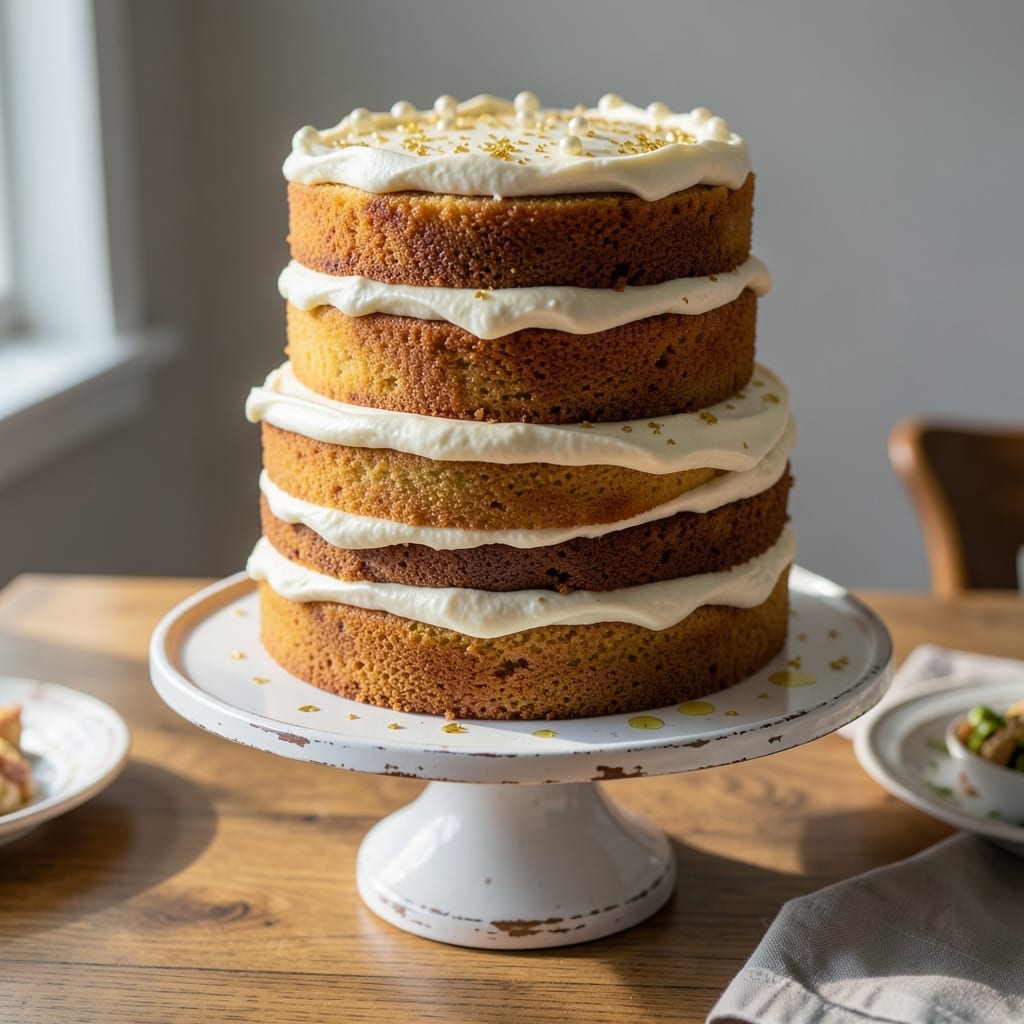
This layer cake delivers on the promise of perfect texture every time. The secret is in the balance of ingredients and precise mixing technique.
You’ll achieve moist layers with a tender crumb that holds up beautifully to fillings and frosting. No dry, dense results here—just consistent, bakery-quality layers.
Ingredients for Cake Recipe for Layer Cake
Precision matters here. These ingredients create bakery-quality layers every time.
| Ingredient | Amount | Notes |
|---|---|---|
| All-Purpose Flour 🌾 | 2 ½ cups | Sifted for even texture |
| Granulated Sugar 🍚 | 2 cups | Fine grain for smooth batter |
| Unsalted Butter 🧈 | 1 cup | Room temperature, softened |
| Large Eggs 🥚 | 4 whole | Room temperature for volume |
| Whole Milk 🥛 | 1 cup | Full-fat for richness |
| Baking Powder 🧂 | 2 ½ tsp | Fresh for maximum lift |
| Baking Soda 🧂 | ½ tsp | Balances acidity in batter |
| Pure Vanilla Extract 🌿 | 2 tsp | High-quality for best flavor |
| Salt 🧂 | ½ tsp | Fine sea salt preferred |
| Sour Cream 🥛 | ½ cup | Adds moisture and tenderness |
| Vegetable Oil 🫒 | ¼ cup | Neutral flavor for balance |
[recipe_ingredient_scaler]
The flour is the foundation—King Arthur or Gold Medal deliver consistent results. Use cake flour if you prefer an even finer crumb, but all-purpose works perfectly. Butter should be European-style (higher fat content) for superior texture. Sour cream is non-negotiable; Daisy or Breakstone’s are reliable brands that provide the necessary acidity and moisture for tender layers.
No buttermilk? Whole milk with 1 tbsp vinegar works as a substitute. Out of sour cream? Full-fat Greek yogurt at the same amount is an excellent alternative. For a richer flavor, replace the vegetable oil with melted coconut oil. The vanilla extract should be pure—Nielsen-Massey is a professional favorite for its deep, complex flavor profile.
Baked layers stay fresh for 2-3 days at room temperature in an airtight container. For longer storage, wrap cooled layers in plastic and freeze for up to 3 months. Always bring ingredients to room temperature before mixing—this ensures even incorporation and optimal rise.
Why You’ll Love This Recipe
- No-Fuss Mixing: I just cream the butter and sugar, add the eggs, then alternate flour and milk—no complicated steps.
- Buttery Richness: The unsalted butter and whole milk give it that melt-in-your-mouth texture I crave.
- Celebration Ready: I’ve used this for birthdays, anniversaries, even a Sunday dinner surprise.
Step-by-Step Instructions for Layer Cake
Achieve bakery-quality results with this precise method for even, tender layers every time.
Step 1: Prepare Pans and Preheat Oven
Position oven rack in the center and preheat to 350°F. This temperature ensures even baking without doming. Grease three 8-inch round cake pans with vegetable oil, then line the bottoms with parchment paper and grease the paper as well.
Dust the pans with a light coating of all-purpose flour, tapping out any excess. This preparation guarantees the layers release cleanly after baking. I always check that my oven is fully preheated before putting the pans in—this prevents uneven rising.
Step 2: Cream Butter and Sugars for Maximum Volume
In a stand mixer with the paddle attachment, beat the 1 cup unsalted butter on medium-high speed for 1 minute until smooth and creamy. Gradually add the 2 cups granulated sugar and continue beating for 4-5 minutes until the mixture is pale and fluffy.
This extended creaming incorporates air, which creates the fine crumb structure characteristic of professional cakes. Stop periodically to scrape down the sides of the bowl with a rubber spatula to ensure even mixing. The mixture should look noticeably lighter in color when properly aerated.
Step 3: Incorporate Eggs and Wet Ingredients
Add the 4 whole large eggs one at a time, beating well after each addition for 30-45 seconds before adding the next. This gradual incorporation prevents the batter from curdling and ensures proper emulsification.
In a separate bowl, whisk together the 1 cup whole milk, 0.5 cup sour cream, 0.25 cup vegetable oil, and 2 tsp pure vanilla extract. With the mixer on low speed, alternately add the dry ingredients (the 2.5 cups all-purpose flour, 2.5 tsp baking powder, 0.5 tsp baking soda, and 0.5 tsp salt) and the wet mixture, beginning and ending with the dry ingredients.
Mix just until combined—overmixing develops gluten, which would make the cake tough. The batter should be smooth and pourable but not thin.
Step 4: Bake Layers Until Perfectly Set
Divide the batter evenly among the prepared pans, about 1⅓ cups per pan. Smooth the tops with an offset spatula. Bake for 25-30 minutes, rotating the pans halfway through for even baking.
The layers are done when a toothpick inserted into the center comes out clean and the tops spring back when lightly touched. Don’t open the oven door during the first 20 minutes—this can cause the cakes to fall.
Cool the layers in the pans for 10 minutes, then turn them out onto wire racks to cool completely before assembling. This cooling period prevents crumbling when you handle the delicate, warm cakes.
Step 5: Level and Assemble the Cake
Once completely cool, use a serrated knife to level the tops of the layers if they’ve domed during baking. Place the first layer on a cake plate and spread with your chosen filling. Repeat with the remaining layers.
For the moistest result, I recommend brushing each layer with a simple syrup made from equal parts sugar and water before adding filling. This technique, common in professional bakeries, locks in moisture and enhances flavor.
Pro Tips For Making Cake Recipe For Layer Cake
- Room Temp Eggs: Pull your eggs out 30 minutes before baking—cold eggs won’t cream properly with the butter and sugar, and you’ll end up with a denser cake.
- Weigh Your Flour: Scooping flour directly from the bag packs it down; I learned this the hard way after my layers came out dry. Use a scale or spoon and level for accurate measurements.
- Rotate the Pans: Halfway through baking, spin your pans 180 degrees to guarantee even browning, especially if your oven has hot spots like mine does.
- Brush with Simple Syrup: Sounds weird, but it works: Brush each layer with a light coat of sugar syrup before frosting to lock in moisture and keep the cake tender for days.
Wine and Beer Pairings for These Flavors
Sweet Dessert Wines
These pair beautifully with the richness of your cake. I love Moscato d’Asti from Italy—its light effervescence and notes of peach and apricot complement the vanilla flavors. Ice Wine from Canada offers intense honey and citrus notes that balance the sweetness. 🍷
Sparkling Options
For a celebratory touch, try Prosecco or Champagne. The bubbles cut through the cake’s richness while the crisp acidity refreshes your palate. I prefer a demi-sec (semi-sweet) Champagne for the best harmony with the layers.
Cocktail Pairings
A White Russian with its creamy texture and coffee notes creates a delightful contrast. Alternatively, a Baileys Irish Cream on the rocks offers a smooth, complementary flavor profile that enhances the cake’s vanilla and butter notes.
Non-Alcoholic Choices
For those avoiding alcohol, a sparkling cider like Martinelli’s provides the same effervescence as champagne. A vanilla chai latte with its warm spices and creamy texture also pairs wonderfully with the cake’s flavors. 💫
Beer Alternatives
While not traditional, a Belgian-style witbier like Hoegaarden offers citrus and spice notes that work surprisingly well. The light body and effervescence cleanse your palate between bites of rich, moist cake.
Nutrition Facts
Frequently Asked Questions
How many layers should I make?
For a classic presentation, 3 layers works perfectly. This creates impressive height while maintaining stability. You can also make 2 thicker layers if preferred.
Why did my layers turn out dense?
Overmixing the batter develops too much gluten. Mix just until ingredients combine. Also ensure your baking powder and baking soda are fresh for proper rise.
Can I bake the layers a day ahead?
Bake and cool completely, then wrap tightly in plastic. Store at room temperature for 1 day or refrigerate for 2-3 days. Bring to room temperature before assembling.
What’s the best way to level the layers?
Use a long serrated knife to trim domed tops while the cakes are still slightly warm. For precision, a cake leveler tool works perfectly to create even surfaces.

Trained in classic French technique but raised on slow-cooked ribs and spicy rubs, she blends culinary skill with smoke and soul.
- Recipe for Boneless Pork Chops in Cast Iron Skillet: Sear and Baste to Juicy Perfection - October 3, 2026
- Recipe for Boneless Cross Rib Roast: Slow-Roasted Beef with Herb Crust - October 3, 2026
- Hamburgers in Sauce Recipe Crock Pot: Slow-Cooked Savory Delight - October 3, 2026