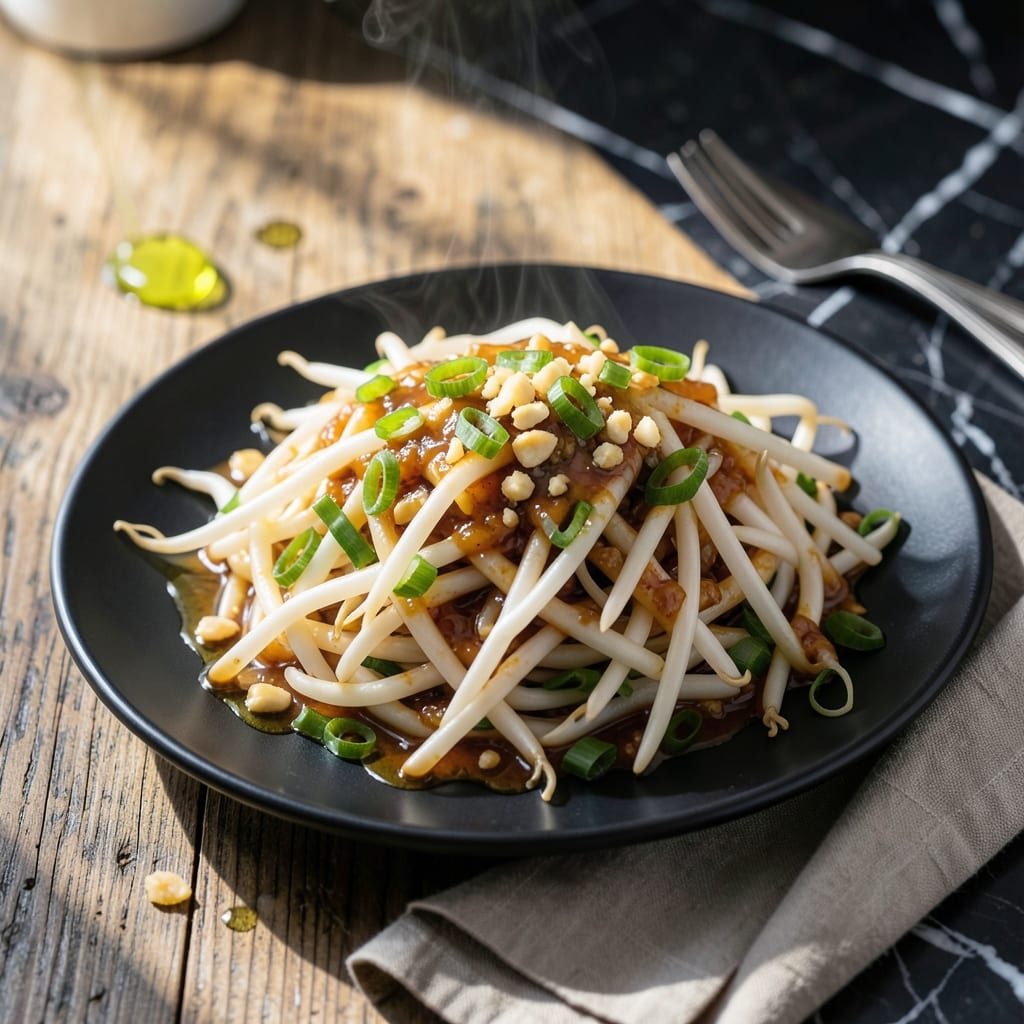
When time is short but you want a quick, flavorful meal, this stir-fry delivers. I developed this method to prove that canned bean sprouts can be just as delicious as fresh when handled properly.
The key is draining and rinsing the sprouts thoroughly, then stir-frying them at high heat with garlic and ginger. This removes any metallic taste while creating a dish that’s crisp-tender and packed with aroma.
You’ll end up with a vegan-friendly stir-fry that’s ready in under 15 minutes, with a balance of savory, spicy, and slightly sweet flavors. It’s a foolproof way to turn pantry staples into something special.
Serve it over rice or noodles for a complete, satisfying meal. The technique works every time.
Ingredients for Canned Bean Sprouts
Pantry staples plus fresh aromatics. Nothing exotic, just good flavors waiting to happen.
| Ingredient | Amount | Notes |
|---|---|---|
| Canned Bean Sprouts 🌱 | 4 cans | Drained and rinsed thoroughly |
| Vegetable Oil 🫒 | 3 tbsp | High smoke point preferred |
| Garlic Cloves 🧄 | 6 cloves | Minced finely for even flavor |
| Fresh Ginger Root 🌿 | 2 tbsp | Peeled and grated |
| Green Onions 🧅 | 4 whole | Thinly sliced on diagonal |
| Soy Sauce 💧 | 3 tbsp | Low-sodium or tamari for gluten-free |
| Rice Vinegar 🍋 | 1 tbsp | For bright acidity balance |
| Sesame Oil 🫒 | 1 tsp | Toasted variety for depth |
| Light Brown Sugar 🍚 | 1 tbsp | For subtle sweetness |
| Red Pepper Flakes 🌶️ | ½ tsp | Adjust for heat preference |
| Sesame Seeds 🌾 | 1 tbsp | Toasted for garnish |
| Cornstarch 🌾 | 1 tsp | Optional for thicker sauce |
[recipe_ingredient_scaler]
The sprouts are the star here. Any brand of canned bean sprouts works, but check for no added salt on the label. Drain and rinse them twice—this removes that metallic canned taste. I grab mine from Trader Joe’s or the Asian aisle at Kroger. For the ginger and garlic, fresh is non-negotiable. Those pre-minced jars just don’t have the same punch (and the texture’s all wrong).
Out of green onions? Shallots or red onion work in a pinch, just slice them thin. No sesame oil? Skip it—don’t substitute with regular oil or it’ll taste flat. Tamari instead of soy sauce if you’re gluten-free. The sugar can be swapped for maple syrup (use 1.5 tbsp), but brown sugar adds a nice caramel note. Need more heat? Add sriracha or gochujang at the end.
This keeps 3-4 days in the fridge, but honestly it’s best fresh. The sprouts lose their crispness if stored too long. Freezing isn’t recommended—they’ll turn mushy. I always make extra sauce and keep it separate to drizzle over rice later.
Why You’ll Love This Recipe
- Open & Ready: No soaking, no peeling—just pop open the can and start cooking.
- Garlic-Ginger Punch: The sizzle of garlic and ginger in hot oil makes every bite ridiculously flavorful.
- Weeknight Hero: I throw this together between work and bedtime stories. Yes, even on a Tuesday night.
- Budget Stretcher: A can costs pennies, feeds four, and tastes like a million bucks.
Step-by-Step Instructions for Quick Bean Sprout Stir-Fry
This method delivers crisp-tender sprouts with a glossy, flavorful sauce in minutes.
Step 1: Prep and Drain the Bean Sprouts
Open the 4 cans Canned Bean Sprouts and drain them thoroughly in a colander. Rinse under cold water to remove any metallic taste, then shake vigorously to remove excess moisture. I like to spread them on a clean kitchen towel and pat dry—this prevents the stir-fry from becoming watery.
While the sprouts drain, slice the 4 whole Green Onions thinly on the diagonal. This cut gives you more surface area for flavor and looks more elegant than a straight chop. Set these aside with your other prepped ingredients for a smooth cooking process.
Step 2: Bloom Aromatics in Hot Oil
Heat 3 tbsp Vegetable Oil in a large skillet or wok over medium-high heat until it shimmers. Add the 6 cloves Garlic Cloves (minced) and 2 tbsp Fresh Ginger Root (grated), stirring constantly for 30-45 seconds until fragrant but not browned.
Real talk: if your garlic starts to brown, it’s already past its prime—burnt garlic tastes bitter and can ruin the dish. The moment you smell that incredible aroma, you’re ready for the next step. This bloom releases the essential oils that form the flavor base of your stir-fry.
Step 3: Stir-Fry the Sprouts to Crisp-Tender
Add the drained Canned Bean Sprouts to the skillet and stir-fry for 3-4 minutes until they turn bright green and slightly crisp at the edges. I use a pair of tongs to toss them continuously—this even cooking prevents some from burning while others stay raw.
Sprinkle the 0.5 tsp Red Pepper Flakes over the sprouts as they cook. This timing allows the heat to infuse the oil without overpowering the dish. The sprouts should retain a slight crunch—this is the texture you’re after, not mushy.
Step 4: Create and Thicken the Sauce
Reduce heat to medium and add the 3 tbsp Soy Sauce, 1 tbsp Rice Vinegar, 1 tbsp Light Brown Sugar, and 1 tsp Sesame Oil. Stir well to combine, then make a slurry with the 1 tsp Cornstarch and 1 tablespoon of water. Pour this into the skillet and stir for 30 seconds until the sauce thickens slightly.
The sauce should coat the back of a spoon but still be pourable. If it’s too thick, add a splash of water. If too thin, let it reduce for another minute. Taste and adjust the seasoning—this is your chance to balance the sweet, salty, and tangy elements.
Step 5: Finish and Garnish
Remove from heat and stir in the sliced Green Onions, reserving a pinch for garnish. The residual heat will soften them slightly while keeping their fresh bite. Transfer to a serving dish and sprinkle with the remaining green onions and 1 tbsp Sesame Seeds.
Here’s the thing—this dish moves fast, so have your serving plates ready. The sesame seeds add a nutty crunch that contrasts beautifully with the tender sprouts. Serve immediately while the sprouts are still crisp-tender and the sauce is glossy and hot.
Pro Tips For Making Canned Bean Sprouts
- Drain and Rinse: Always rinse canned bean sprouts thoroughly under cold water and drain well—this removes excess sodium and any metallic taste. I learned this the hard way after my first batch tasted like a salt lick.
- Hot Oil First: Heat the vegetable oil until it shimmers before adding garlic and ginger; about 30 seconds on medium-high. Sounds simple, but it actually changes the outcome—raw garlic in cool oil just doesn’t develop that depth of flavor.
- Skip the Overcook: Bean sprouts only need 2-3 minutes in the pan after adding. Any longer and they turn mushy—I was skeptical until I tried it, but they should stay slightly crisp.
- Ginger First, Garlic Second: Add minced ginger to the oil 10 seconds before the garlic to prevent burning. After burning three batches, I finally figured out garlic scorches faster, and this timing keeps both aromatic and golden.
Essential Equipment for Perfect Results
High-Heat Skillet
A large stainless steel skillet or cast iron pan is essential for achieving the high heat needed to get those sprouts crisp-tender. I use my 12-inch Lodge—it distributes heat evenly and holds up to the constant tossing. Avoid nonstick for this dish; you need that medium-high heat without worrying about scratching. 🔥
Wok Alternative
If you have a carbon steel wok, this is its time to shine. The sloped sides make tossing the sprouts effortless, and the surface area allows for quick, even cooking. Just ensure it’s well-seasoned first—I ruined my first stir-fry with a brand-new, unseasoned wok.
Tongs for Tossing
A good pair of 12-inch tongs gives you the control to keep the sprouts moving constantly. I prefer the OXO Good Grips version—the silicone tips won’t scratch your pan, and the locking mechanism keeps them tidy in my tiny Boston kitchen drawer.
Fine Grater for Ginger
For the ginger, a microplane grater is my secret weapon. It extracts the maximum juice and fine pulp, which dissolves beautifully into the oil. I’ve tried mincing with a knife, but the texture isn’t the same. A 1-inch piece of ginger yields about 2 tbsp when grated finely.
Colander for Draining
Don’t underestimate the importance of a large colander for draining and rinsing the sprouts. I use a 5-quart stainless steel one—big enough to handle all 4 cans at once. Rinse them under cold water, then shake vigorously to remove excess moisture. This step prevents a watery stir-fry.
Small Bowl for Slurry
Have a small bowl ready for mixing the cornstarch slurry. I keep a 4-ounce prep bowl from Pyrex dedicated to this task—it’s the perfect size for 1 tsp cornstarch and 1 tbsp water. Stir it just before adding to the pan to prevent lumps.
Nutrition Facts
Frequently Asked Questions
Do I need to rinse canned bean sprouts before cooking?
Rinse them thoroughly under cold water to remove any metallic taste from the can.
Can I substitute fresh bean sprouts in this recipe?
Yes, but reduce cooking time to 2-3 minutes since fresh sprouts are more delicate. Drain them well first.
How do I make this dish less spicy?
Skip the red pepper flakes or reduce to a pinch. For mild heat, add 1/4 tsp instead.
What if my sauce doesn’t thicken?
Mix another 1/2 tsp cornstarch with 1 tbsp water, stir into the pan, and cook for 1-2 minutes more.

Trained in classic French technique but raised on slow-cooked ribs and spicy rubs, she blends culinary skill with smoke and soul.
- Recipe for Boneless Pork Chops in Cast Iron Skillet: Sear and Baste to Juicy Perfection - October 3, 2026
- Recipe for Boneless Cross Rib Roast: Slow-Roasted Beef with Herb Crust - October 3, 2026
- Hamburgers in Sauce Recipe Crock Pot: Slow-Cooked Savory Delight - October 3, 2026