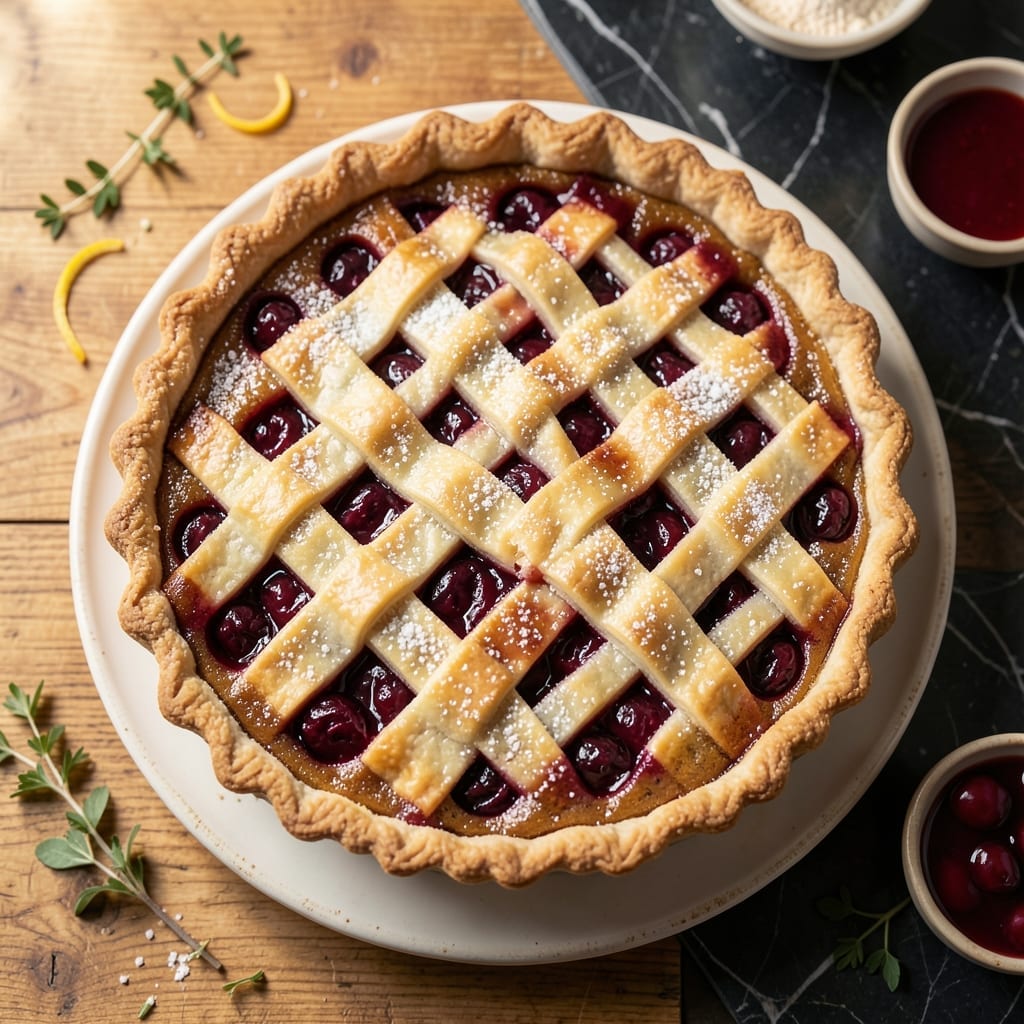
This pie proves that flaky perfection doesn’t require fresh fruit. Using canned filling simplifies the process while delivering that classic cherry pie experience.
I’ve refined this method over years of baking, ensuring a golden crust and balanced sweet-tart filling every time. The result is a dessert that looks and tastes homemade without the extra effort.
Ingredients for Cherry Pie Recipe Using Canned Filling
Pantry staples plus canned filling create this classic dessert with minimal effort yet maximum flakiness.
| Ingredient | Amount | Notes |
|---|---|---|
| All-Purpose Flour 🌾 | 2 ½ cups | Plus extra for dusting surface |
| Granulated Sugar 🍚 | 2 tbsp | Divided for crust and filling |
| Salt 🧂 | 1 tsp | Fine sea salt preferred |
| Unsalted Butter 🧈 | 1 cup | Cold, cubed for flaky texture |
| Ice Water 💧 | ½ cup | Plus more as needed |
| Canned Cherry Pie Filling 🍒 | 2 cans | 21 oz each, well-drained |
| Almond Extract 🌰 | ½ tsp | Pure extract for best flavor |
| Lemon Juice 🍋 | 1 tsp | Freshly squeezed preferred |
| Cornstarch 🌽 | 1 tbsp | For thickening if needed |
| Large Egg 🥚 | 1 whole | For egg wash finish |
| Coarse Sugar 🍚 | 1 tbsp | For sprinkling on crust |
| Vanilla Ice Cream 🍦 | 4 cups | For serving alongside pie |
[recipe_ingredient_scaler]
The crust hinges on butter temperature—Land O’Lakes or Plugrá for consistent quality. Use European-style butter (82% fat) if available for superior flakiness. The canned filling should be Comstock or Solo brands for optimal texture and sweet-tart balance. Avoid generic brands with artificial colors. For the almond extract, McCormick offers reliable quality at most Kroger locations.
No almond extract? Vanilla extract at double the amount works acceptably. For a boozy depth, substitute 1 tbsp cherry brandy. If your filling seems thin after draining, the cornstarch ensures proper thickening. The egg wash can be replaced with 2 tbsp heavy cream for extra shine. In a pinch, store-bought pie crust saves time (though homemade is superior).
The unbaked pie keeps 2 days refrigerated. Baked pie stays fresh 3-4 days at room temperature, loosely covered. Freeze unbaked pie for up to 3 months—thaw overnight before baking. Serve warm with ice cream for the classic experience.
Why You’ll Love This Recipe
- No-Fuss Filling: I love skipping the pitting and prepping—just dump the canned cherries in and go.
- Buttery Crust: That flaky, all-butter crust made with cold water and flour? It’s what makes every bite worth it.
- Crowd Pleaser: From potlucks to Sunday dessert, this pie disappears fast—no fancy techniques required.
- Budget Friendly: A can of filling and pantry staples mean I can bake a showstopper for under five bucks.
Step-by-Step Instructions for Cherry Pie Using Canned Filling
Achieve bakery-quality results with this method for a consistently flaky, golden crust.
Step 1: Prepare the Pie Crust Dough
In a large bowl, whisk together the 2.5 cups All-Purpose Flour, 2 tbsp Granulated Sugar, and 1 tsp Salt until evenly combined. I always use fine sea salt for the cleanest flavor without any grittiness.
Cut in the 1 cup Unsalted Butter (cold and cubed) using a pastry cutter or your fingers, working quickly until the mixture resembles coarse crumbs with pea-sized butter pieces visible. This creates the flaky layers in your crust.
Gradually add the 0.5 cup Ice Water, one tablespoon at a time, mixing just until the dough comes together. It should hold when pressed but not be sticky. Overworking the dough will make it tough, so stop as soon as it forms a shaggy mass.
Step 2: Chill and Roll Out the Crust
Divide the dough into two equal portions, flatten into discs, wrap in plastic, and refrigerate for at least 1 hour. This rest period allows the gluten to relax and the butter to firm up, which prevents shrinking during baking.
On a lightly floured surface, roll out one disc to a 12-inch circle about 1/8-inch thick. Transfer to a 9-inch pie dish, pressing gently into the bottom and sides. Trim the edges to leave a ½-inch overhang and refrigerate while you roll the second disc.
Step 3: Prepare and Thicken the Filling
In a bowl, combine the 2 cans Canned Cherry Pie Filling (well-drained), 0.5 tsp Almond Extract, and 1 tsp Lemon Juice. The almond extract enhances the cherry flavor beautifully, while the lemon juice adds a bright contrast.
If the filling seems too thin, sprinkle in the 1 tbsp Cornstarch and stir well. Let it sit for 5 minutes to thicken. This step ensures your pie slices hold their shape when served.
Step 4: Assemble and Bake the Pie
Pour the filling into the chilled bottom crust. Roll out the second dough disc and place it over the filling. Trim and crimp the edges to seal, then cut several 1-inch slits in the top crust to allow steam to escape.
Brush the top crust with a beaten 1 whole Large Egg and sprinkle with 1 tbsp Coarse Sugar. This creates a beautiful golden finish with a satisfying crunch. Bake at 375°F for 45-50 minutes until the crust is deep golden brown and the filling is bubbling.
Step 5: Cool and Serve
Let the pie cool on a wire rack for at least 2 hours before slicing. This allows the filling to set properly. Serve warm or at room temperature with 4 cups Vanilla Ice Cream on the side for the perfect contrast of temperatures and textures.
The crust should be crisp and flaky, with a rich golden color, while the filling remains thick and glossy. Each slice should hold its shape when served, with the ice cream slowly melting over the warm pie.
Pro Tips For Making Cherry Pie Recipe Using Canned Filling
- Chill the Dough: Always refrigerate your pie dough for at least 30 minutes before rolling—it prevents the butter from melting too soon and makes it way easier to handle. I learned this the hard way after my first few pies turned into tough, greasy messes.
- Drain the Filling: Drain the canned cherry filling well and press out excess liquid with a spoon, or your pie will be soupy. Sounds tedious, but it’s the only way to avoid a soggy bottom crust.
- Vent the Top: Cut 4-5 small slits in the top crust to let steam escape, or the filling will bubble out and make a sticky mess in your oven. My grandmother swore by this, and she was right.
- Brush with Butter: Right after baking, brush the crust with melted butter for a richer, shinier finish. I was skeptical until I tried it—now it’s non-negotiable for me.
Essential Equipment for Great cherry pie recipe using canned filling
Pie Dish Essentials
Invest in a 9-inch glass pie dish—I swear by Pyrex for even heat distribution and the ability to monitor crust browning. The transparency helps you check that bottom crust without removing it from the oven. 💡
Rolling Pin Matters
A French rolling pin (without handles) gives you better control for thin, even crusts. I use my J.K. Adams maple wood pin—it’s durable and doesn’t stick like plastic. Keep it floured but not caked.
Pastry Tools
A pastry cutter is non-negotiable for perfect flaky texture. The OXO Good Grips model has comfortable handles and sharp blades. For crimping, a simple fork works, but a fluted pastry wheel makes decorative edges effortless.
Baking Surface
Place your pie dish on a preheated baking sheet to catch drips and ensure even bottom baking. I use a half-sheet pan from Nordic Ware. This prevents the dreaded soggy bottom crust.
Cooling Rack
A wire cooling rack is essential for proper air circulation after baking. The Wilton Excelle Elite model has a non-stick coating that makes cleanup easy. Never cool pie directly on the counter—it’ll create steam and ruin your crust.
Measuring Accuracy
Precision matters in baking. I rely on OXO measuring cups and adjustable measuring spoons for the cornstarch and extracts. A kitchen scale isn’t mandatory here, but it does help with consistent flour measurements.
Nutrition Facts
Frequently Asked Questions
Can I use a store-bought crust instead?
Yes, a refrigerated pie crust works in a pinch. Just follow package instructions for thawing and baking times. Homemade crust offers better flavor and texture, but store-bought saves time with good results.
Why does my crust shrink during baking?
This usually happens if the dough wasn’t chilled long enough. Ensure it rests for at least 1 hour in the fridge before rolling. Also, avoid stretching the dough when placing it in the dish.
How do I prevent a soggy bottom crust?
Bake on a preheated baking sheet and avoid adding extra liquid to the filling. The cornstarch and proper draining of canned filling help create a firm base.
Can I make this pie ahead of time?
Assemble and refrigerate the unbaked pie for up to 2 days, or freeze for up to 3 months. Bake from frozen, adding 10-15 minutes to the baking time.

Trained in classic French technique but raised on slow-cooked ribs and spicy rubs, she blends culinary skill with smoke and soul.
- Recipe for Boneless Pork Chops in Cast Iron Skillet: Sear and Baste to Juicy Perfection - October 3, 2026
- Recipe for Boneless Cross Rib Roast: Slow-Roasted Beef with Herb Crust - October 3, 2026
- Hamburgers in Sauce Recipe Crock Pot: Slow-Cooked Savory Delight - October 3, 2026